Posts may contain affiliate links that help enable me to continue to provide you with free recipes. As an Amazon Associate, I earn from qualifying purchases. Please see my Privacy Policy for further details.
Whether you’re a novice or an experienced bread baker, No-Knead bread is the easiest and one of the tastiest bread you’ll ever make! Just dump it in a bowl, mix, and let it rest overnight, and dump it into a Dutch oven the next day to bake! Easy, peasy, delicious!
So we all know that I love, no… I LOOOOOOOOOOOOOOOVE bread in like a big way. However, I try not to eat a lot of it because it does tend to settle directly on my thighs. I truly think it just bypasses my mouth and goes directly to my stomach and thighs to rest like forever. LOL Honestly, I think it’s a ‘winter’ thing for me as typically in the warmer weather I want nothing to do with it. Don’t get me wrong, I love it but the last thing I want on a hot summer night is warm bread. However, there’s something about bread being comforting on a cold winter night.
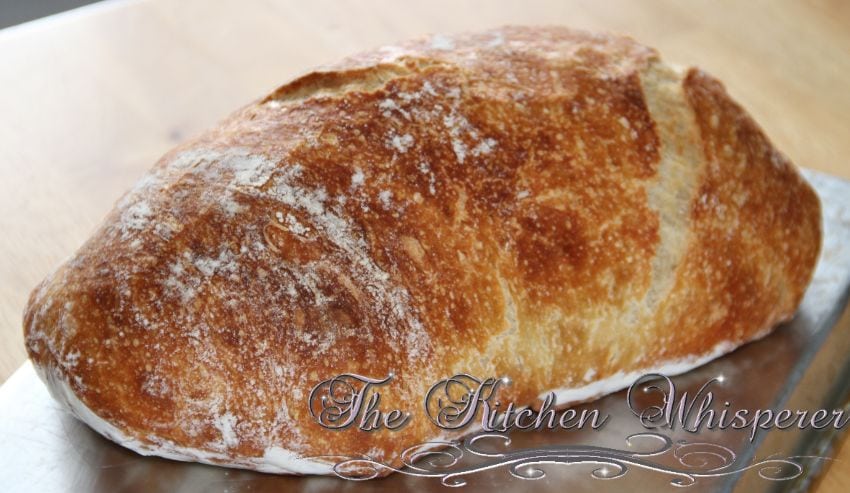
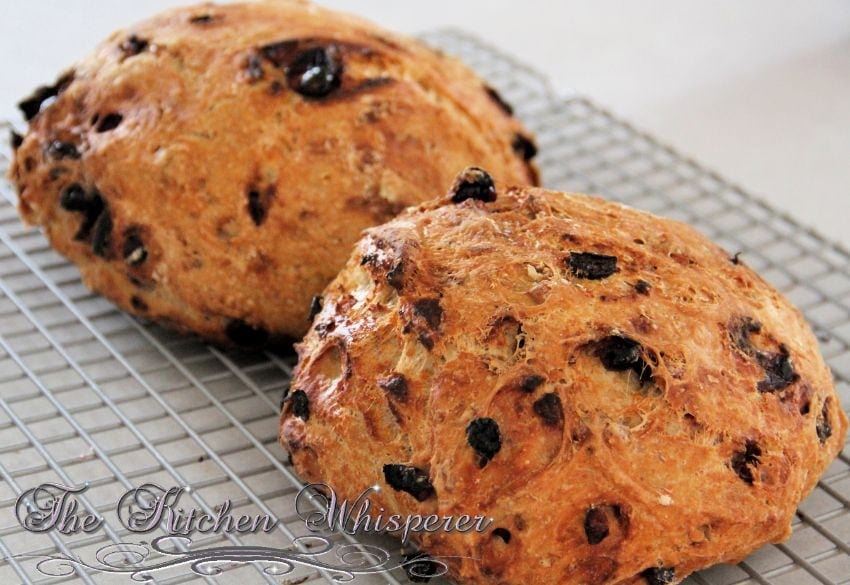
I mean just look at that bread! 1 simple recipe, with a few add-ins, and you have your very own GOURMET Cranberry Almond Citrus Crusty Bread that rivals the best bakeries!
When it comes to bread I go in spurts as to what types I want albeit Brioche, Sourdough, Challah, and so forth. Lately, I’ve been on this HUUUUUUUUUGE crusty and chewy no-knead bread. Perhaps partly because I was crushed over the holidays with baking so I needed easier stuff to make that just rocked your socks off. This has quickly become a staple (again) in our house that I make at least once a week. What I love the most about this recipe is that it’s so simple, so basic that ANYONE can make it (well okay, providing you have the ingredients and a dutch oven/clay baker with lid) and PATIENCE.
I’ll share the base recipe however it’s up to you to tweak it with your add-ins. Don’t be afraid to be adventurous here. The recipe is very forgiving and you don’t need mad bread baking/shaping skills either.
BUTTTTTTTTTTTTT wanna know the best part out of all of this?!?! You DON’T need a stand mixer! No dough hook, kneading by hand as your grandma did – just a wooden spoon, a big bowl, and love *yes, you NEED love when you bake!*
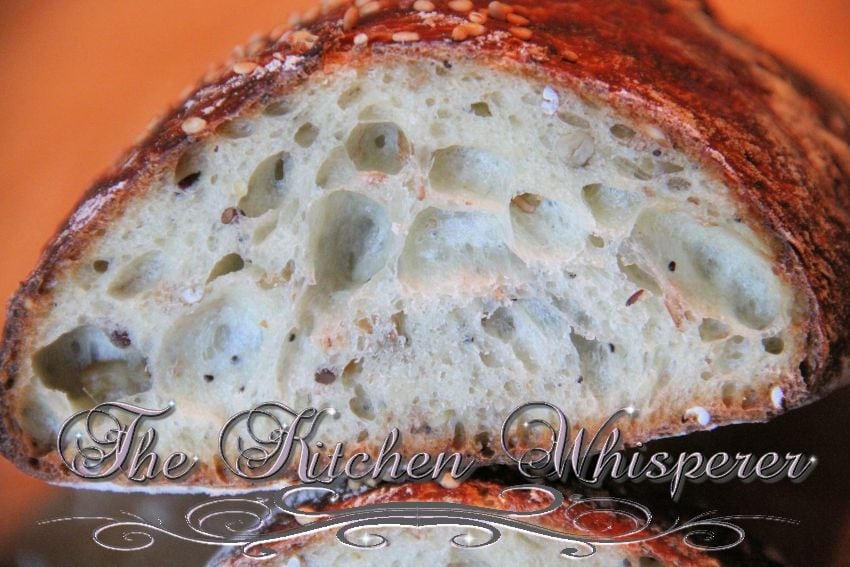
See.. 1 recipe and you can turn it into a Hearty Grain Crusty Bread. Just LOOK at those holes!
And if you just want to kick it up a bit, add roasted garlic and parmesan cheese right before you shape it!
How To Store Your Bread
Fresh, homemade bread has no preservatives or chemicals, unlike the ones you buy in the store. So when it comes to homemade bread, I tend to rely on storing it so it stays moist and tender on the inside. The crispiness you can always fix from reheating.
- Heavy Boules (round loaves) – If it’s to be eaten in its entirety on the first day, slice it and store it cut-side down on a cutting board. That will typically help keep it fresh for the day.
- For 2-3 days – store it in plastic wrap snuggly. Commercial food-safe plastic bags work as well (like the kind you get at the bakery). I will also use my Emile Henry Bread Box as well as I love how that keeps my bread fresh.
- More than 4 days – freezer
Reheating Homemade Bread
For this style of bread, I prefer the following:
- Wrap it snuggly in aluminum foil, and pop it into a preheated 350F oven for about 15 minutes (longer if it’s a huge loaf).
- Remove it from the oven, and crank the heat to 450F.
- Remove the foil and mist the crust of the bread with water.
- Pop it back into the oven for a few minutes to crisp up the crust.
The Best No Knead Crusty Bread from scratch
- Prep Time: 10
- Cook Time: 40 minutes
- Total Time: 50 minutes
- Category: bread
- Method: oven
- Cuisine: bread
Whether you’re a novice or experienced bread baker, No-Knead bread is the easiest and one of the tastiest bread you’ll ever make! Just dump in a bowl, mix and let it rest overnight and dump into a dutch oven the next day to bake! Easy, peasy, delicious!

Ingredients
- 3 cups bread flour
- 1/2 teaspoon instant yeast
- 1 1/2 teaspoon table salt
- 1 1/2 – 1 3/4 cups water (room temp)
- Lidded cast iron dutch oven or clay dutch oven/pot – see note if you do not have one of these!
- Any add-ins you want (nuts, dried fruits, cheese, spices etc…)
Instructions
- In a large bowl add in the flour, yeast and salt. You need to make sure the bowl is at least 2 times the size as this will easily double in volume. Whisk to combine. Add in the water and mix with a wooden spoon – do NOT use a stand mixer. Mix it until it’s combined and forms a ‘shaggy’ dough. Just make sure that all the flour is incorporated. It will not be a smooth dough – that’s how it’s supposed to be.
- Cover with plastic wrap and set in a warm place overnight for at least 12 hours but no more than 24.
- When you’re ready to bake, put the rack in the middle and preheat to 450F. When the oven reaches temp, put your dutch oven pot (cast iron or heavy ceramic {check to see that your ceramic can handle 450F temp first!}) in the oven WITH THE LID on. Let it heat up for 30 minutes.
- While that’s heating up, use a dough scraper and scrape your dough onto a heavily floured surface (or you can flour parchment paper and put it on there). *See note
- If adding nuts, fruits, etc, add it now and gently knead in to disperse. Shape into a ball, tucking the sides under. It will be sticky but that’s good.
- Cover lightly with plastic until the 30 minutes is up.
- Remove the pot from the oven, place the ball dough on floured parchment paper and plop the ball down in the pot. You’re essentially placing the whole thing inside (try to remove the excess flour) the pot – parchment paper with the dough ball.
- Replace the lid and bake for 30 minutes. No peaking! Remove the lid and bake for another 15 minutes. Remove from the oven and using tongs remove the bread and cool on cooling rack.
Notes
If you’re not comfortable with shaping the dough, when you remove the pot from the oven after 30 minutes you can carefully just pour the dough into the pot. It won’t be a perfectly round bread loaf but that’s okay – it’s just rustic. If you do pour it in, just jostle the pan around to kind of even out the dough before putting the lid on. But practice with shaping the dough. You can’t screw it up.
Don’t have a dutch oven or clay pot? Never fear! Grab your cast iron pan instead! If you don’t have a cast iron pan, you can use the following:
Clay pots with lids, Pizza stone with a bowl to cover the bread, insert from a crockpot, pyrex baking dish with a lid, stainless steel pot with a lid, baking dish covered with aluminum foil, old cast iron dutch oven. Essentially ANYTHING that can withstand the oven heat and time!
1. Take a 12″ round cast iron pan (with preferably a 2-3″ side wall) and place that into your 450F degree oven (just like the directions on the site). This pan will go on the middle rack.
2. WHILE you are heating that up, place a metal pan on the lowest shelf/rung in the oven at the same time. I just use an old cake pan that has seen better days.
3. When you remove the VERY HOT skillet from the oven and put your dough in it (have the dough resting on parchment paper so the bottom doesn’t get that ‘black’ color from the pan).
4. AND as soon as you put it in the oven put about 3 cups of ice cubes in the hot baking pan. DO THIS FAST as you want to trap the steam in the oven!
5. This will create steam (just like a dutch oven).
6. After 30-35 minutes check the bread. It should be done but if it’s not cook for 10-15 min more. If at 30 minutes it’s getting dark but not done (will sound hollow when tapped), just tent some foil over top for about 10 minutes.
7. Cool as normal.








This bread is great the first day but the days after it gets harder and drier each day. Is there a way to keep it edible the third and fourth days??
Hi Leah! Every homemade boule like this will do that as it’s not pumped full of chemicals or preservatives to keep it “fresh”. However I updated the post with 2 new sections on how to store this bread and then how to reheat it! Check them out!
Best Kitchen Wishes!
Not only is it easy it’s super tasty.
It’s definitely a weekly thing for us to make!
Best Kitchen Wishes!
Tried this out tonight. My wife says it’s a keeper! I did cut the potato cubes too small and they all stuck to the foil, but other than that mighty tasty!.
Thank you so much for this recipe. I had heard of no-knead bread but never tried it. I used a clay pot I bought in a thrift shop a while ago, all-purpose flour and it turned out great. This method seems to give a better texture bread than recipes I’d used before — I even managed to get some of those little holes which I had convinced myself could only be achieved by a pro !
OMG this bread is a life saver; literally! Our stores are completely out of bread but they had bread flour and yeast. So I decided to make bread for the first time ever yesterday using your recipe.
Lori this bread is incredible! I can’t believe how easy it was! My husband and kids were raving over it and said I’m never to buy store bought bread again!
Folks this recipe is THE BEST!
I don’t know in what world this recipe makes what was shown in the pictures bc I basically made a beige disc of bread. This didn’t rise in the oven and the dough was so wet it was impossible to shape even after adding more flour
The recipe makes the picture shown Emily.
It sounds like perhaps you might have mismeasured the ingredients as this dough is far from wet. Tacky after the overnight rise but definitely not wet. The dough isn’t wet but rather should be more on the shaggy side almost like a biga when you go to let it proof overnight.
How new/fresh is your yeast? How do you store it (your yeast)? Did you use actual bread flour? Did the dough double in size overnight after it rested?
When you went to make/form the dough, did you preheat your dutch oven/lidded oven-safe container? As it was heating up, did you form your dough into a round shape and cover lightly? I know a million questions. But I can tell you that millions have made this bread and with much success over and over.
I’m honestly thinking that your yeast was defunct OR you possibly mismeasured, unfortunately. It happens as I’ve had that happen before.
Best Kitchen Wishes!
#TKWTreasureHunt Oh boy! So many recipes, so little time. In looking for this recipe< I saw the Double Chocolate one. Have to try that one too.
#TKWTreasureHunt
Another easy, guilty pleasure. I choose this bread when I want to make extra crunchy grilled cheese sandwiches. 🙂
Love bread ! #TKWTreasureHunt