Posts may contain affiliate links that help enable me to continue to provide you with free recipes. As an Amazon Associate, I earn from qualifying purchases. Please see my Privacy Policy for further details.
Ever since I posted my recipe for the Most Awesomest Crusty No Knead Bread EVER! the bread baking revolution has soared. Folks that were afraid to make bread from scratch were now becoming master bread bakers in their kitchens. Those that tried numerous times making other breads and ended up with nothing but bricks failed; giving up hope.
Until this… this GLORIOUS gorgeous bread.
When I tell you this is the EASIEST bread you will ever make, believe me! No kneading, no mixers, no fuss and nothing complicated.
Now while I make that bread about once a week with various flavor adaptations I always try and push the limits; see how far I can take it. Well the one day I was in a I NEED chocolate mood! But I also wanted bread. I really do limit my bread/carb intake even though it’s just cruel and pretty much a punishment but for me bread tends to pack on weight which is so not what I want. So as I stood in the kitchen one night staring at the jar of chocolate sitting right next to the loaf of tomato basil bread I contemplated making a chocolate sandwich. I instantly regressed back to sitting in 7th grade Social Studies watching a film and them discussing how French people eat chunks of chocolate between 2 slices of baguette bread for lunch. Yes, I did consider this but the though just seemed ‘dry’.
However…
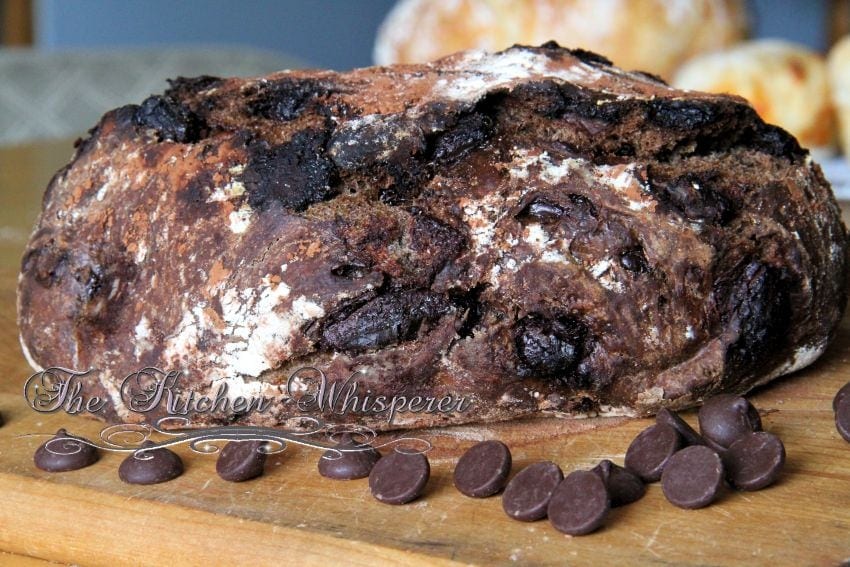
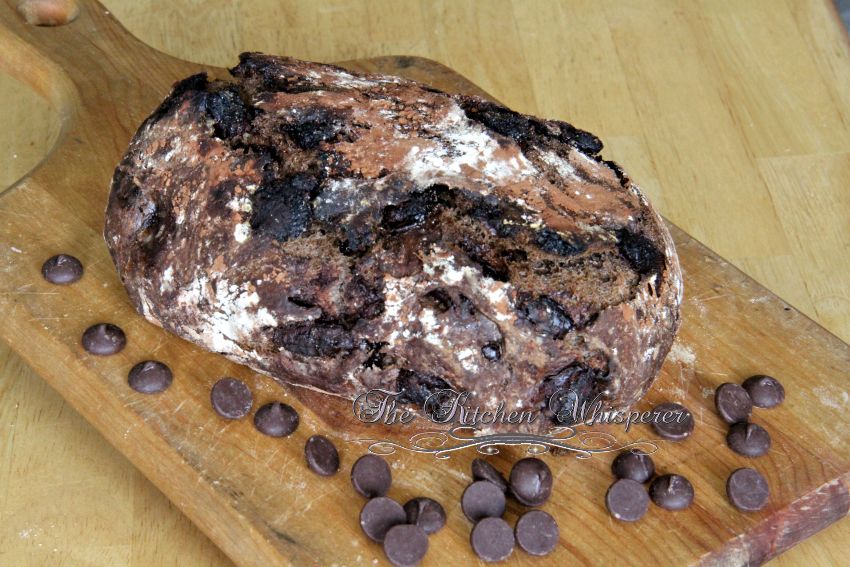
and there’s always a however with me. What if I made chocolate infused bread?!?! A wicked little grin formed on my face (kind of Grinch-like) and I figured I’d throw caution to the wind and make a chocolate version of my crusty no knead bread. I put it all together and covered it. About 18 hours later this thing looked so gorgeous. All black and puffy. I could not WAIT to put this baby in the oven. Since I was leery on the chocolate melting and sticking to the pan I dusted some parchment with cocoa and placed it on that. When this came out of the oven the chocolate chunks that were expose were charred (in a good way) and the smell of warm cocoa and chocolate was intoxicating!
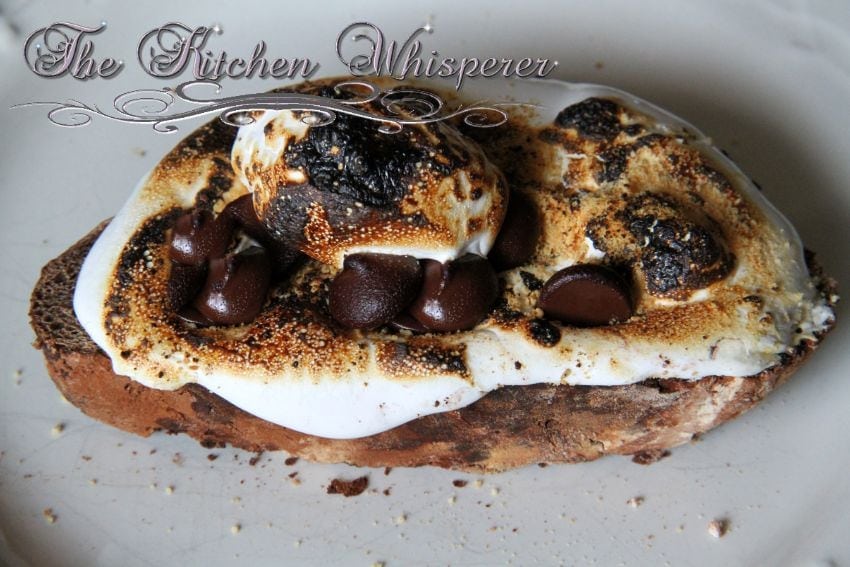
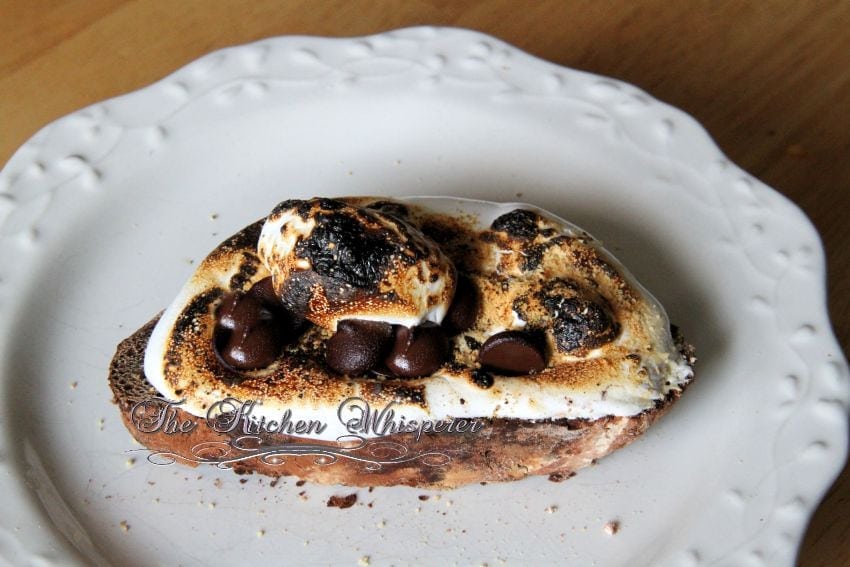
Sadly I didn’t get to eat it that day as Mr. Fantabulous wanted Date Night (which means Home Depot) then dinner then here and there. By the time we got home it was super late and while I could have nommed on that bread then, I waited until the next day. The next day we worked in the yard however I kept thinking about this bread. I wasn’t sure how to eat it. I mean – do I butter it? Peanut butter? Nutella? So I did what I always do when I need suggestions.. I took it to the TKW Facebook Family! There were awesome suggestions but one member, David gave the most perfect suggestion EVER. A deconstructed S’more! I mean how awesome is that?! My dear TKW friend, you are brilliant!
So I cut a piece, well okay 2 pieces – 1 to try plain (which ROCKED… OMG!) and the other for the deconstructed S’more! When I took my first bite of this I swear I saw angels! This was totally mind blowing! The next day I made this as a ‘grilled cheese’ but with raspberry jam, brie and nutella. DELISH!
You have to try this! Seriously, you HAVE TO TRY THIS!

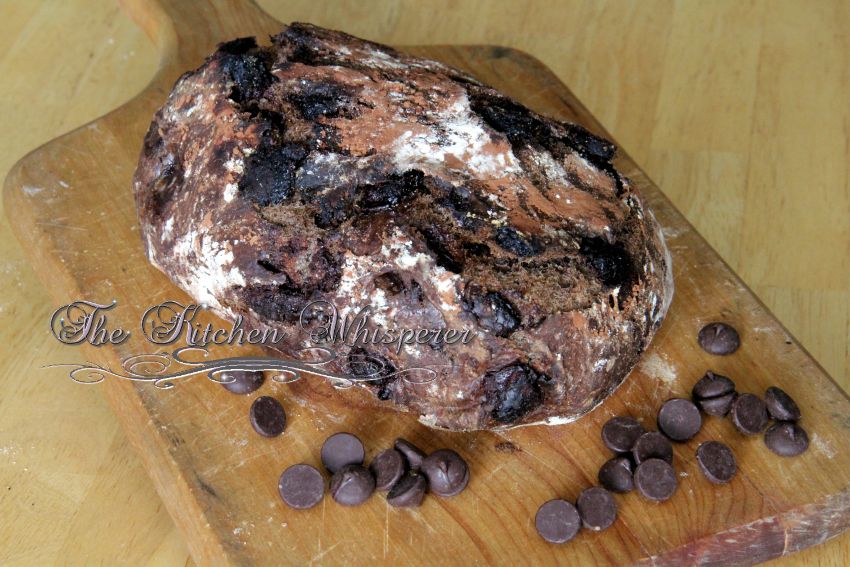
Awesomest Double Chocolate Chunk Crusty No Knead Bread
Find more fantabulous recipes, tips and tricks at www.thekitchenwhisperer.net. Also, join our TKW Family on Facebook
Ingredients
- 3 cups bread flour
- 1/2 teaspoon instant yeast
- 2 tablespoon double dark chocolate cocoa plus additional for dusting
- 2 tablespoon sugar
- 3/4 teaspoon table salt
- 1 1/2–3/4 cups water (room temp)
- 1 cup semi-sweet chocolate chunks or semi-sweet chocolate chips
- Lidded cast iron dutch oven or clay dutch oven/pot – see note if you do not have one of these!
Instructions
- In a large bowl add in the flour, yeast, cocoa, sugar and salt. You need to make sure the bowl is at least 2 times the size as this will easily double in volume.
- Whisk to combine.
- Add in the water and chocolate.
- Mix with a wooden spoon – do NOT use a stand mixer.
- Mix it until it’s combined and forms a ‘shaggy’ dough. Just make sure that all the flour is incorporated. It will not be a smooth dough – that’s how it’s supposed to be.
- Cover with plastic wrap and set in a warm place overnight for at least 12 hours but no more than 24.
- When you’re ready to bake, put the rack in the middle and preheat to 450F.
- When the oven reaches temp, put your dutch oven pot (cast iron or heavy ceramic {check to see that your ceramic can handle 450F temp first!}) in the oven WITH THE LID on.
- Let it heat up for 30 minutes.
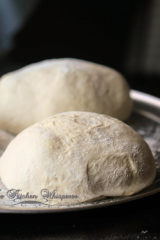
- While that’s heating up, use a dough scraper and scrape your dough onto a heavily floured surface (or you can flour parchment paper and put it on there). *See note
- Shape into a ball, tucking the sides under. It will be sticky but that’s good.
- Cover lightly with plastic until the 30 minutes is up.
- Remove the pot from the oven and plop the ball down in. Or if you transferred it to a cocoa dusted parchment paper, you can place the whole thing inside (try to remove the excess cocoa if you have a bunch on it).
- Sprinkle the top with cocoa lightly.
- Replace the lid and bake for 30 minutes. No peaking!
- Remove the lid and bake for another 15 minutes.
- Remove from the oven and using tongs remove the bread and cool on cooling rack.
Notes
If you’re not comfortable with shaping the dough, when you remove the pot from the oven after 30 minutes you can carefully just pour the dough into the pot. It won’t be a perfectly round bread loaf but that’s okay – it’s just rustic. If you do pour it in, just jostle the pan around to kind of even out the dough before putting the lid on. But practice with shaping the dough. You can’t screw it up.
Don’t have a dutch oven or clay pot? Never fear! Grab your cast iron pan instead!
1. Take a 12″ round cast iron pan (with preferably a 2-3″ side wall) and place that into your 450F degree oven (just like the directions on the site). This pan will go on the middle rack.
2. WHILE you are heating that up, place a metal pan on the lowest shelf/rung in the oven at the same time. I just use an old cake pan that has seen better days.
3. When you remove the VERY HOT skillet from the oven and put your dough in it (have the dough resting on parchment paper so the bottom doesn’t get that ‘black’ color from the pan).
4. AND as soon as you put it in the oven put about 3 cups of ice cubes in the hot baking pan. DO THIS FAST as you want to trap the steam in the oven!
5. This will create steam (just like a dutch oven).
6. After 30-35 minutes check the bread. It should be done but if it’s not cook for 10-15 min more. If at 30 minutes it’s getting dark but not done (will sound hollow when tapped), just tent some foil over top for about 10 minutes.
7. Cool as normal.


I wish you posted a pic of how the bread looked inside once cut…
Hi there, just curious if you think using regular cocoa powder instead of the dark will make a difference? Thank you for any insight you can give!
Hi Lyndsey!
You’ll be completely fine substituting the cocoas. The dark cocoa just gives it more of a intense dark chocolate flavor.
Best Kitchen Wishes!
Hi,
What size dutch oven would I use to make this recipe? I can’t wait to try it!
Hi Sadie!
I go with a 6 quart stock pot.
Best Kitchen Wishes!
Turn off the auto videos and music, horrible!!!
Yeah that should have NEVER happened Jo and has been removed. I am NOT happy either that showed up. That’s definitely not the site I present nor what I want. I just tested it out on 3 different machines and it’s fixed now. I had to clear my browser cache first though.
Best Kitchen Wishes!
Hi, I was finding a chocolate no baked bread recipe and came across your site. The bread you posted looked awesome. I have a question. If I do not have a skilled iron and only a bread tin. Could I use that as well? And is it a must to warm the tin at 450 degree?
I have to make this and have it with strawberry jam.. mm mmmm!
I am going to go get chocolate and try this! Add dried sour cherries to this!
Yeah Michelle! I’ve made this with dried blueberries and chocolate and LOVED it! The cherries is something Mr. Fantabulous would love!
Best Kitchen Wishes!
OG, this sounds good.
HAHAHA Eileen! This is totally unexpected but seriously works! I made this bread, cut thick slices and made a grilled ‘cheese’ out of it using sweetened cream cheese and raspberry jam inside! It was pure magic!
Best Kitchen Wishes!
I made this recipe for the first time last weekend and made cinnamon raisin bread. It was AWESOME! It was the most moist bread ever! This week, i tried the Double Chocolate….Oh my word!! It smelled so good while in the raising stage and then while baking i wasnt sure i could wait!!! After it cooled, i topped it with marshmellow, broiled it for a few seconds, and ……. OOOOOHHHH ABSOLUTELY HEAVEN!!!! This is the easiest, most adaptable bread recipe ever! I will never make regular bread again! Thank You so much for sharing this fabulous awesome recipe!!!!!! Next time, cheesy garlic….yUMMMM!!!
That’s awesome to hear Cheryl! This is my go-to bread recipe for EVERYTHING! I absolutely love it!
Actually I have a cheesy garlic recipe posted: http://www.thekitchenwhisperer.net/2013/06/29/awesomest-cheddar-chive-garlic-ale-crusty-no-knead-buns/ Only this one has beer in it!
Best Kitchen Wishes!