Posts may contain affiliate links that help enable me to continue to provide you with free recipes. As an Amazon Associate, I earn from qualifying purchases. Please see my Privacy Policy for further details.

These Itsy Bitsy Spider Cookies are Spooktacular and perfectly ghoulish for a Halloween treat!
So with Halloween upon us, I wanted to do something ghoulish with some cookies. Plus, I wanted to freak out Mr. Fantabulous. See he haaaaaaaaaaaaaaaaaates spiders. I mean he would rather move than deal with them.
I’m the official Spider killer in the family. Actually, I think it’s part of my wedding vows “I solemnly swear to love, honor, cherish and kill all spiders til death do us part”. LOL But hey, the things we do for love, right? I mean he’s the official mouse/worm/creepy crawly/bat/skunk/critter remover.
Well as of late my darling husband has been driving me crazy. Okay so truth be told, it’s not him, it’s more me. I’m still home recuperating and I’m going stir-crazy so every little thing is driving me crazy, including my darling husband.

Now I’m not the first to make spider cookies as they’ve been around for years but I haven’t posted on them ever and now’s as good a time as any, right? See Halloween is tied with Christmas as my favorite holiday.
We have an annual party, Boofest, every year where we all dress up, eat like there’s no tomorrow, partake in multiple of adult beverages and just let our hair down. Sadly this year we won’t be having one due to my surgery though we have discussed having a party later this fall. Today I decided to make these spider cookies to at least be somewhat festive…and to freak out my hubby. Yeah I know, I’m evil! MUAHAHAHA!
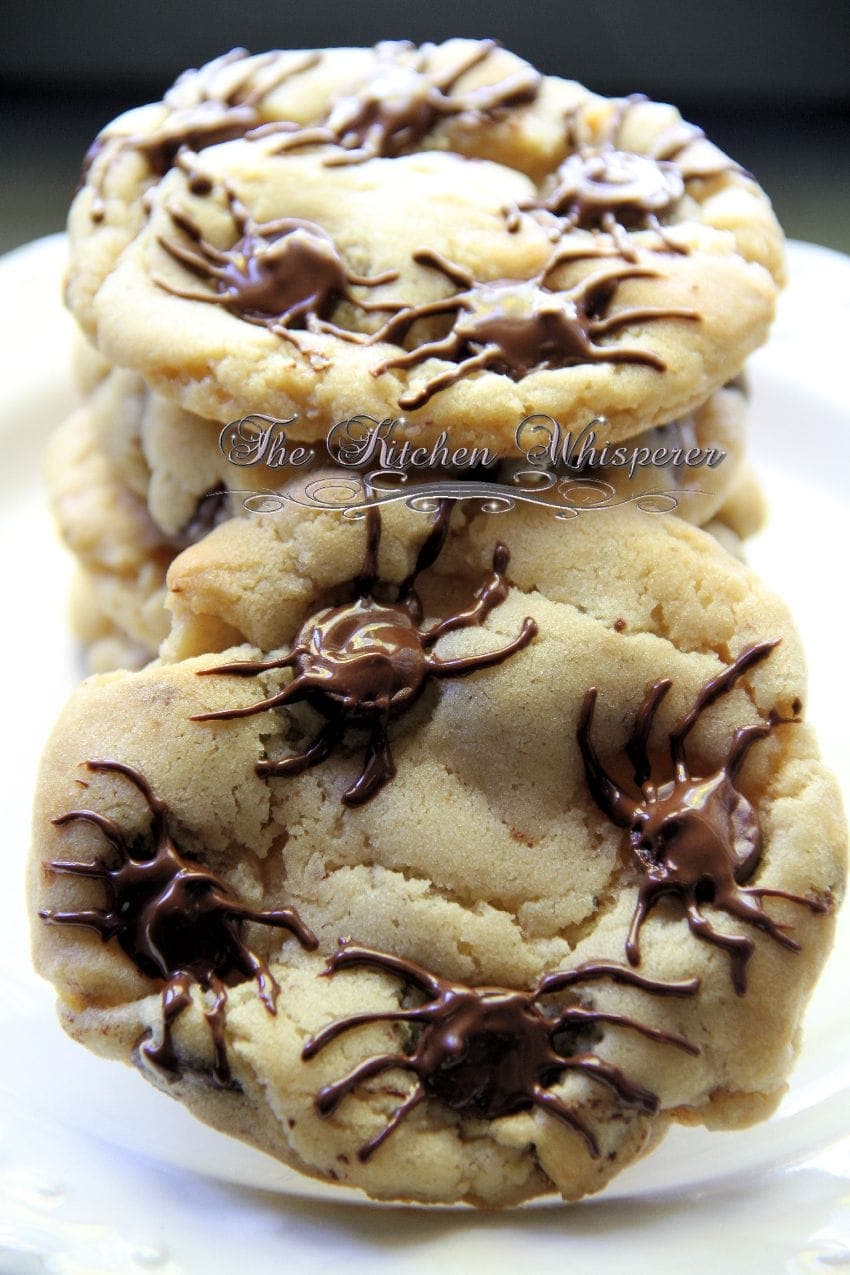
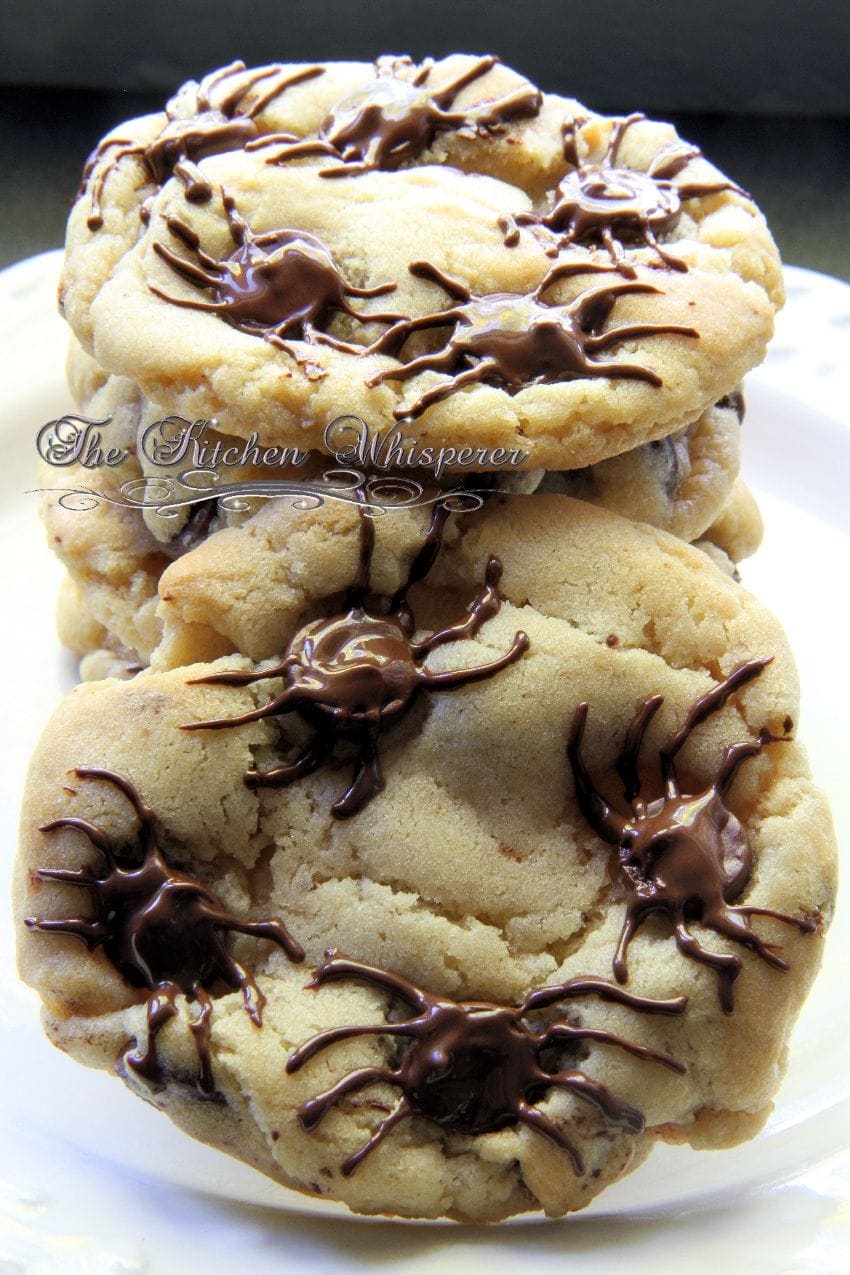
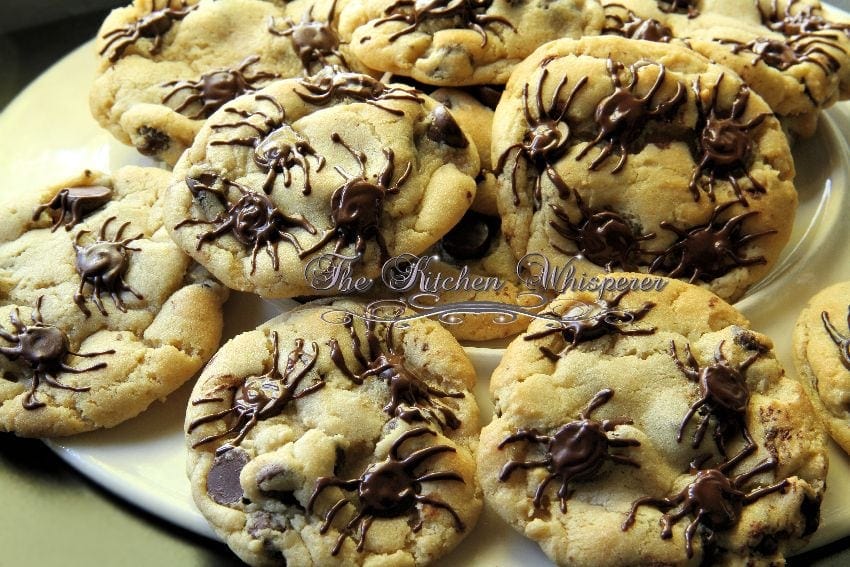
Aren’t they the coolest things ever?!!!

Yeah, I know “EWWWWWWWWWWWWWWWW!!! They look CREEPY! You got spiders in your cookies!!!” Exactly and I’m damn proud of it! These are so festive for Halloween, I love them!
They aren’t hard at all though they are a tad time-consuming as you have to ‘paint’ on the chocolate legs with a toothpick. I tried a squirt bottle but too much came out. The toothpick method worked best for me.

So Mr. Fantabulous sees me putting the dough balls on the cookie sheet and he gets all excited as he loves my cookies.
Well a few hours later he comes up to the house and as he walks in I hear him sniffing followed by “I can’t wait to have some cookies”. Now by this time I had Spiderized a few cookies and was in the middle of doing another.
He pours a big glass of milk, sits down at the table, and then goes to grab a cookie. Folks this man JUMPED back like 3′, gasped, and said “What the hell is that???” to which I let out such a belly laugh that actually hurt my healing abdomen. I said “Honey, aren’t they awesome! They are for Halloween. I Spiderized them!”
Folks the look of death I got from this man was truly priceless. He was MAD at me because I ‘ruined the cookies’ by putting spiders in them. Even though I explained to him that they aren’t real spiders, that it’s just painted on chocolate the man actually refused to eat them!
I said, “Look, I saved a bunch for you without the spiders on them… here!” Do you know that man got up from the table, poured his milk back into the jug, and left the room? He was actually mad at me! LOL
Well okay he technically wasn’t mad at me but he was not happy at all. He absolutely refuses to go anywhere near these cookies or the container! Furthermore, he wished me ‘good luck in eating them all as they are all mine!
Now I’ll freeze them or give them to company as I’m not a big sweet eater. This is why I only made about 1 1/2 dozen of these. But I know him, he’ll eat the non-spidered cookies. LOL
So if you’re having a Halloween Party or are invited to one, perhaps you want to give these to your class, take them to the office party or just make ’em for yourself, these are a great way to celebrate in a ghoulish, creepy way!
I think tonight, while Mr. Fantabulous drifts off to sleep I’m going to set one of these on the nightstand and start singing “Itsy Bitsy Spider Cookie, crept up the bed nightstand…” MUAHAHAHA!
PrintItsy Bitsy Spider Cookies
These Itsy Bitsy Spider Cookies are Spooktacular and perfectly ghoulish for a Halloween treat! | thekitchenwhisperer.net #halloween #halloweenfood #spiders #itsybitsy #halloboo #cookies #sweets #desserts #chocolatechipcookies
Ingredients
- 1 1/2 sticks unsalted butter, chilled (12 tablespoons)
- 1 1/4 cups light brown sugar, packed
- 3/4 cup white sugar
- 1 large egg
- 1 egg yolk
- 2 1/2 cups all purpose flour, sifted
- 1 teaspoon baking soda
- 1 teaspoon baking powder
- 1/2 teaspoon kosher salt
- 2 1/2 cups chocolate chips (semisweet, milk, or dark)
- 1/2 cup milk chocolate chips plus 1 tablespoon vegetable oil
- 1 teaspoon vanilla
Instructions
- In a bowl of a stand mixer fitted with the paddle attachment add the butter. Beat until smooth and creamy (~2-3 minutes). Add in both sugars and beat until well blended. Add in the egg, egg yolk, and vanilla and beat until fully incorporated.
- In a separate bowl add the flour, baking soda, baking powder, and salt; whisk to combine. With the mixer on low, slowly add the dry ingredients until combined. Turn the mixer off and add in 2 cups of chocolate chips. Mix just until incorporated (no more than 10-15 seconds).
- Place the dough in a bowl, cover it, and refrigerate for 1 hour.
- When ready to bake, preheat the oven to 350F with the rack in the middle. Line a cookie sheet with parchment paper. Using a medium cookie scoop, scoop out a 1 1/2″ ball. Roll it in your hands until it’s smooth. Place on the parchment and repeat. You should get 9 per pan. Gently flatten the balls to a 3/4″ round disc.
- Take the remaining 1/2 cup of chocolate chips and place a few, pointed tips down into the cookie. The chip’s base will be your spider’s body.
- Bake for 9-11 minutes or until lightly golden brown. Remove from the oven and allow to cool on the pan for 2 minutes. Remove from the pan and place on a cooling rack.
- Once the cookies have cooled, melt the 1/2 cup milk chocolate chips with the vegetable oil in 15-20 second increments until smooth and shiny.
- Using a toothpick, dip the tip in the chocolate and start to paint the legs from the body of the chocolate chip (the flat round part) outward—8 legs per spider. Allow to cool completely and the chocolate to harden before storing in an air-tight container.


Hi Kitchen Whisper..I have followed your recipe for a couple of years now and love them! I usually do do comment, but when I saw this pin and it did not have your name attached to it…..I thought I would let you know. We made these 2 years ago for a Halloween Potluck and They were a big hit and and want you to be able to credit , when credit is due!http://tastesbetterfromscratch.com/2015/10/chocolate-chip-spider-cookies.html
Hi Wendy!
I appreciate you letting me know! I did see that and after looking at it, her recipe is pretty different than mine. It’s not a copy cat though as you can see my recipe for these has been around for a couple of years. Plus I say in my post, these cookies have been around for years, even before I posted them. I can remember growing up and my Mom making them. So who’s to say where the original creation of this ‘look’ came from, ya know? But the recipe itself is mine though.
Thanks again hon for looking out for me!
Best Kitchen Wishes!
I made these cookies for my son’s ( he is an adult) Halloween party. The guests absolutely loved them, he said they were the hit of the party. I had a bit of a problem with the dough spreading quite a bit with the first sheet I baked. I don’t know if I did something wrong in mixing or not. In making the rest of the cookies I made them with a smaller amount of dough and that helped. They looked great and tasted delicious. Thanks for the recipe.
Hi Donna!
I’m sorry the first tray spread too thin. Some things that will cause a cookie to spread out “too far” is the butter was melted first then put into the dough. Or the dough wasn’t chilled enough. Either I will grate my butter (just freeze a stick and grate it like cheese) or will take it straight from the fridge, make my dough and then refrigerate the dough for at least an hour or more. In the summer, obviously it’s longer.
I’m glad though you were able to make them smaller and have the cookies turn out great!
Best Kitchen Wishes!
I love your site! I love your humour! I LOVE your recipes! Please don’t stop! I get such a good giggle reading your posts and fantastic idea’s and good recipes to try.
Can I come spend a day when you are cooking??
Linda
Linda,
Thank you so much! Thing is, this is what my life is like with Mr. Fantabulous. I’m thrilled that you love the site and my recipes. That really, really means a lot to me!
I’d love help in the kitchen *wink*
Best Kitchen Wishes!
These cookies look adorable! I can’t wait to make them with my little neighbors. Thank you!
Thank you so much Sharon! They are just the cutest things ever even though my husband refuses to go near them! LOL
Best Kitchen Wishes!