• FB
  • Insta
  • Pinterest
  • X
  • TikTok
  • YouTube
  • Amazon
  • Home
  • About
  • Recipe
    Index
The Kitchen Whisperer
  • Tuesday’s
    Tips
  • Weekly
    Menu
  • Shop
  • Recipe Index
  • Shop
  • Weekly Menu
  • Tuesday’s Tips
Aug 25 2015

Tuesday’s Tip with The Kitchen Whisperer – How to dry fresh herbs

Find the recipe card at the end of the post. Make sure to read the content as it contains chef tips, substitution options, and answers to FAQs to help you succeed the first time around!

Posts may contain affiliate links that help enable me to continue to provide you with free recipes. As an Amazon Associate, I earn from qualifying purchases. Please see my Privacy Policy for details.

I love growing my own fresh herbs. However if you’re like me you tend to plant more than can use – yes, even more.  I think it’s because when we plant the seeds or plants we see them as teeny, not really knowing that they will get bigger and take over your gardens at times.  So towards the end of summer you’re left with gorgeous fresh basil, oregano out the wazoo and enough parsley that you can’t give away.  And if you’re like me you can’t bear the thought of letting one single leaf go to waste however you can only make so much pesto or can so many jars of pizza sauce.  So what are you left to do?

Don’t let your herbs go to waste, dry them and fill up your spice jars!

Tuesday Tip
Making your own dried herbs is easier than you think!  All you need is patience, fresh herbs, some string (or pan) and clean jars to put the dried herbs in.

First you need to decide how you want to dry them.

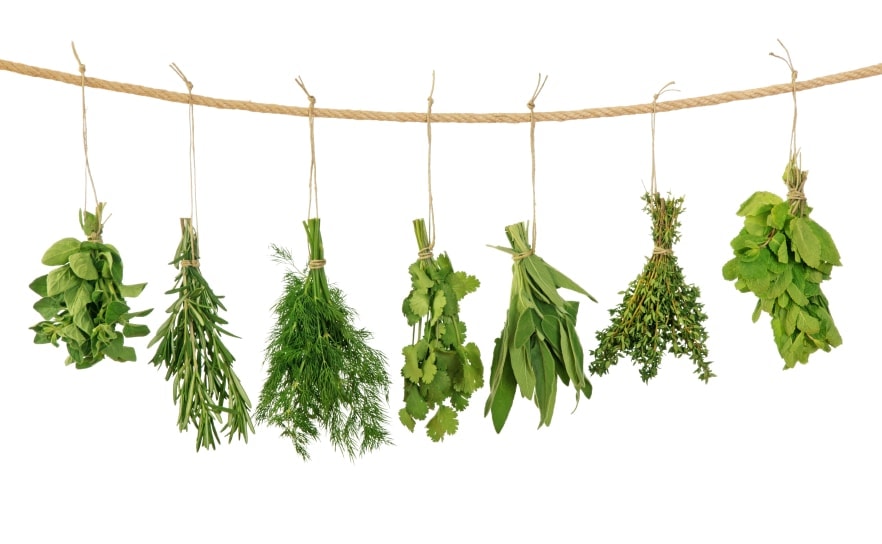
→ Less Tender Herbs — The more sturdy herbs such as rosemary, sage, marjoram, oregano, rosemary and dill,  thyme, summer savory and parsley are the easiest to dry using the air drying method.

→ Tender-Leaf Herbs — Basil, oregano, tarragon, lemon balm and the mints have a high moisture content and will mold if not dried quickly. Try hanging the tender-leaf herbs or those with seeds inside paper bags to dry. Tear or punch holes in the sides of the bag. Suspend a small bunch (large amounts will mold) of herbs in a bag and close the top with a rubber band. Place where air currents will circulate through the bag. Any leaves and seeds that fall off will be caught in the bottom of the bag.

Air Dry

→ Gather 5-10 branches together and tie with string or a rubber band. The smaller the bundle, the easier and faster they will dry.
→ Put the bundle of herbs, stem-side up, in a paper bag (or wrap muslin, a mesh produce bag) with several holes around the bundle, and tie it at the neck.
→ Tie the end of the bag closed, being sure not to crush the herbs as you do, and poke a few holes in the bag for ventilation.
→ Hang the bag by the stem end in a warm, well-ventilated room.
→ After a week they will ready to be placed and stored in your spice jars.

Oven

→ Place herb leaves or seeds on a cookie sheet one inch deep or less.
→ Put herbs in an open oven on low heat – less than 180 degrees F – for 2-4 hours. To see if the herbs are dry, check if leaves crumble easily. Oven-dried herbs will cook a little, removing some of the potency and flavor.

The oven method actually the most labor-intensive, and the least energy-efficient method. Herbs need to be dried at about 100 degrees, but most ovens don’t go that low. They also need air circulation, and some ovens don’t have vents. You’ll need to get an oven thermometer and experiment. Try turning the oven on warm or its lowest setting for a while, then turning it off (while leaving the light on). You can also try propping the door open slightly with a wooden spoon

Dehydrator

For this simply follow your machines instructions. Food dehydrators range in price from $30 to $400 so definitely buy what you can afford.  Most that I’ve ready about that give great reviews are around the $150 range. Quality dehydrators have handy features such as timers and adjustable temperature control.  Dehydrator drying is a fast and easy way to dry high quality herbs because temperature and air circulation can be controlled. Pre-heat dehydrator with the thermostat set to 95°F to 115°F. In areas with higher humidity, temperatures as high as 125°F may be needed. After rinsing under cool, running water and shaking to remove excess moisture, place the herbs in a single layer on dehydrator trays. Drying times may vary from 1 to 4 hours. Check periodically. Herbs are dry when they crumble, and stems break when bent.

Fresh herbs hanging isolated on white background

Save For Later!

Make it a meal!

Pairs Perfectly With:

Leave a Reply Cancel reply

Your email address will not be published. Required fields are marked *

2 responses

  1. Linda Andry
    August 25, 2015

    First, I’d like to thank you for your ongoing inspiration. When I feel lazy I just look at all the wonderful things coming out of your kitchen and shame myself into action. Regarding today’s topic, I love chives, have lots of them, and tried drying (hoarding) them for the upcoming winter. They have the texture (and taste) of sticks! I washed, snipped and air dried them on paper towels, stirring to make sure no moisture was present to cause mold, but I got twigs! Any advise would be appreciated.

    Reply
    1. TKWAdmin
      August 31, 2015

      Hi Linda!

      Thank you so very much for your kind words. That really means a lot to me. And hey, we all need a break from the kitchen; even yours truly does from time to time.

      I too love chives! Hmmm… so they turned brittle? You can dry chives in the oven on its lowest setting. Leave the door open slightly as the chives dry. Another alternative is to let the chives air dry on trays in the sunlight. The herbs also need ventilation as they dry. Due to them having a high moisture content the dehydrator is best. Have you tried cutting them and then flash freezing them on a cookie sheet in the freezer? Just let them freeze, shake so they don’t stick together and then keep in a freezer safe container.

      Best Kitchen Wishes!

      Reply

Welcome!

I’m Lori, The Kitchen Whisperer®! Let me help you tame the kitchen one bite at a time.

More about Lori

Let’s be friends

  • Facebook
  • Instagram
  • Pinterest
  • X
  • TikTok
  • YouTube

Legend


AF Air Fryer B Base Recipes BBQ BBQ Method FM Freezer Meals IP Instant Pot MP Meal Prep O Oven Method PF Party Foods SC Slow Cooker S Smoker Method

Deliciousness Delivered.

Sign up to receive delicious recipes, kitchen tips and weekly menus (bacon, pizza, & BBQ oh my!) straight to your inbox.

Click to Subscribe
Text: this week's menu

Subscribe for delicious new recipes, kitchen tips & weekly menus

Join the TKW Family

What’s trending on TKW

  • Best Super Soft and Chewy Hoagie Rolls
  • Mom’s Classic Easy Stuffed Cabbage Rolls – The Best Recipe!
  • The Ultimate Slow Baked Boneless Short Ribs Recipe
  • Authentic Belgian Waffle Recipe
  • Best Ever Pork Roast and Sauerkraut
  • The Best Portabella Mushroom Veggie Burgers
  • Easy and Juicy Cornish Game Hens
  • 45 Easy & Delicious Pellet Smoker Recipes
  • Smoked Hot Honey Butter Spatchcock Chicken
Back to Top
Recipe Index
Instagram feed
Contact
Terms & Conditions
Privacy Policy
  • Facebook
  • Instagram
  • Pinterest
  • X
  • TikTok
  • YouTube
  • Amazon