• Skip to primary navigation
  • Skip to header navigation
  • Skip to footer navigation
  • Skip to main content
  • Skip to primary sidebar
  • Work with Me
  • Press/PR
  • Contact
Display Search Bar

The Kitchen Whisperer

  • Home
  • About
  • Recipe Index
  • Shop
  • Weekly Menu
  • Tuesday’s Tips

Jun292013

Awesomest Cheddar Chive Garlic Ale Crusty No Knead Buns

Posts may contain affiliate links that help enable me to continue to provide you with free recipes. Please see my Privacy Policy for further details.

Print Recipe

Find the recipe card at the end of the post. Make sure to read the content as it contains chef tips, substitution options, answers to FAQs to help you succeed the first time around!

With the debut of my Awesomest No Knead Crusty Bread, it’s been a true whirlwind for this recipe. Those before that were intimidated by making fresh bread from scratch no longer feared it.  Those that tried making bread before only to have it end up like a brick now found their love of making bread with this single recipe.

You all know me how I like to push the limits.  Thus the creation of the Awesomest Double Chocolate Chunk Crusty No Knead Bread which is insane. I mean chocolate in bread!

Well I took it one step further.  See I had a lot of folks say they didn’t have a dutch oven or even a cast iron pan.  And since I do my very best to make sure everyone can make a recipe I set out to find a way that this crusty most awesomest bread could be made sans the dutch oven or cast iron pan.

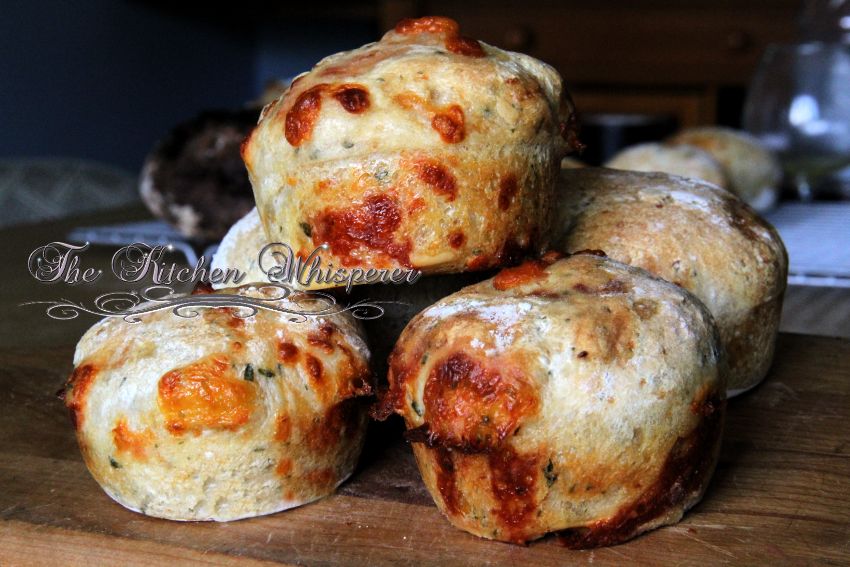
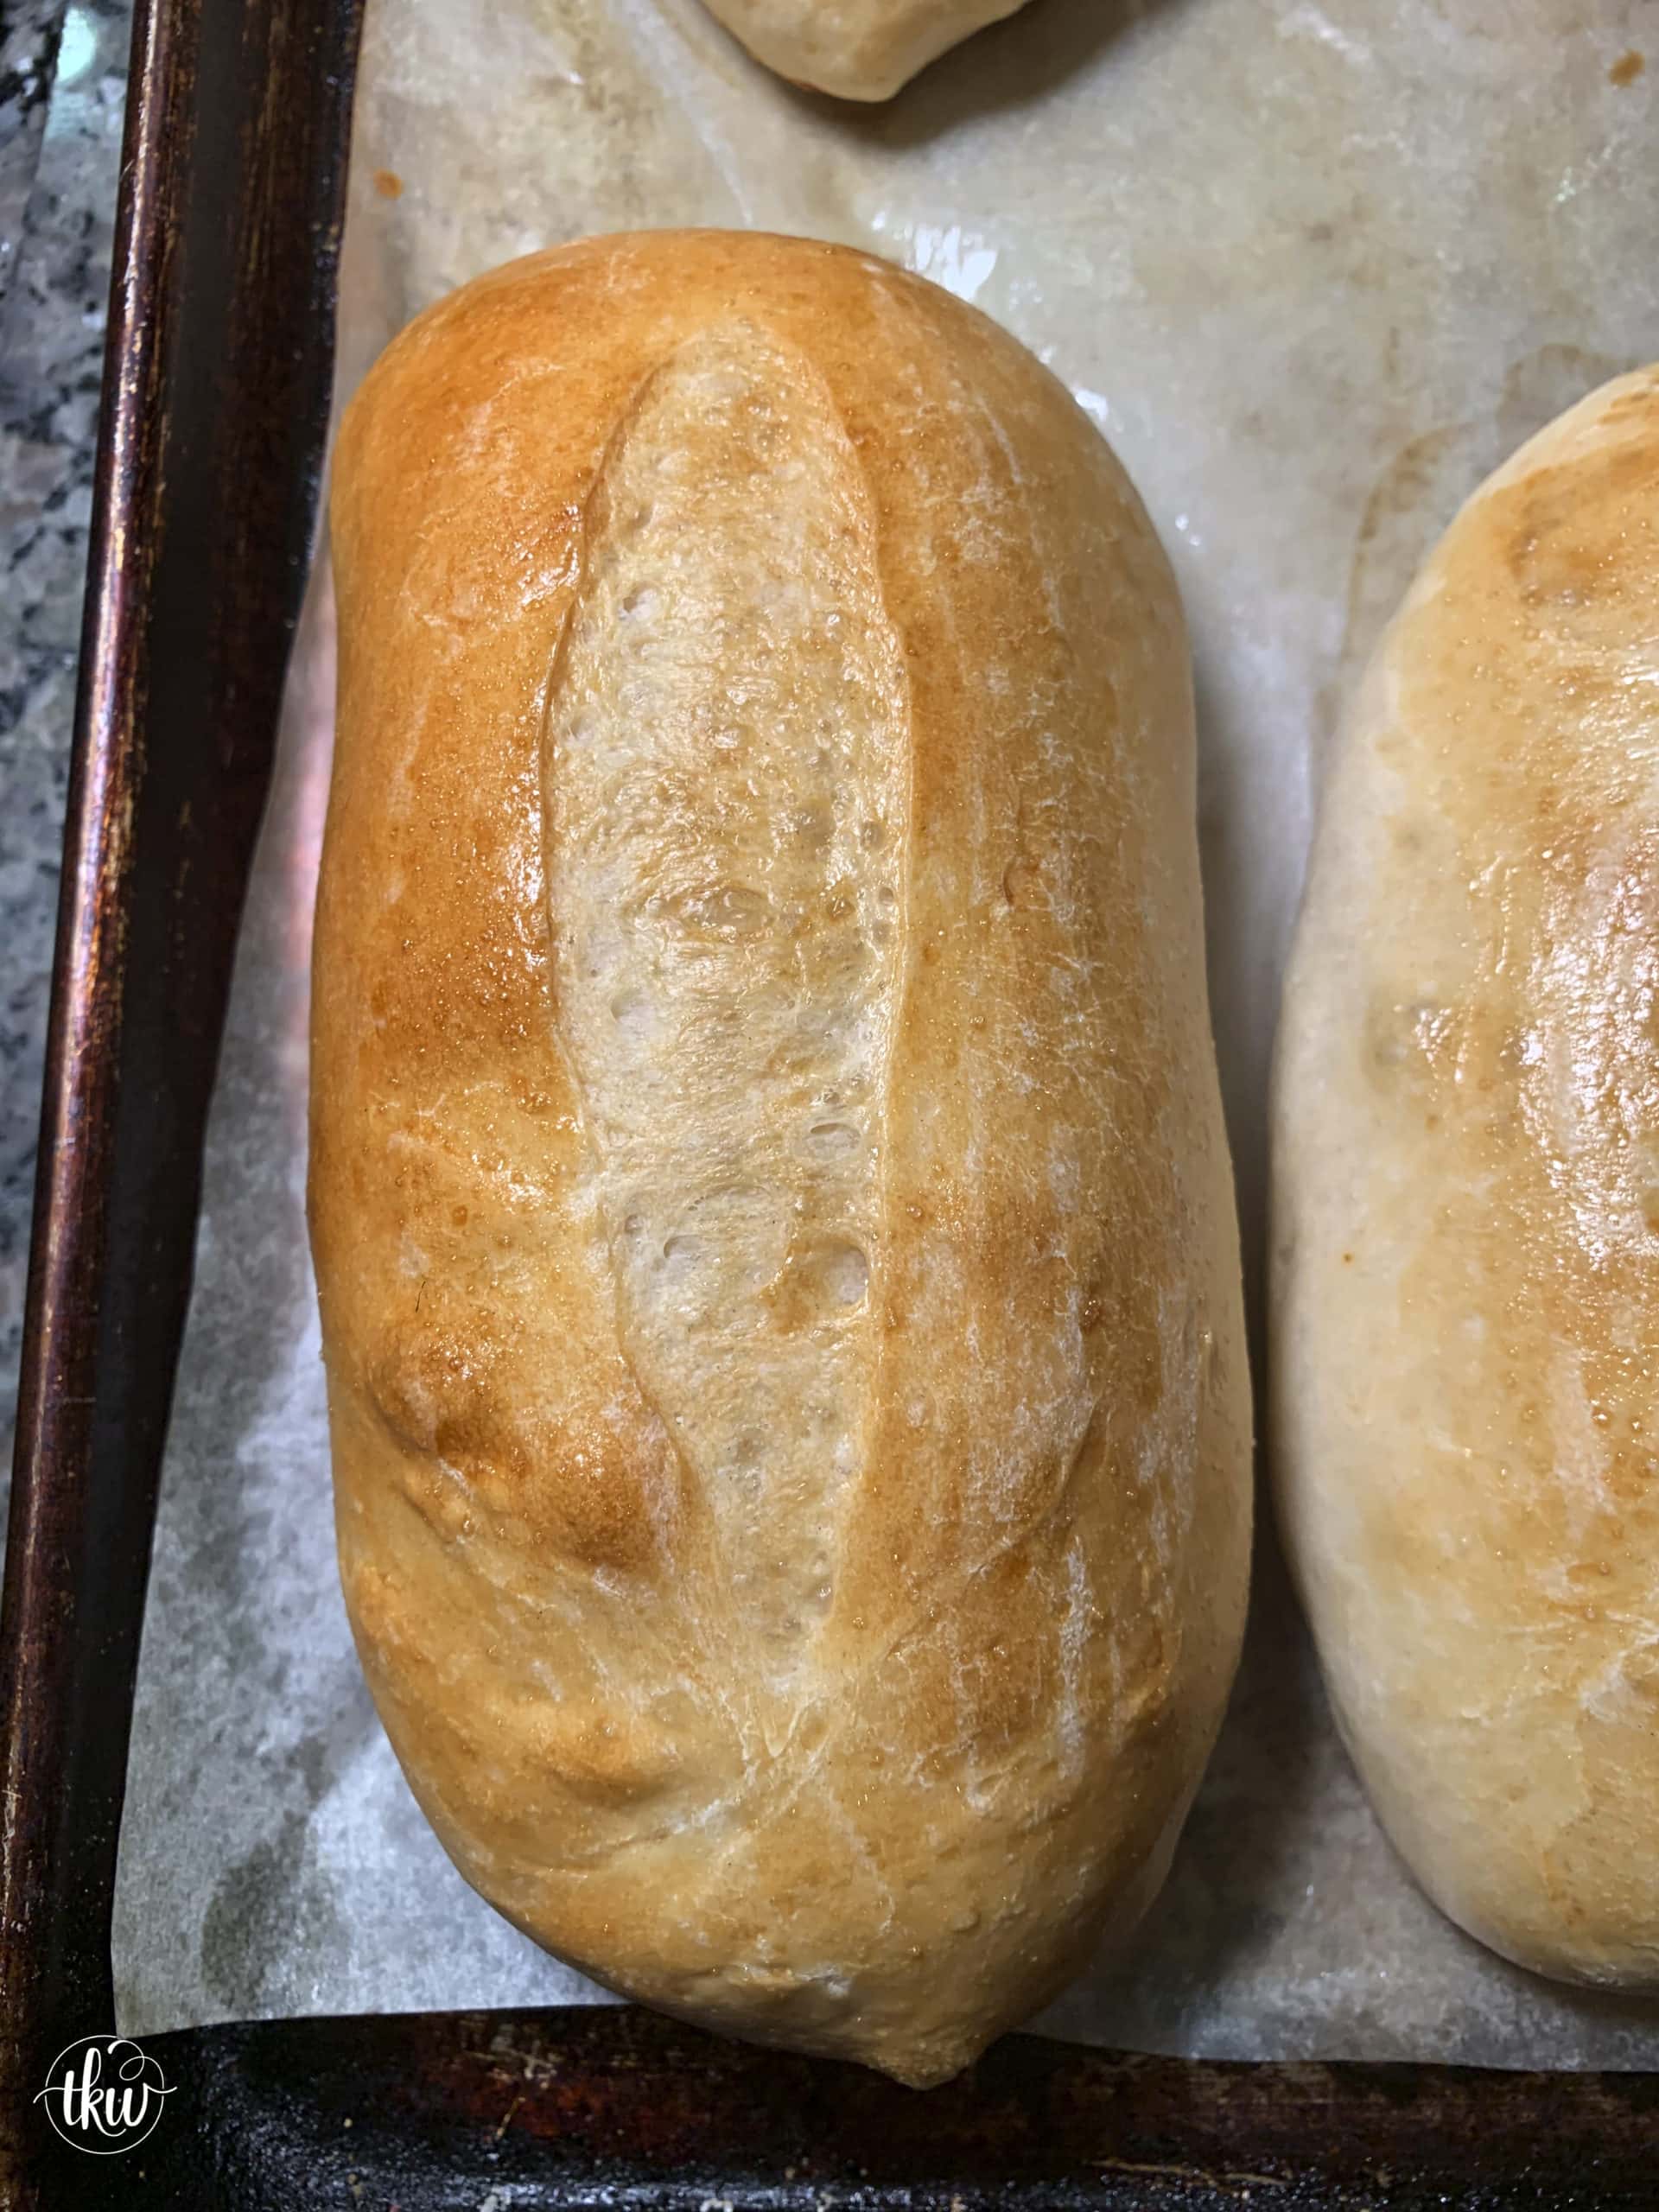
As you can see, I think I succeeded!  These buns were super crusty but oh so tender and chewy on the inside!  Plus they have beer and cheese in them.  I mean seriously, beer and cheese in any baked good is pure magic!

CheddarChiveGarlicAleNoKnead1

These were so amazing words can’t even describe them.

Mr. Fantabulous and I literally had to ration out these things and call dibs on how many each of us got!

CheddarChiveGarlicAleNoKnead

When we bit into these (straight out of the oven) the cheese was still so warm and melty.  You could smell the beer even before you took your first bite.  The sweetness of the chives balanced out the flavors beautifully!

I’m thinking next time I make these, perhaps adding some bacon in with them.

Bacon!  I know, right!  LOL

CheddarChiveGarlicAleNoKnead2

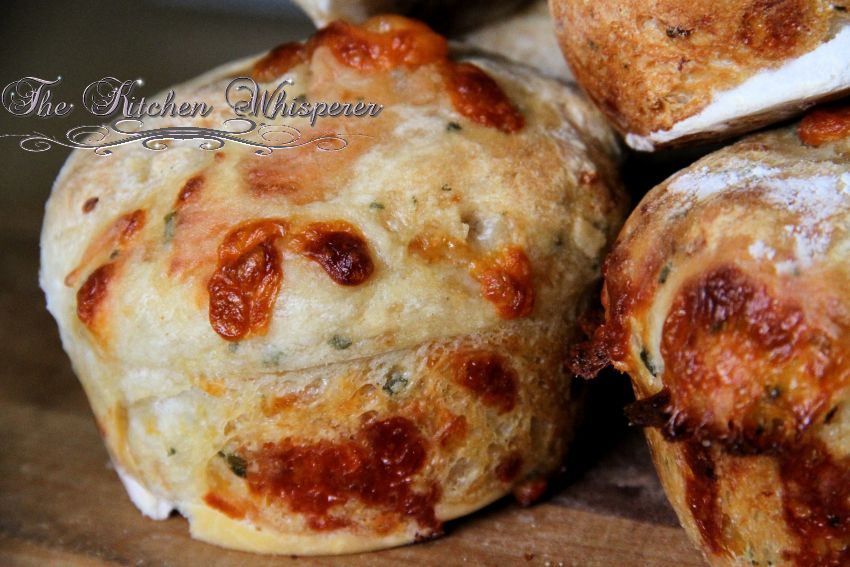
Just look at those gorgeous buns!  *giggles like a 14 year old boy*  HAHAHA I know, the littlest things make me laugh.

CheddarChiveGarlicAleNoKnead3

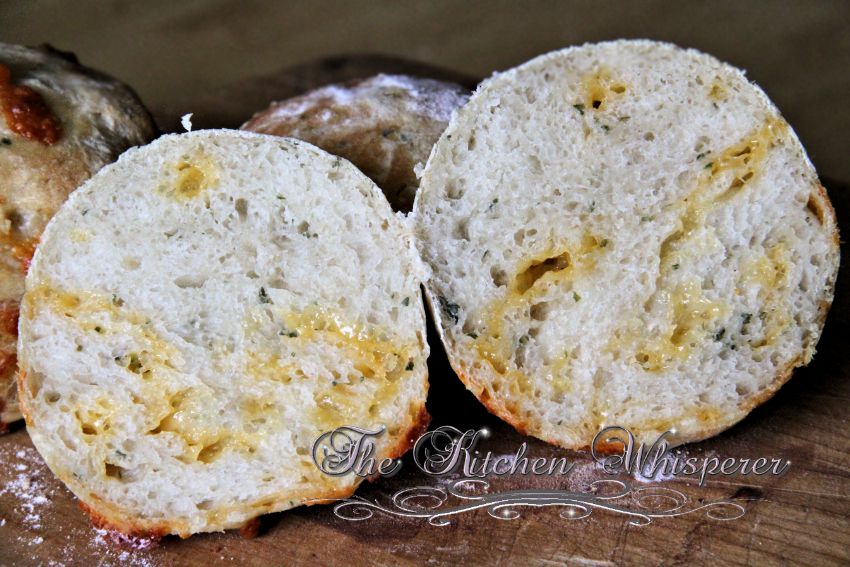
Just look at those ribbons of melted cheese! No, that’s no butter.  That’s pure unadulterated cheddar infused with chives and beer!

CheddarChiveGarlicAleNoKnead4

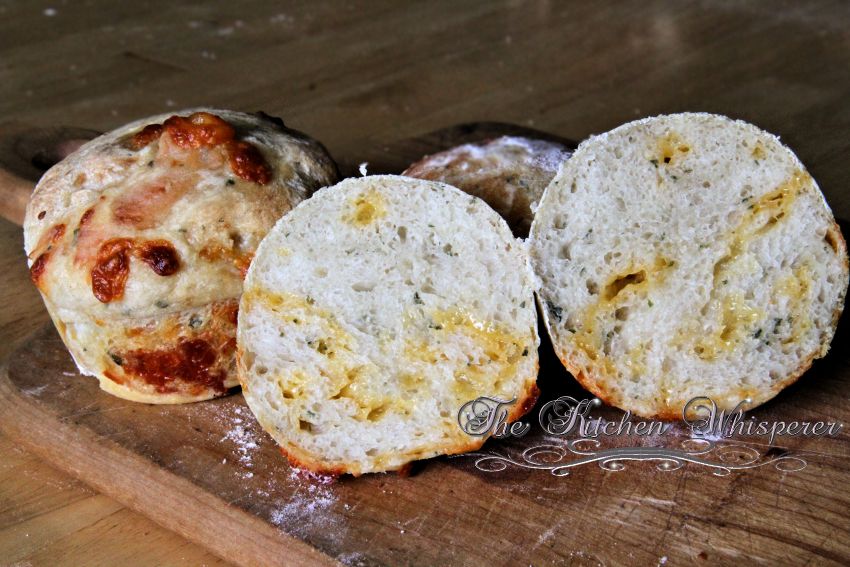
These were awesome with butter, garlic butter, as a sandwich.  Mr. Fantabulous actually LOVED LOVED LOVED these with his egg salad.  He inhaled these!  I actually cut mine in half, topped with some pizza sauce and cheese and made mini french breads.

Seriously I think I fell in love that night with bread!

So for those of you that haven’t tried making bread from scratch, you NEED to make these!  They are super easy and seriously, you’ll kick yourself in the pants for not making this type of bread sooner!

Print

Awesomest Cheddar Chive Garlic Ale Crusty No Knead Buns

  • Author: The Kitchen Whisperer

Find more fantabulous recipes, tips and tricks at www.thekitchenwhisperer.net. Also, join our TKW Family on Facebook

Print Recipe
Pin Recipe
★★★★★ 5 from 4 reviews
Did you make this recipe?
Leave a review

Ingredients

  • 3 cups bread flour
  • 1/2 teaspoon instant yeast
  • 1 1/2 teaspoon table salt
  • 1 1/2 cups ale, room temperature
  • 2 teaspoon fresh garlic, minced or 1 teaspoon garlic powder
  • 2 tablespoon fresh chives minced or 1 tablespoon dried chives
  • 1 1/2 cups shredded sharp cheddar

Instructions

  1. In a large bowl add in the flour, yeast, and salt. You need to make sure the bowl is at least 2 times the size as this will easily double in volume.
  2. Whisk to combine.
  3. Add in the chives, garlic and beer.
  4. Mix with a wooden spoon – do NOT use a stand mixer.
  5. Mix it until it’s combined and forms a ‘shaggy’ dough. Just make sure that all the flour is incorporated. It will not be a smooth dough – that’s how it’s supposed to be.
  6. Cover with plastic wrap and set in a warm place overnight for at least 12 hours but no more than 24.
  7. Turn the dough out on to a lightly floured surface add the cheese on top and using a floured hand or wooden spoon, gently fold in the cheese then using a bench scraper cut the dough into 8 equal sizes.
  8. Shape each bun into a ball tucking the sides under.
  9. Place the ‘buns’ onto a parchment lined pan that has been lightly dusted with flour.
  10. Cover lightly with plastic wrap and allow to rise up to 2 hours or until doubled in size.
  11. 30 minutes prior to ready to baking, put a rack in the middle of the oven and another on the lowest rack (not bottom) and preheat to 450F.
  12. On the lowest rack place a metal baking pan with a 1” side.
  13. Remove the plastic wrap from the dough balls and mist with water.
  14. Fill a container with 2 cups of ice and enough water to make 3 cups total.
  15. Place the baking pan with the dough balls on it on the middle rack.
  16. Working VERY fast (but safe) dump the ice and ice water into the pan on the lowest rack and shut the door. This causes steam and steam equals a very crusty shell (just like how a dutch oven would produce).
  17. Bake for 15-25 minutes or the bread, when tapped sounds hollow and is crusty to the touch.
  18. Remove from the oven, dump out the buns and place onto a cooling rack to cool completely.

Notes

If wanting to make this as a bread loaf do the following:

Bread
1. When you’re ready to bake, put the rack in the middle and preheat to 450F.
2. When the oven reaches temp, put your dutch oven pot (cast iron or heavy ceramic {check to see that your ceramic can handle 450F temp first!}) in the oven WITH THE LID on.
3. Let it heat up for 30 minutes.
4. While that’s heating up, add the cheese on top and using a your floured hand or wooden spoon, gently fold in the cheese.
5. Next, use a dough scraper and scrape your dough onto a heavily floured surface (or you can flour parchment paper and put it on there). *See note
6. Shape into a ball tucking the sides under. It will be sticky but that’s good.
7. Cover lightly with plastic until the 30 minutes is up.
8. Remove the pot from the oven and plop the ball down in. Or if you transferred it to a floured parchment paper, you can place the whole thing inside (try to remove the excess flour).
9. Replace the lid and bake for 30 minutes. No peaking!
10. Remove the lid and bake for another 15 minutes.
11. Remove from the oven and using tongs remove the bread and cool on cooling rack.

Don’t have a dutch oven or clay pot? Never fear! Grab your cast iron pan instead!
1. Take a 12″ round cast iron pan (with preferably a 2-3″ side wall) and place that into your 450F degree oven (just like the directions on the site). This pan will go on the middle rack.
2. WHILE you are heating that up, place a metal pan on the lowest shelf/rung in the oven at the same time. I just use an old cake pan that has seen better days.
3. When you remove the VERY HOT skillet from the oven and put your dough in it (have the dough resting on parchment paper so the bottom doesn’t get that ‘black’ color from the pan).
4. AND as soon as you put it in the oven put about 3 cups of ice cubes in the hot baking pan. DO THIS FAST as you want to trap the steam in the oven!
5. This will create steam (just like a dutch oven).
6. After 30-35 minutes check the bread. It should be done but if it’s not cook for 10-15 min more. If at 30 minutes it’s getting dark but not done (will sound hollow when tapped), just tent some foil over top for about 10 minutes.
7. Cool as normal.

If you don’t have a cast iron pan, you can use the following:

Clay pots with lids, Pizza stone with a bowl to cover the bread, insert from a crockpot, pyrex baking dish with a lid, stainless steel pot with a lid, baking dish covered with aluminum foil, old cast iron dutch oven. Essentially ANYTHING that can withstand the oven heat and time!

Made this Recipe?

Tag @thekitchenwhisperer on Instagram and hashtag it #thekitchenwhisperer
Recipe Card powered byTasty Recipes

CheddarChiveGarlicAleNoKnead-collage

Sharing is caring!

Previous Post
Next Post

Reader Interactions

View Comments

Recipe Reviews & Comments

  1. Dianne says

    January 12, 2017 at 12:26 pm

    Just checking on the amount of liquid in this recipe. I made it the other day and when I turned it out on the board there was liquid. I make no knead all the time and the liquid to 3 cups flour is usually 12 oz.

    Reply
    • TKWAdmin says

      January 12, 2017 at 4:52 pm

      Dianne,

      I’ve made this with 16 ounces of beer and 12 ounces and honestly it depends on the type of cheese (cheddar) I use. Some is drier than the other. But as for you having liquid in the bowl doesn’t make sens as it should have all been incorporated when you mix it all together. The liquid doesn’t separate from the flour. What type of cheese did you use? However I updated the recipe to go with 1 1/2 cups with standard cheddar.

      Best Kitchen Wishes!

      Reply
      • Dianne says

        January 12, 2017 at 6:53 pm

        I just used a sharp cheddar. But the liquid was before I added the cheese it was when I took the dough from the bowl to the board to add the cheese in. The bread had a great flavor but it was kind of flat and I wondered it the liquid was the problem.
        Thanks for the response.

        Reply
  2. Frank says

    November 30, 2016 at 1:00 pm

    How many rolls does this recipe yield? 12?

    Reply
    • TKWAdmin says

      November 30, 2016 at 9:03 pm

      Hi Frank!

      6-8 depending on how big you make the buns.

      Best Kitchen Wishes!

      Reply
  3. Sue...who else...;) says

    February 24, 2014 at 2:20 pm

    Ok…I’m not done picking this poor recipe apart I guess. I am about to go make the rolls but now thinking about just making bread. Yeah….I know you’re at work so I guess it will be the rolls but….for bread….dust with cocoa??? I assume that’s “maybe” for a color issue but….I’ve never had a problem with my regular no-knead breads having a browning issue so…..explain please…..when you get time.
    Hugs and loves sweetie….;)

    Reply
    • TKWAdmin says

      February 24, 2014 at 2:27 pm

      HAHA I so love you Sweet Sue! I’m preparing your bedroom for you now 🙂 I removed that cocoa line. The directions for the bread are similar to the Chocolate no knead bread and I may have had that on the brain as I was typing up this recipe.

      God what would I do without you?

      Much loves!

      Best Kitchen Wishes!

      ★★★★★

      Reply
  4. Sue Stewart says

    February 23, 2014 at 5:45 pm

    Hello my dear lady…;)
    Are you keeping warm and cozy? The snow just keeps on coming I hear…we even got an inch in 24 hours a couple of weeks ago but that was it….;) Didn’t mean to rub that in…;)
    I am finally getting around to making this recipe. David did find me what he thinks is a perfect ale so….it’s mixed up and waiting till tomorrow for baking. BUT…the cheese???? I take it that gets kneaded in at step 7 1/2??? I know, I keep finding these little things to drive you nuts with….;) Anyway, while you are looking over this recipe, at step 11, I imagine that to be about 20 minutes or until the oven is fully heated but…..;)
    Ok, back to cooking…both of us.
    Hugs and loves,
    Byeeeeeeeeeeeeeeeeeeeeee

    Reply
    • TKWAdmin says

      February 23, 2014 at 7:18 pm

      Oh Sweet Sue what would I do without you? You sure I can’t convince you to come live here and work as my technical editor? You’ll work for bacon and brownies, right? *wink* It’s fixed – in both steps. Step 7 is where you fold in the cheese and then make the dough balls. Step 11 is 30 minutes.

      Fortunately we’ve had 2 straight days of sun and the snow is almost all melted. I’m so over winter it’s not even funny!

      Much loves!

      Best Kitchen Wishes!

      ★★★★★

      Reply
  5. Sue Stewart says

    January 30, 2014 at 9:44 pm

    Hello…it’s me again….over here now….;)
    How do you think this would be with jalapenos thrown in??? Fresh or canned/jarred??? Gonna’ have to try that out for sure.
    Now…big question….what kind of ale? We don’t drink so….I don’t have a clue. David got me a IPA which is a pale ale but…I don’t have a clue.

    Thanks again for all the recipes and tips and tricks and help and….just for being there…;)

    Byeeeeeeeeeeeeeeeeeeee

    Reply
    • TKWAdmin says

      January 31, 2014 at 7:49 am

      Hey Sue!

      I’ve used Yuengling, Sam Adams and so forth. I used pretty much what we had on hand. As for the jalapeños go for it but I’d use fresh. Jarred may have vinegar or pickling spices that could bitter the bread.

      Best Kitchen Wishes!

      Reply
  6. Eileen says

    August 2, 2013 at 9:23 pm

    Thanks for the hit on how to ‘keep’ it.

    Reply
    • TKWAdmin says

      August 3, 2013 at 11:42 am

      You are most welcome 🙂

      Reply
  7. Eileen says

    August 2, 2013 at 7:42 pm

    Oh, I’m making these with bacon. Great breakfast food to have on hand. I wonder how well they would freeze if they last that long.
    Eileen

    Reply
    • TKWAdmin says

      August 2, 2013 at 8:24 pm

      Eileen,

      It’s regular bread so it’ll keep for a while. I double wrap my bread then put in a plastic baggie. Take some out when I need it.

      Best Kitchen Wishes!

      ★★★★★

      Reply
  8. Aviva says

    June 30, 2013 at 4:28 am

    Thank You for taking the time to figure out so many options to replace baking vessels for those of us that don’t have what the recipe originally called for!And not to be forgotten the amazing recipe 🙂

    Reply
    • TKWAdmin says

      June 30, 2013 at 3:10 pm

      Aviva,

      You are most welcome! I know what it’s like and how frustrating it can be when you want to make a recipe but you don’t have the right ingredient. I do my best to try to make sure everyone can make my recipes.

      Best Kitchen Wishes!

      ★★★★★

      Reply

Leave a Comment & Review Cancel reply

Made it?
Recipe rating ★☆ ★☆ ★☆ ★☆ ★☆

Primary Sidebar

let’s be friends

Subscribe for delicious new recipes, kitchen tips & weekly menus

Yeah!!! I'm so happy you are joining the TKW Family! You will get an immediate email asking you to confirm your subscription. If it's not in your inbox check your SPAM or JUNK folders. If you do not confirm it, you won't receive my newsletters.

What's Trending on TKW

The Best Cheesy Reuben Wonton Appetizers
Instant Pot Sticky Gochujang Pork Belly Burnt Ends
Grilled Nashville Hot Chicken & Potato Bites
How To Perfectly Grill Italian Parmesan Asparagus
Instant Pot Homemade Cheesy Hamburger Helper
Instant Pot Mexican Pulled Chicken
Everything Bagel No Knead Focaccia with Garlic & Oregano
Chunky Portabella Mushroom Veggie Burgers
The Best Super Soft and Chewy Hoagie Bread Rolls
Back to Top
  • Recipe Index
  • instagram
  • Contact
  • Terms & Conditions
  • Privacy Policy
Site CreditsDesigned by Melissa Rose Design.Developed by Once Coupled.
132 shares