Making homemade crusty French baguettes are easier than you think. Nothing beats the smell of warm bread filling up the kitchen! Make this delicious recipe today!
So, I had been craving some crusty French bread for a while. Well, that’s not entirely true. What I was craving was herbed dipping oil and crusty bread. I had made the herbed dipping out but had no bread. Well, that is, no bread is best suited for the oil. Therefore, I had to make bread.

Now, I know some of you are probably thinking, “Go to the store, woman, and buy some!” Um, no. I prefer to control the ingredients I put in my bread, and honestly, my bread rocks!
You can keep your grocery store and specialty chain bread stores (which arrive frozen and aren’t made from scratch on-site, by the way!). I want MY bread! And once you make this, you’ll only want THIS bread again!
Easy to Make But Plan Ahead
Now, this bread is fairly easy, but you need to plan for it as it will be all day.
No, you won’t be with the bread all day working on it. Instead, you’ll have to let it rise, fold it, rise again, and repeat a few more times.
So, the night before you want to eat this, you’ll have to start the recipe to create the sponge.


What does “Sponge” mean in bread baking?
A sponge is a wet batter that has yeast added to it. The yeast creates bubbles in the moist batter, making it sponge-like.
The sponge method is used for three different reasons:
- Taste
- Texture
- Chemistry.
The flavor created is dependent on the ingredients used and the fermenting yeast. Like sourdough, the longer the fermentation, the greater the taste difference.

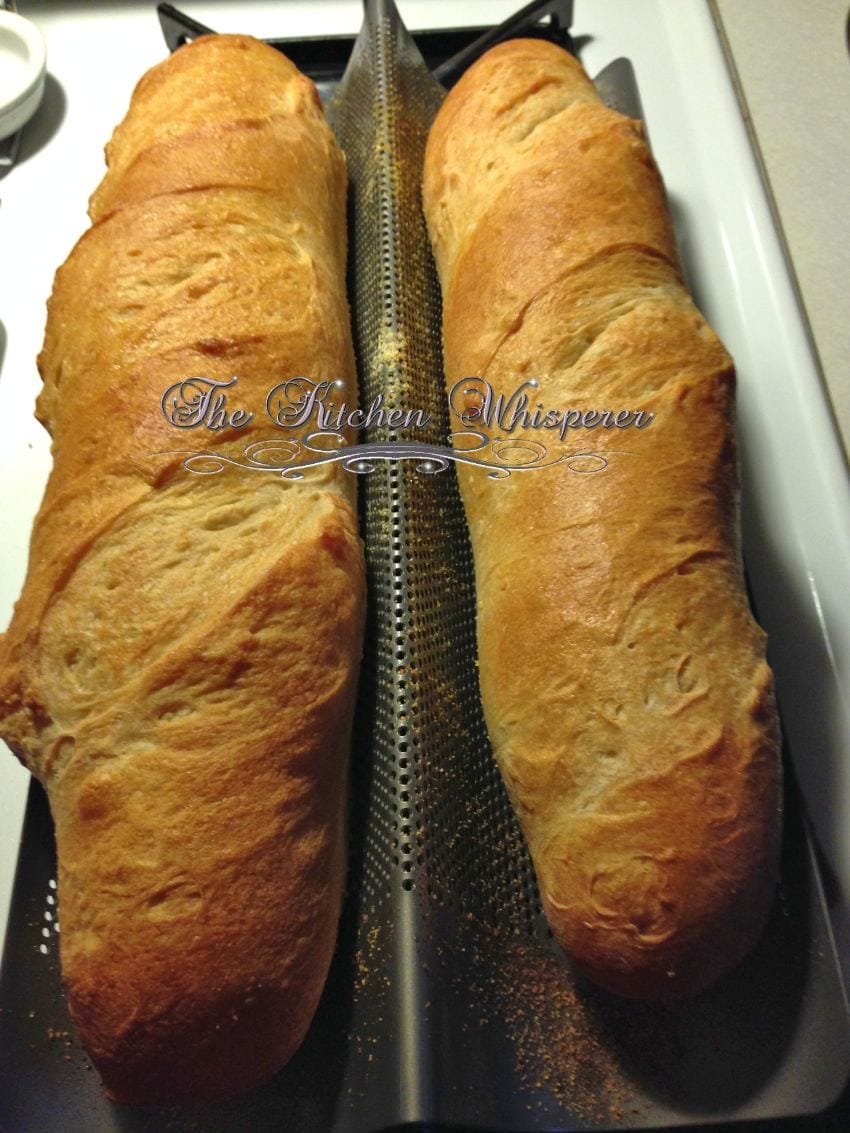
Even though this dough took a full day to prepare, it was well worth it! The bread was crusty on the outside and chewy on the inside.

As you can see below I use a 2-Section Non-Perforated Non-Stick French Baguette Bread Pan.
If you want seriously crusty bread, GET THIS PAN! I use this for baguettes as well as Italian Bread. Now this one makes 2 ‘fatter’ baguettes or Italian loaves. If you want the thinner style baguettes, then use this pan: 3-section Non-Perforated Non-Stick Baguette Pan.
If you’re like me, the first time I bought this pan, I was really, really nervous about using it. It has holes, and I was afraid that the dough would 1—stick and 2—seep through the holes and do bad things to the inside of my oven.
I can tell you that this recipe doesn’t stick or seep through. All you have to do is spray it lightly with baking spray and sprinkle on some cornmeal.
Crusty French Baguettes

Making homemade crusty French baguettes are easier than you think. Nothing beats the smell of warm bread filling up the kitchen! Make this delicious recipe today!
- Prep Time: ~2-3 hours
- Cook Time: 25 minutes
- Total Time: 0 hours
- Yield: 2 baguettes
- Category: bread, baguette, crusty bread
- Method: oven
- Cuisine: bread, baguette, crusty bread
Ingredients
Sponge
- 1/2 cup bread flour
- 1/2 cup warm water
- 1/2 teaspoon yeast
Dough
- 3 – 3 1/2 cups bread flour
- 1 teaspoon yeast
- 1 1/2 cups warm water
- 1 1/2 teaspoon kosher salt
Glaze
- 1 large egg beaten with 2 tablespoons water
Instructions
Make the Sponge
- Stir all of the ingredients together in a medium bowl until combined. Cover with plastic wrap and let sit at room temperature for at least 8 hours but no more than 24 hours. Essentially the sponge will rise and fall some.
Make the Dough
- The next day, make the dough by combining 3 cups flour and the yeast in a Stand Mixer fitted with the dough hook.
- With the mixer on low speed, add the water and mix until the dough comes together ~ 2 minutes.
- Stop the mixer, cover the bowl with plastic wrap. Just wrap the plastic wrap around the top of the bowl with the dough hook in it. Don’t bother removing it.
Mix it all together
- Let the covered bowl sit at room temperature for 20 minutes. After 20 minutes, remove the plastic wrap, add the sponge and salt, and knead the dough on medium-low speed until it is smooth and elastic, 8 minutes. If after 4 minutes, the dough seems a bit too wet, add the remaining 1/2 cup flour, 2 tablespoons at a time, until the dough clears the sides of the bowl but sticks to the bottom.
- Lightly oil a large bowl and set aside. Sprinkle some flour on your counter and turn the dough out onto it. Gently knead by hand to form a smooth, round ball. Place the dough in the bowl and cover tightly with greased plastic wrap. Let rise in a warm place until doubled in size, ~60-90 minutes.
- Turn the dough in the bowl with a Dough Scraper. Essentially, you’re folding the dough on top of itself. Cover and let rise for 30 more minutes, then repeat the turning process. Cover and let rise until the dough has doubled, about 30 minutes longer.
- Sprinkle some flour on your counter and gently scrape the dough from your bowl on the floured counter. Using a bench cutter, divide the dough into half. Gently pat each piece of dough into an 8 by 6″ rectangle with the 8″ side towards you.
- Fold the bottom third of the dough up towards the center and press gently to seal. Take the top third of the dough and fold that over the center, gently pressing down to seal. Lightly flour the side of your hand and create a large crease length-wise down the center of the dough. Starting at one end of the dough, grab the outside of the dough (on either side of the crease), pull up to the top, and pinch to secure. Repeat this for the entire length of the dough. Gently roll and set aside. Repeat the above folding, crease indention, and pinching steps for the other dough ball.
- Spray the Baguette Pan with cooking spray and sprinkle with cornmeal. Place both baguettes in the pan. Mist the baguettes with vegetable oil spray, cover loosely with plastic wrap and let rise in a warm place until nearly doubled in size and the dough barely springs back when poked with a knuckle, ~ 1 to 1 1/2 hours.
- Meanwhile, adjust an oven rack to the lower third position and heat the oven to 500F. Place an empty metal pan on the bottom of the oven. Score the top of the bread with a sharp knife, cutting three 1/2″ deep slashes along the width of each baguette. Brush the bread with the glaze, then spray lightly with water. Place the baguette pan on the rack and immediately pour 1 cup of VERY hot water into the pan on the bottom of the oven. Shut the door fast and IMMEDIATELY reduce the oven temperature to 425F and bake until the crust is deep golden brown and the center of the bread registers 210 degrees on an instant-read thermometer, about 25 minutes, rotating the loaves halfway through baking.
- Transfer the bread to a wire rack and let cool for about 30 minutes before serving.
Notes
Time does not include the proofing for the sponge, which can be up to 24 hours


Leave a Reply