• Skip to primary navigation
  • Skip to header navigation
  • Skip to footer navigation
  • Skip to main content
  • Skip to primary sidebar
  • Work with Me
  • Press/PR
  • Contact
Display Search Bar

The Kitchen Whisperer

  • Home
  • About
  • Recipe Index
  • Shop
  • Weekly Menu
  • Tuesday’s Tips

Jul62013

Gluten Free Crispy Chicken Strips

Posts may contain affiliate links that help enable me to continue to provide you with free recipes. Please see my Privacy Policy for further details.

Find the recipe card at the end of the post. Make sure to read the content as it contains chef tips, substitution options, and answers to FAQs to help you succeed the first time around!

I am in LOVE LOVE LOVE with my Gluten Free Panko Breadcrumbs!

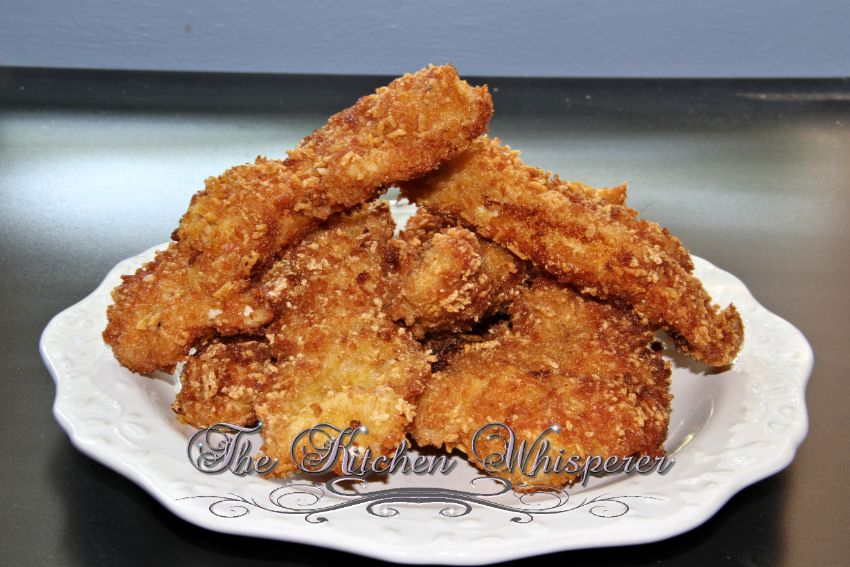
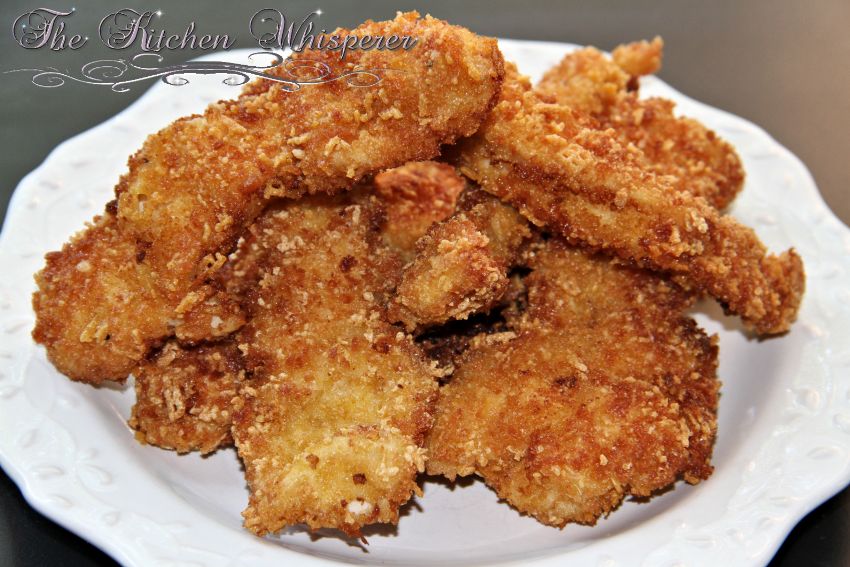
Whether you’re 5 or 75, you will LOVE these crispy, crunchy super moist chicken strips!  They are perfect for lunch, dinner, snacks, on the go or because it’s Wednesday!

GlutenFreeCrispyChickenTenders3

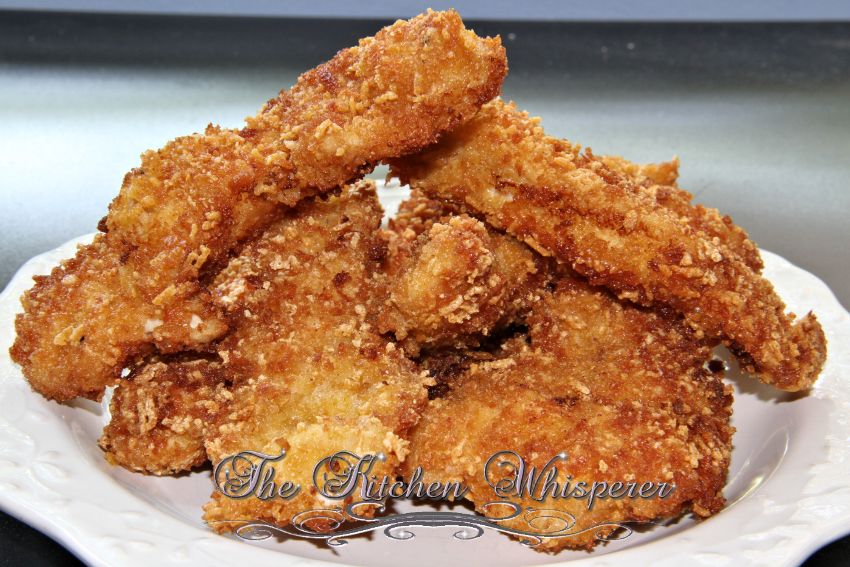
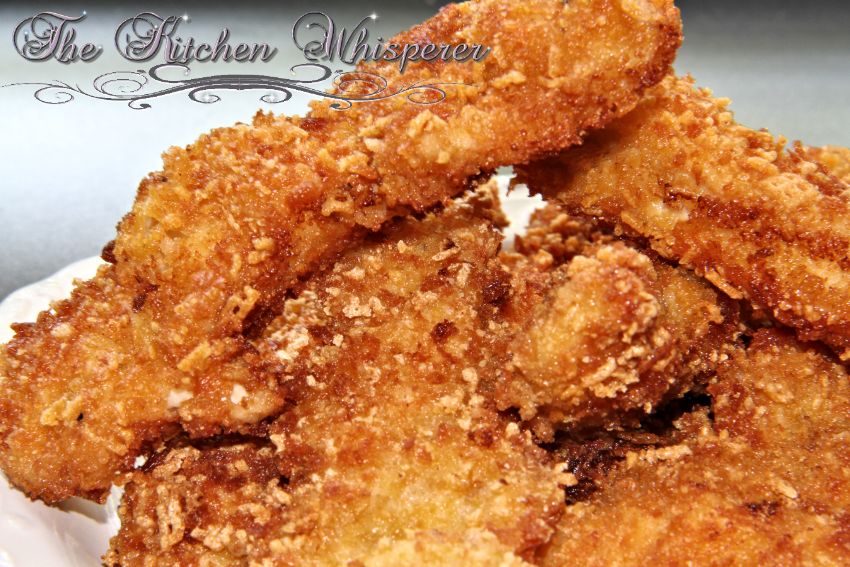
LOOK at that coating on them!

I mean seriously, don’t they just SCREAM crunch?!

GlutenFreeCrispyChickenTenders2

When I bit into my first one (of about 472 strips) the chicken was so moist and tender.  It was positively perfect!  I just left these with a simple salt and pepper but you could go 9 million ways on seasonings.  I can’t wait to make these BBQ style!

GlutenFreeCrispyChickenTenders

I NEED these in my life like right now…

so with that, I’m off to the kitchen to make sa’mo for me 🙂

GlutenFreeCrispyChickenTenders1

Print

Gluten Free Crispy Chicken Strips

  • Author: The Kitchen Whisperer

Find more fantabulous recipes, tips and tricks at www.thekitchenwhisperer.net. Also, join our TKW Family on Facebook

Print Recipe
Pin Recipe
★★★★★ 5 from 5 reviews
Did you make this recipe?
Leave a review

Ingredients

  • 2 1/2 cups Gluten Free Panko , divided
  • 1/4 cup grated Parmesan
  • 4 skinless, boneless chicken breasts, cut into 1/2” thick strips
  • 2 large eggs
  • 1/2 teaspoon kosher salt
  • 1/2 teaspoon black pepper
  • 1/4–1/2 cup Olive oil

Instructions

  1. In a food processor grind 3/4 cup of the Panko until it’s a powder.
  2. Place ground panko, salt and pepper in a shallow bowl and gently mix.
  3. Beat eggs in a second shallow bowl.
  4. Combine remaining panko and parmesan in a third shallow bowl.
  5. Set up an assembly line and dredge the chicken in the ground panko, shaking off any excess.
  6. Transfer to the beaten egg and turn to coat. You want the flour to be covered in eggs.
  7. Allow the excess to drip back into the bowl.
  8. Place the chicken in the panko parmesan mixture and coat evenly. Press to adhere.
  9. Heat 1/4 cup oil in a large heavy skillet or a cast-iron skillet over medium-high heat.
  10. Working in batches, cook the chicken until golden brown ~4-6 minutes.
  11. Flip and cook until golden brown. ~4 minutes.
  12. Transfer to the cooling rack on the pan.
  13. Add more oil if needed and repeat until all the chicken is cooked.
  14. Serve with favorite dipping sauce

Made this Recipe?

Tag @thekitchenwhisperer on Instagram and hashtag it #thekitchenwhisperer
Recipe Card powered byTasty Recipes


Save For Later!

Previous Post
Next Post

Reader Interactions

View Comments

Recipe Reviews & Comments

  1. Sheryl Grieder says

    May 11, 2023 at 2:25 pm

    WOW! I loved these! My husband is newly diagnosed with an allergy to wheat. I am so thankful to find a delicious recipe that not only made my GF hubby happy but our 2 picky teens and myself as well! Delicious 😋 👍👍

    ★★★★★

    Reply
    • TKWAdmin says

      May 11, 2023 at 3:01 pm

      Thank you so much! Please if ever you need help changing one of my recipes to gluten-free, please let me know!

      Best Kitchen Wishes!

      Reply
  2. Kat Miller says

    February 3, 2021 at 8:00 am

    I made these in my air fryer last night and they were a HUGE hit with the family! So crunchy on the outside and moist on the inside. I used the gluten free panko, left out the parm, but added cayenne and Italian seasonings to the crunchy part. Love the idea of grinding up panko to use instead of flour – great tip! I will be making this again! Thank you!

    (Air Fryer: 400 degrees, 8 min on each side)

    ★★★★★

    Reply
    • TKWAdmin says

      February 3, 2021 at 12:07 pm

      Thank you SO MUCH Kat! So happy you loved it and THANK YOU for the air fryer directions too!

      Best Kitchen Wishes!

      Reply
  3. Beth Cruickshank says

    April 4, 2020 at 10:51 pm

    I made your Gluten Free Crispy Chicken tonight and it was AMAZING! Our daughter and my husband ate soo much of it that they are both lying around complaining about their sore stomachs 🤣🤣🤣 I accidentally added parmesan to the powdered panko, so I also added 1/4 cup of parmesan to the whole panko too. It was still great!
    Thanks for the great recipe!!

    Reply
    • TKWAdmin says

      April 5, 2020 at 12:34 pm

      LOL that’s how you know when something is super good! So happy you all loved it Beth! And that’s completely fine about adding parmesan to the panko. It doesn’t hurt it at all!

      Best Kitchen Wishes!

      Reply
  4. Joey Lopez says

    October 25, 2019 at 9:44 pm

    Thank you!!!!!!! Trying these tonight, I bought two boxes of gluten free panko and ruined some chicken with another recipe, this one sounds promising – grinding it in the food processor for the first dredge GENIUS!!

    Reply
  5. Jeanne says

    February 8, 2019 at 4:23 pm

    Have you tried making these in the oven instead of frying in oil ?

    Reply
    • TKWAdmin says

      February 8, 2019 at 8:00 pm

      You can cook them at 400F on a rack lined pan and spritz with a bit of oil. 15-29 minutes should do the trick. Just test the temp as the chicken should be 165f

      Best Kitchen Wishes!

      Reply
  6. Kim says

    February 6, 2019 at 6:57 pm

    Made this for my daughter, who needs to eat gluten-free, and the whole family enjoyed! Thank you!

    Reply
  7. Nancy Knickmeyer says

    December 19, 2018 at 7:50 pm

    Haven’t had chicken fingers since going GF by choice 6yrs ago – I’ve missed them and these are AMAZING!

    ★★★★★

    Reply
    • TKWAdmin says

      December 24, 2018 at 10:37 am

      Yeah!!! So happy you found these! Search my site as I have a recipe to make GF Panko Breadcrumbs. You can use that on any recipe that calls for regular coating/breadcrumbs.

      Merry Christmas and best Kitchen Wishes!

      Reply
  8. Penny says

    February 13, 2017 at 5:13 pm

    Hi –

    You mention parmesan in the instructions, but it is not listed in the ingredients. How much parmesan? Also, there’s a bullet that just says “, divided”. Is that referring to the Panko crumbs?

    Thanks so much!

    Reply
    • TKWAdmin says

      February 13, 2017 at 6:04 pm

      Sorry about that Penny. It was missed in the ingredients (I updated it). Yes the bulleted ‘divided’ is an error. I’ve fixed that too. Sorry 🙁

      Best Kitchen Wishes!

      Reply
  9. plasterers bristol says

    January 6, 2017 at 4:36 am

    These sound really nice. Thanks for sharing this.

    Simon

    Reply
  10. jessie says

    December 30, 2014 at 3:00 am

    Would freezing these work? What would be the best way to reheat them?

    Reply
    • TKWAdmin says

      December 30, 2014 at 9:29 am

      Hi Jessie!

      Yep but don’t make them right away instead arrange the breaded chicken tenders on a baking sheet in a single layer and freeze until hard, 1 to 2 hours. Store in re-sealable freezer bags for up to 1 month. Then when you’re ready to cook, fry up as normal.

      If you do make them and freeze them, let them cool completely. To cook, just pop them frozen in the oven on a baking sheet and re-heat at 400F until warmed through. Though I’m personally not a fan of re-heated foods.

      Best Kitchen Wishes!

      ★★★★★

      Reply
      • Anna says

        April 11, 2016 at 1:53 pm

        dang these look amazing. Could I use this breading and then bake the chicken? Thanks!

        Reply
        • TKWAdmin says

          April 11, 2016 at 6:07 pm

          Hi Anna!

          Thank you!!! Yes you can! What I would do is line a baking sheet with foil and then place a cooling rack in that. Lightly spray the cooling rack. Coat the chicken, place on the rack and lightly spray with oil. Bake at 400F for 10-15 minutes, flipping once during the baking (respray with oil) or until the temp reads 165F.

          Best Kitchen Wishes!

          ★★★★★

          Reply
          • Jeanne says

            February 8, 2019 at 4:28 pm

            Sorry I just sent you a message asking about baking , not frying. I should have read all the comments ! Again, sorry !

            Reply

Leave a Comment & Review Cancel reply

Made it?
Recipe rating ★ 5 Stars ☆ ★ 4 Stars ☆ ★ 3 Stars ☆ ★ 2 Stars ☆ ★ 1 Star ☆

Primary Sidebar

let’s be friends

Subscribe for delicious new recipes, kitchen tips & weekly menus

Yeah!!! I'm so happy you are joining the TKW Family! You will get an immediate email asking you to confirm your subscription. If it's not in your inbox check your SPAM or JUNK folders. If you do not confirm it, you won't receive my newsletters.

What's Trending on TKW

Easy Candied Honey Sugar Crunch Hot Salted Cashews
The Best Smoked Spatchcock Thanksgiving Turkey
Ultimate Cheesy Smothered Pork Chops Broccoli And Rice Casserole
Smothered Alfredo Chicken Casserole With Potatoes Bacon And Broccoli
Ultimate One-Pot Spicy Southwestern Cheesy Pasta
The Ultimate German Chocolate Cookies
Chunky Portabella Mushroom Veggie Burgers
The best Cranberry Relish… ever!  No really, like EVER!
The Best Super Soft and Chewy Hoagie Bread Rolls
Back to Top
  • Recipe Index
  • Instagram Feed
  • Contact
  • Terms & Conditions
  • Privacy Policy
Site CreditsDesigned by Melissa Rose Design.Developed by Once Coupled.