
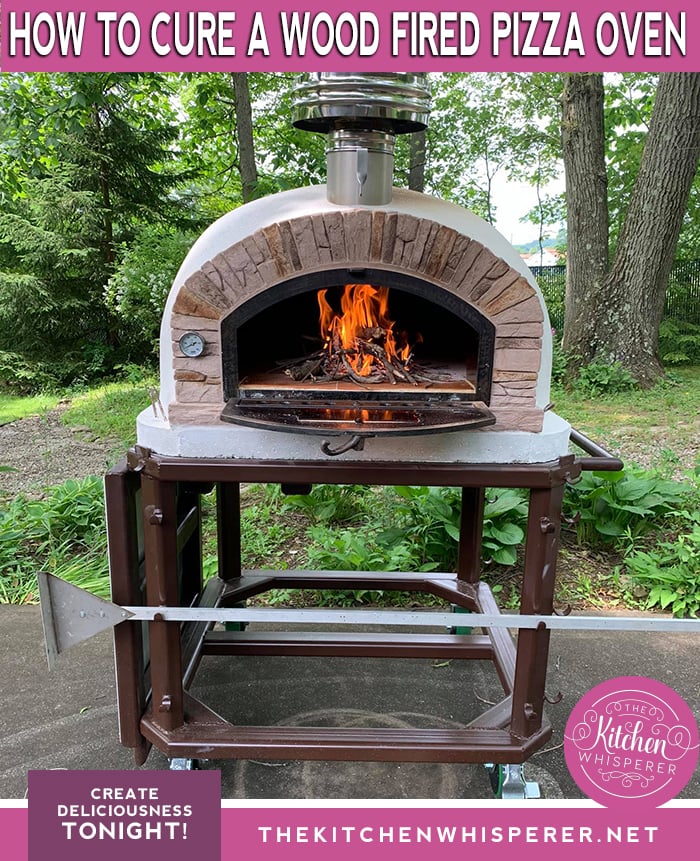
Curing a brick and mortar pizza oven is a must. Follow along with me in this 5-day curing process. Soon enough you’ll be on your way to becoming your best backyard home pizzaiolo!
This post is being sponsored by my friends at Authentic Pizza Ovens, featuring my Buena Ventura Red Brick Premium Pizza oven. As always, all opinions my own. Thank you for supporting partnerships with brands I trust and believe in.
Now more than ever people are cooking from scratch and making everything at home. Pizza is one of the most popular requested recipes and rightly so. It’s delicious and completely customizable.
Today I’m going to share with you my adventures of Bella, that’s the name of my oven, and the 5-day curing process. I’ll educate you as to why you need to cure an authentic oven like this, the mechanics of the oven and things you can make in it.
*spoiler alert – you can make pretty much anything in it!*
Brand Ambassador
I’m the newest Brand Ambassador for Authentic Pizza Ovens and couldn’t be happier. They are truly an AMAZING company that produces incredible ovens! Each oven is hand-crafted in a small town north of Lisbon. They ship globally so my friends in Australia and Canada – they can help you out!
As someone with over 30+ professional years as a pizzaiola, I’m beyond excited to team up with these guys. Pizza has always been a part of my life and my goal is to make it a part of yours too. The thing is, think of this as not a pizza oven but as a truly versatile out-door oven. Trust me, you’ll LOVE it!
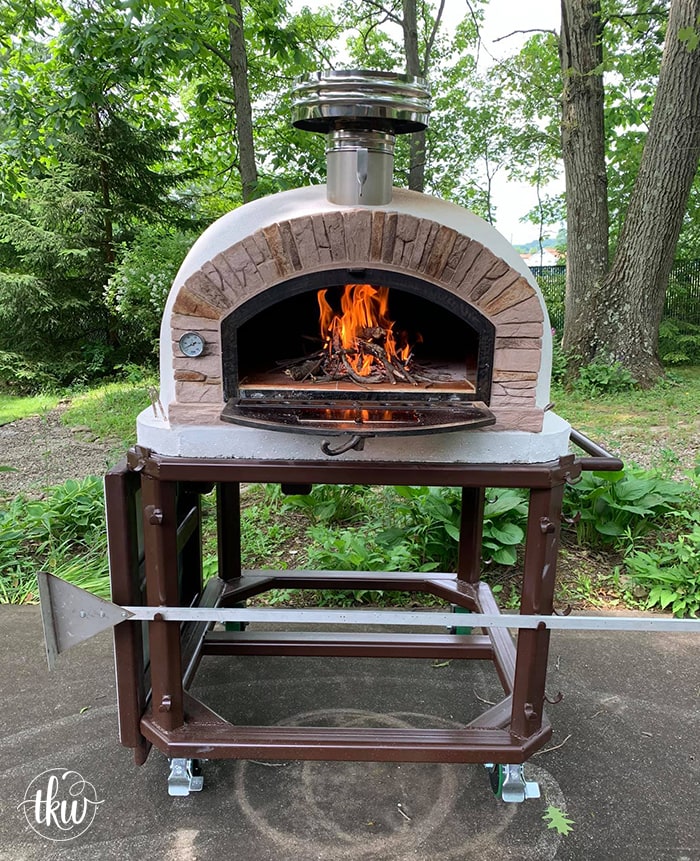
Bella – My Oven
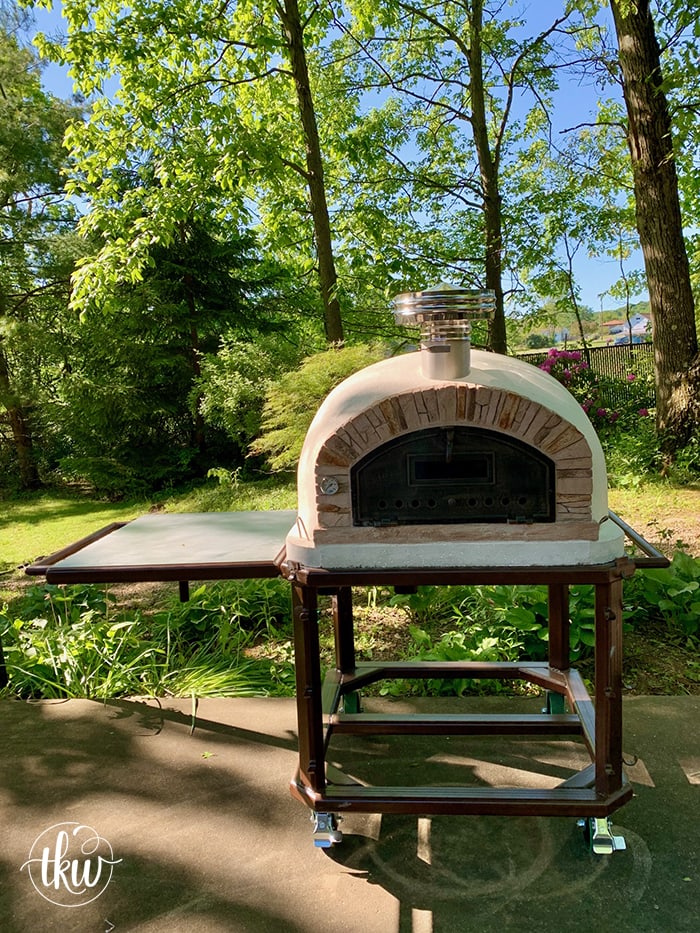
So I have the Buena Ventura Red Brick Premium Pizza oven model.
- It’s large enough that I can fit 2 12″ pizzas in at one time if need be.
- My pizzas cook in 90 SECONDS when at temp. I tend to cook pizzas around 375-400C.
- Temps range from 0-500C (or 932F)
- It will never rust!
- Has a peep window in the door plus a bar to slide open for airflow
- It’s about 1200lbs so you need a crane, engine hoist or something that can help move it into place
- Super Easy to clean
I’ll write up another post about it in more detail but trust me it’s amazing!
*Also pictured is Atlas. This is a one-of-a-kind custom stand Mr. Fantabulous designed and Fabricated for me.
Curing This Wood-Fired Pizza Oven
So what does it mean to “cure” a pizza oven? These ovens are made out of brick and mortar.
In a nutshell, “Curing simply means removing the moisture in the mortar.” The trick is when you’re curing something, to not do it too fast or create some massive bonfire right out of the gate.
You need to work up to it!
Low and Slow – Yes, it really takes 5 days!
Any type of masonry contains some level of moisture initially. If you were to add some huge fire in it right away, you will inevitably crack the both the inside and outside dome of the oven much bigger and quicker than desired. Both inside and outside cracks are normal and honestly, expected upon the curing process.
Those superficial appearance cracks are easily fixed with a brush on patch-kit and there is nothing to worry about for the inside cracks. However, in Italy, those outside surface cracks are a sign of use and never patched. These cracks only affect aesthetics. Just follow the schedule!
So with this oven, you do a 5-day series of cures where each day your goal is to reach a higher temperature level and maintain that level for 4-5 hours.- Day 1 Goal – maintain the temperature at a 60C/140F
- Day 2 Goal – maintain the temperature at a 100C/215F
- Day 3 Goal – maintain the temperature at a 150C/300F
- Day 4 Goal – maintain the temperature at a 200C/400F
- Day 5 Goal – maintain the temperature at a 250C/480F
Let’s Make Fire!
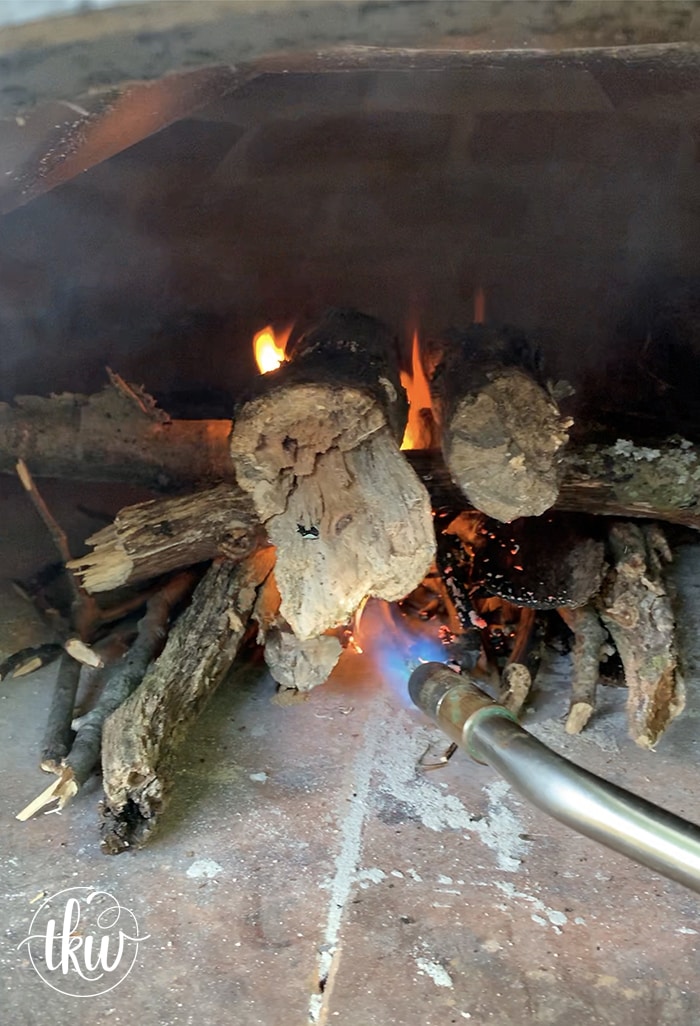
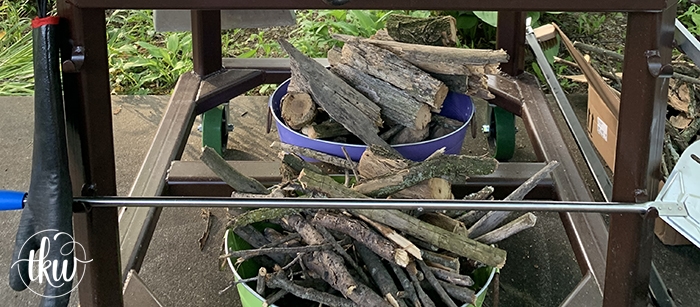
When you start out any fire, you want to start with dry, seasoned wood. You start off with smaller kindling and sticks in a stack type build. You need to make sure that you have space so airflow can go in and under the wood and push upwards.
By the airflow coming in from the bottom and blowing up through towards the top you’re helping to provide oxygen to the fire which will, in turn, help the fire burn and allow the logs to catch fire.
To start my fire, I started off with a Mapp gas tank and torch but switched to propane and the torch. Mapp gas is all I had on hand and it’s overkill for this. Plus it’s way more expensive than Propane.
The last thing you’ll need is an Ash & Embers Rake. Mr. Fantabulous made mine (of course he did). You can get one from Authentic Pizza Ovens or on Amazon like this one.
- Open the oven door (and the air holes in the door)
- Place 2-3 small to medium logs in the front, middle of the pizza oven leaving a few inches of space in between.
- Going the opposite direction, add 2-3 same size logs still leaving a gap (remember you want airflow).
- Add 1-2 more logs on top, going in the opposite direction.
- Add the super small pieces and kindling to some of the gaps.
- Ignite your propane torch and leave it on the kindling pieces for 30-60 seconds or until the fire is caught.
- Slowly start adding small pieces of wood gradually working up to larger ones. This process can take 25-30 minutes for it to be fully caught. If you add too large of a log you can suffocate the fire and it’ll go out.
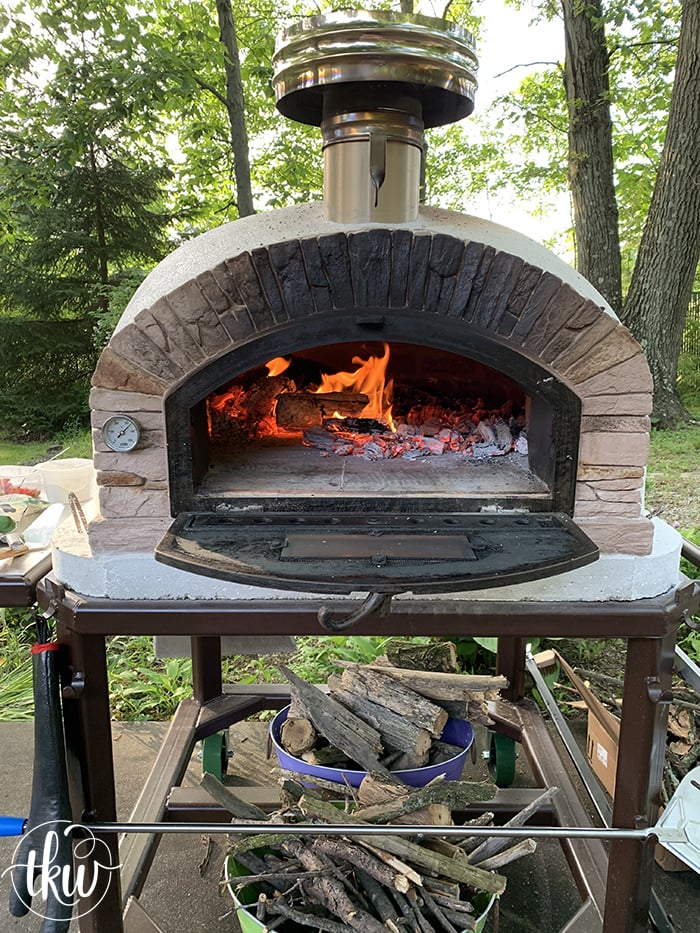
Let the first set of wood burn down to well-established coals. At that point, you can push it towards the middle and add wood in a tee-pee pattern to help raise the temps. Again, for this process, your trick is to maintain low temps.
- At this point, it’s about maintaining a steady temperature for the cure. This is where you’ll regulate the heat using your door (either opening it fully for more air, only keeping the air holes open (or partially closed to slow down the temps).
- You may need to add more wood, depending on your fire and temperature. I checked on it every 30 minutes or so.
- Keep it at the prescriptive temps for 4-5 hours each day.
- When done, simply close the chimney flue and oven door/vents. Never leave these open overnight. Always keep them shut. Nighttime can produce moisture which is something you do not want in your oven.
Types of Wood To Use in a Wood-Fired Pizza Oven
You only ever want to use hard, seasoned woods.
- Fruit & Nuts wood – almond, apple, or cherry are amazing when cooking foods where you want that sweet wood smell to infuse into whatever you’re making. I use cherry for non-pizza foods
- Oak & Maple – This is a hard and dense wood that burns hot and long. This is what I tend to use for my pizzas. It doesn’t impart any flavors into the pizza which is what I want.
- Mesquite & Hickory – this is what you want to use when you want that very distinctive wood-fired food. This is often what’s used by pitmasters. This type of wood is perfect for poultry and bbq-type foods.
Never, never, never, EVER use Pine, Fir, Spruce, or any softwood like that. It produces sap and leaves excessive soot. It can coat the oven and chimney flue with creosote.
And never, EVER use construction lumber, laminated woods, plywood, or anything painted/treated.
Controlling the Temperature
This is where using your oven door is key. You’ll have to work with your environment as to whether or not you need to leave the door open or if just the air vents are enough.
When it’s very windy here, I only need to leave the vents open. But when there’s no wind I find that I have to leave the door open more often for airflow.
Cleaning Your Wood-Fired Oven
After every use, and when it’s cooled down, you’ll need to remove the ash and coals in the oven. This is where an ash rake and brush come in handy. The oven needs to be cleaned out before you use it.
Because the ovens get so hot, they are practically self-cleaning. Just scoop out the ashes, use a wire bristol brush and sweep it clean. It takes me 2 minutes to clean mine out.
Cooking in a Wood-Fired Pizza Oven
As I mentioned earlier, you can cook practically anything in these ovens.
I strongly suggest following along on my Instagram Pizza account to see all of my creations. There you can see lots of behind the scenes shots, videos and get a glimpse on what I’ll be featuring on the blog.
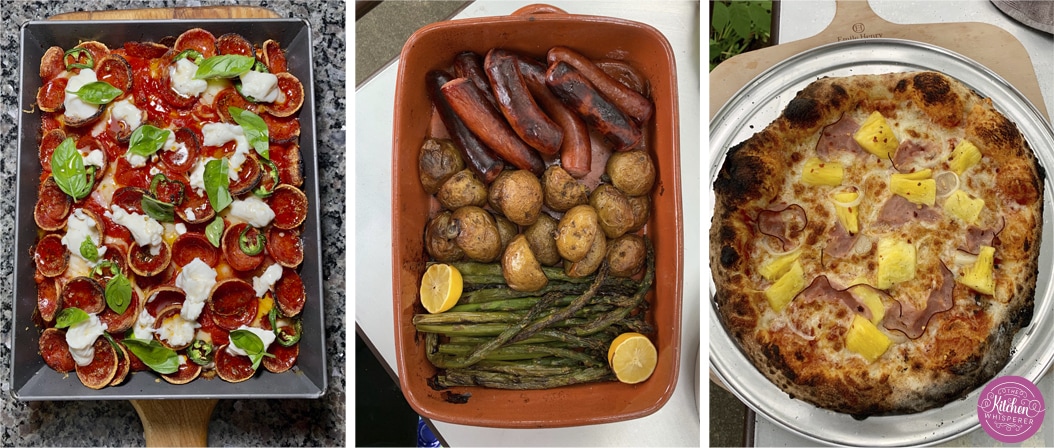
This Grandma Pizza was (and still is) a HUGE internet success!
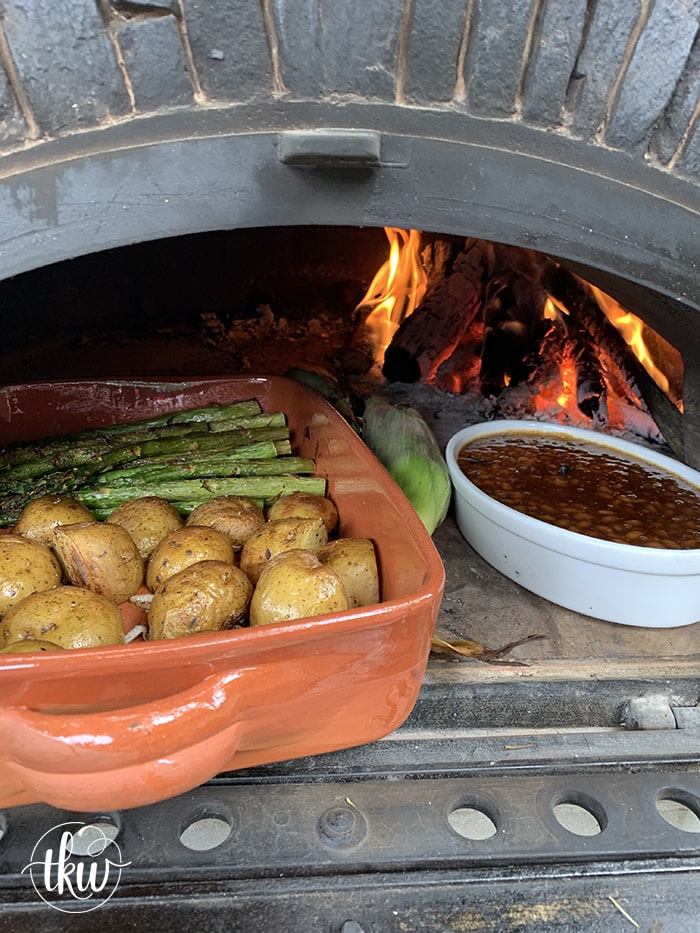
Full meals like this wood-fired asparagus & potatoes (fyi.. the pan COMES with your oven order!), corn on the cob, baked beans and kielbasa (was added 30 minutes into the cooking!)
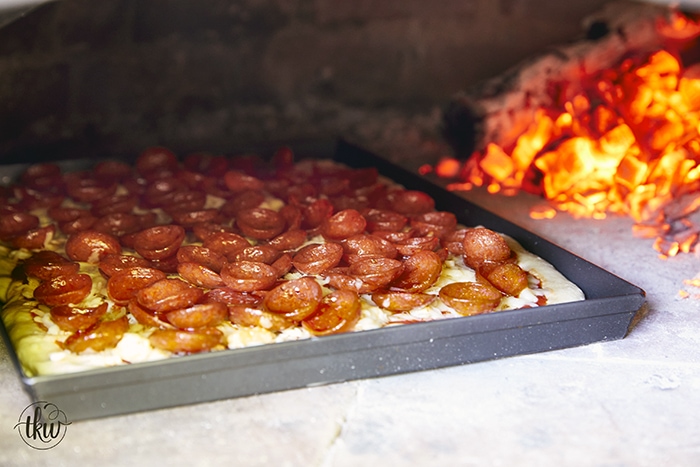
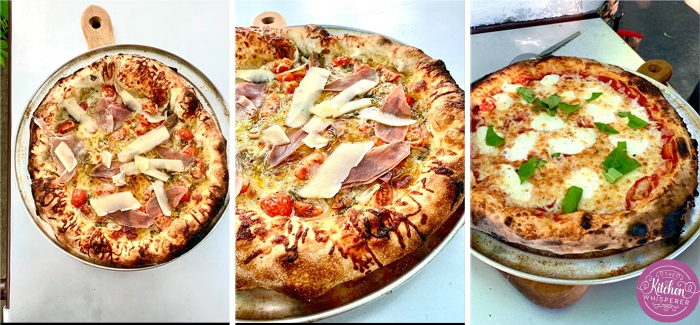
And of course, New York Style and Neapolitan Pizzas!
These 2 pizzas were each done in 90 seconds! It took me longer to dress them than it was to cook them!
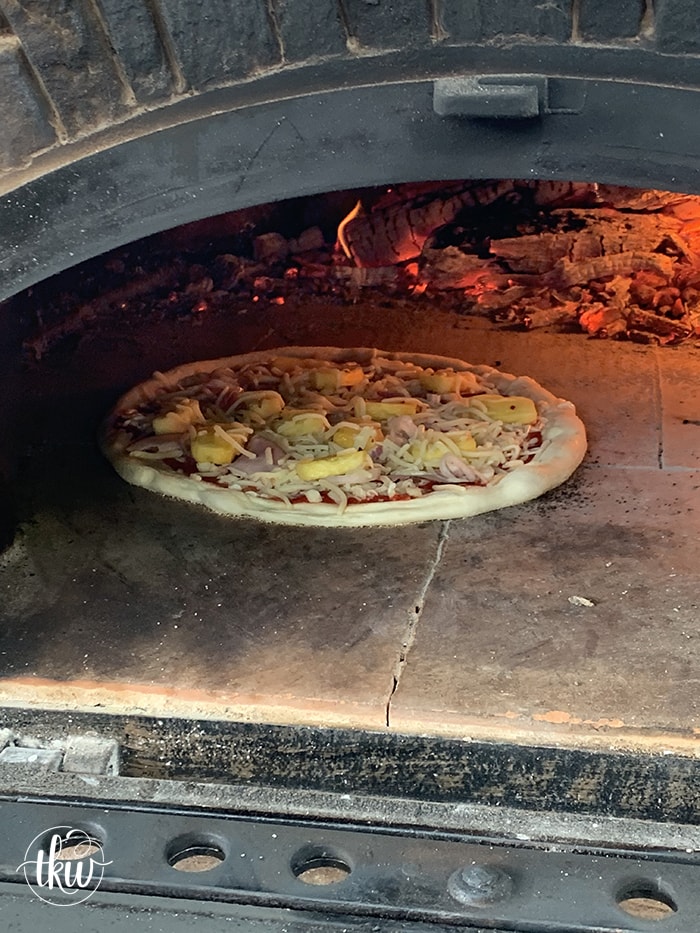
And Mr. Fantabulous’ favorite- Pineapple, Ham, and Shallots
Are you a pineapple on pizza fan? I’m not… at all but he is so we compromise!
As I said, there’s so much you can make in this oven!
When it’s too hot to turn on the kitchen oven, heat up one of these Authentic Pizza Ovens and turn your backyard/porch/sideyard into your own little outdoor cafe!


Leave a Reply