


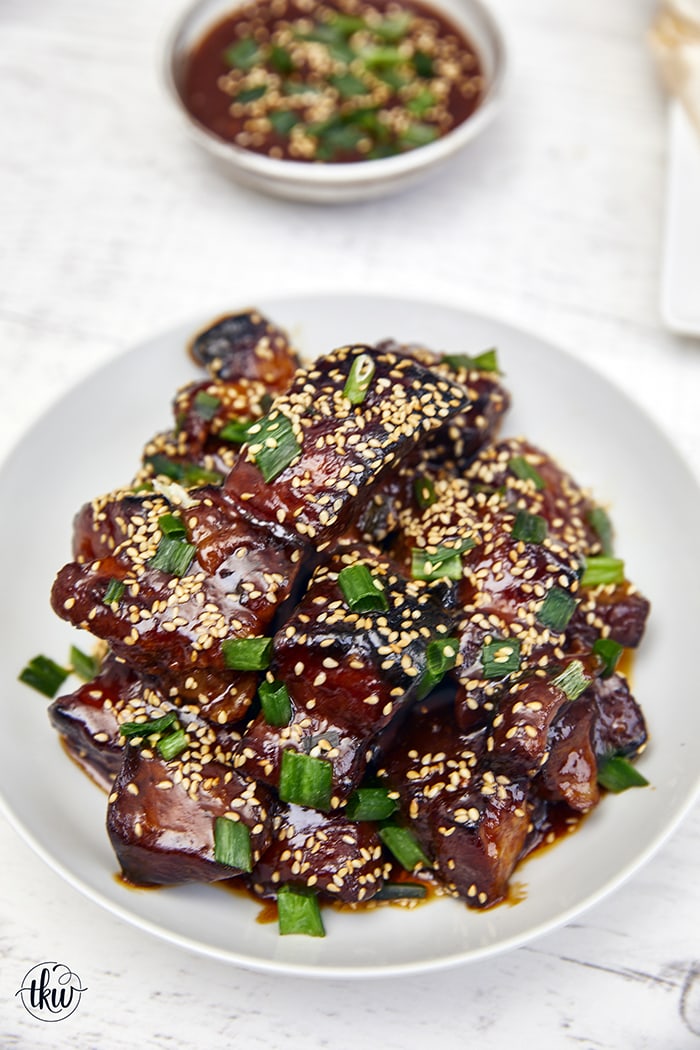
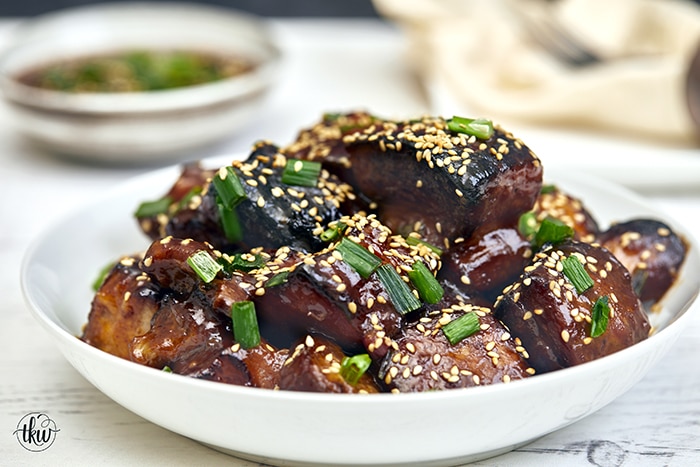
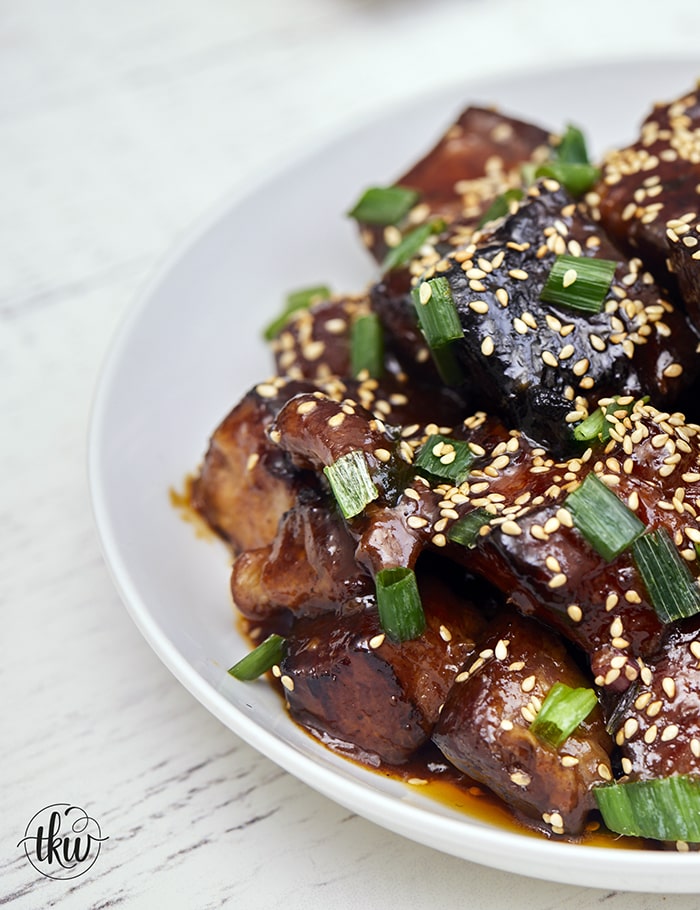
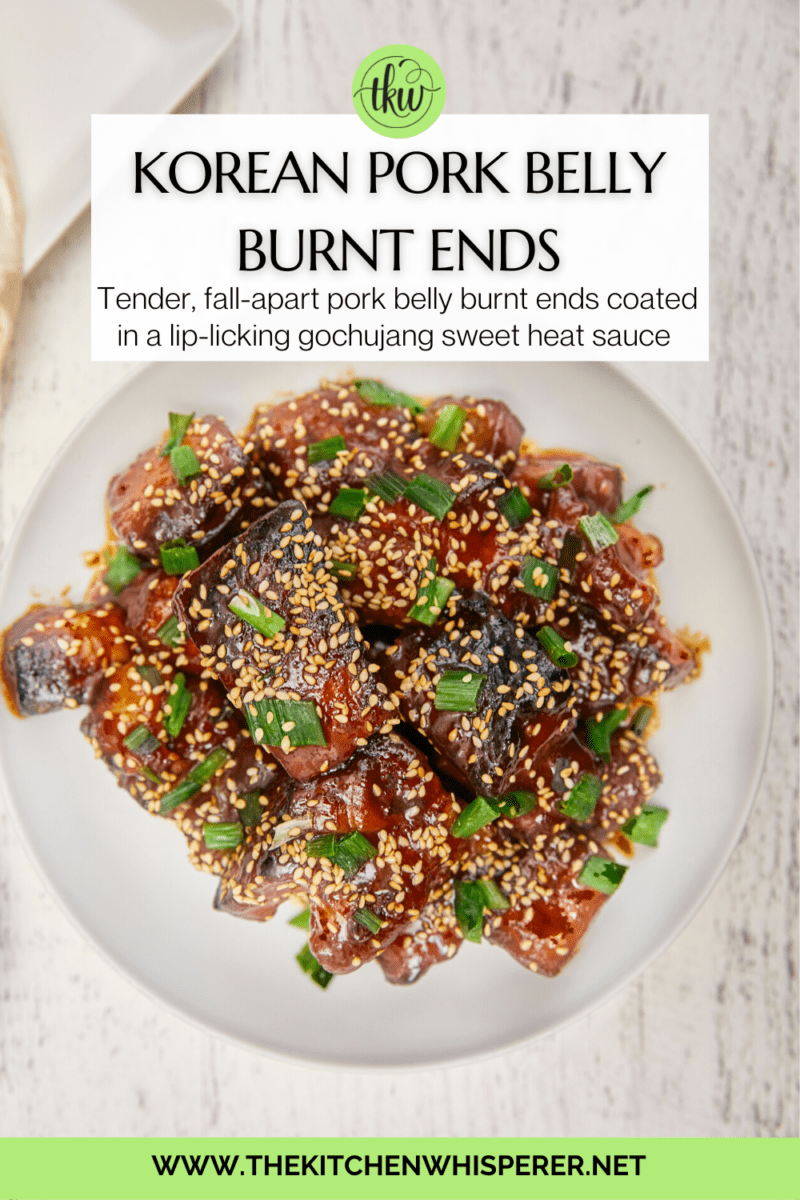
These Korean flavor-inspired pork belly burnt ends are so tender, they melt in your mouth. And that lip-licking gochujang sweet heat sauce they are coated in is like a religious experience!
This Took Me To Church
Did you ever have a dish or just a single bit of a dish that literally made you thank the lord you were alive to taste it?
That was THIS DISH for me! Oh, I’ve had amazing pork belly before but there was just something next-level about this one. I have a feeling y’all are going to go nuts over this!
Grab Your Ingredients
All of these ingredients most local markets will carry. And if you’re a foodie like the rest of the world, I’m pretty sure you might even have a good portion of the sauce ingredients on hand.
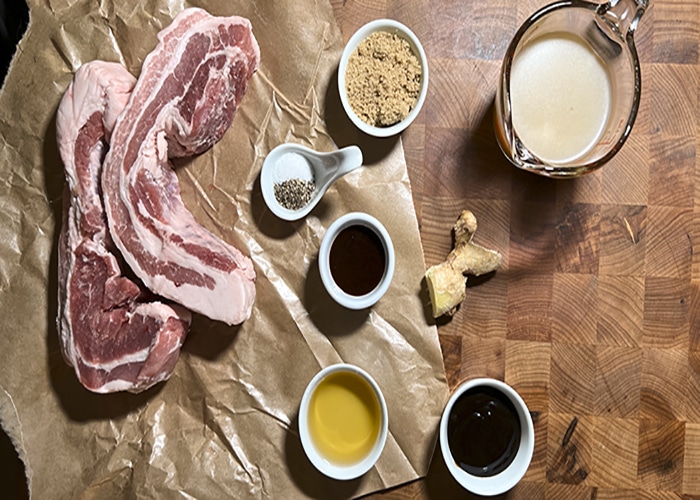
- Pork Belly – get it without the skin if possible. I hate trimming the skin off as that’s a pain. I’d rather pay for the ease of use.
- Liquids – rice wine vinegar, low sodium oyster sauce, gochujang, white peach juice, pork stock (can you use chicken stock)
- Sweeteners – brown sugar and honey
- Additional – fresh ginger, salt, pepper, toasted sesame seeds, green onions.
No, do not use powdered ginger as it’s not the same.
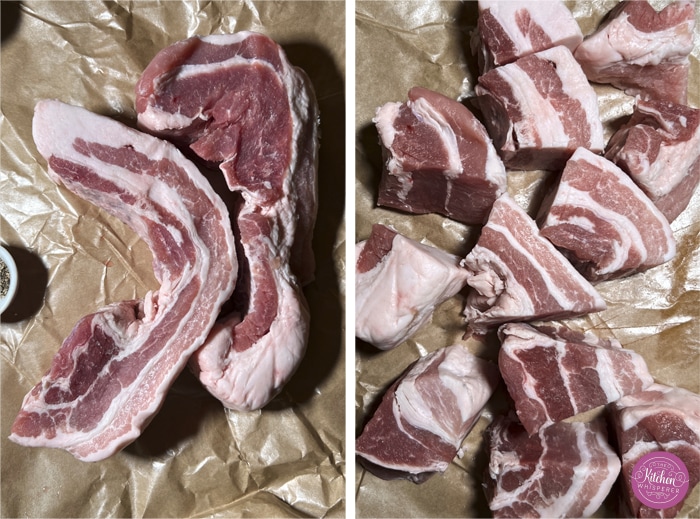
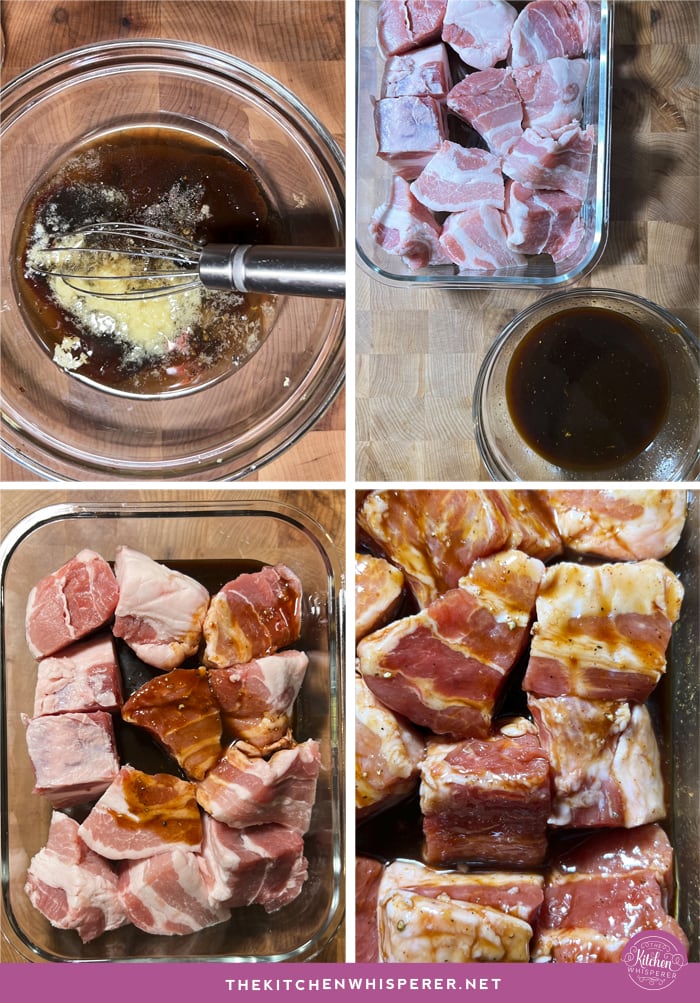
Cut The Pork Belly
I’m not a fan of the 1×1″ cubes as by the time they render down they are almost too small of a bite. I prefer mine to be about 2″x1.5″ big.
Make The Marinade
24 hours before you’re ready to cook, mix up your marinade and pour it over the cut pork belly. Give it a quick stir, coating all sides, pop a lid on, and put it in the fridge to rest overnight.
You want the flavors to marry and infuse into the pork.
I’m So In Love With This Instant Pot!
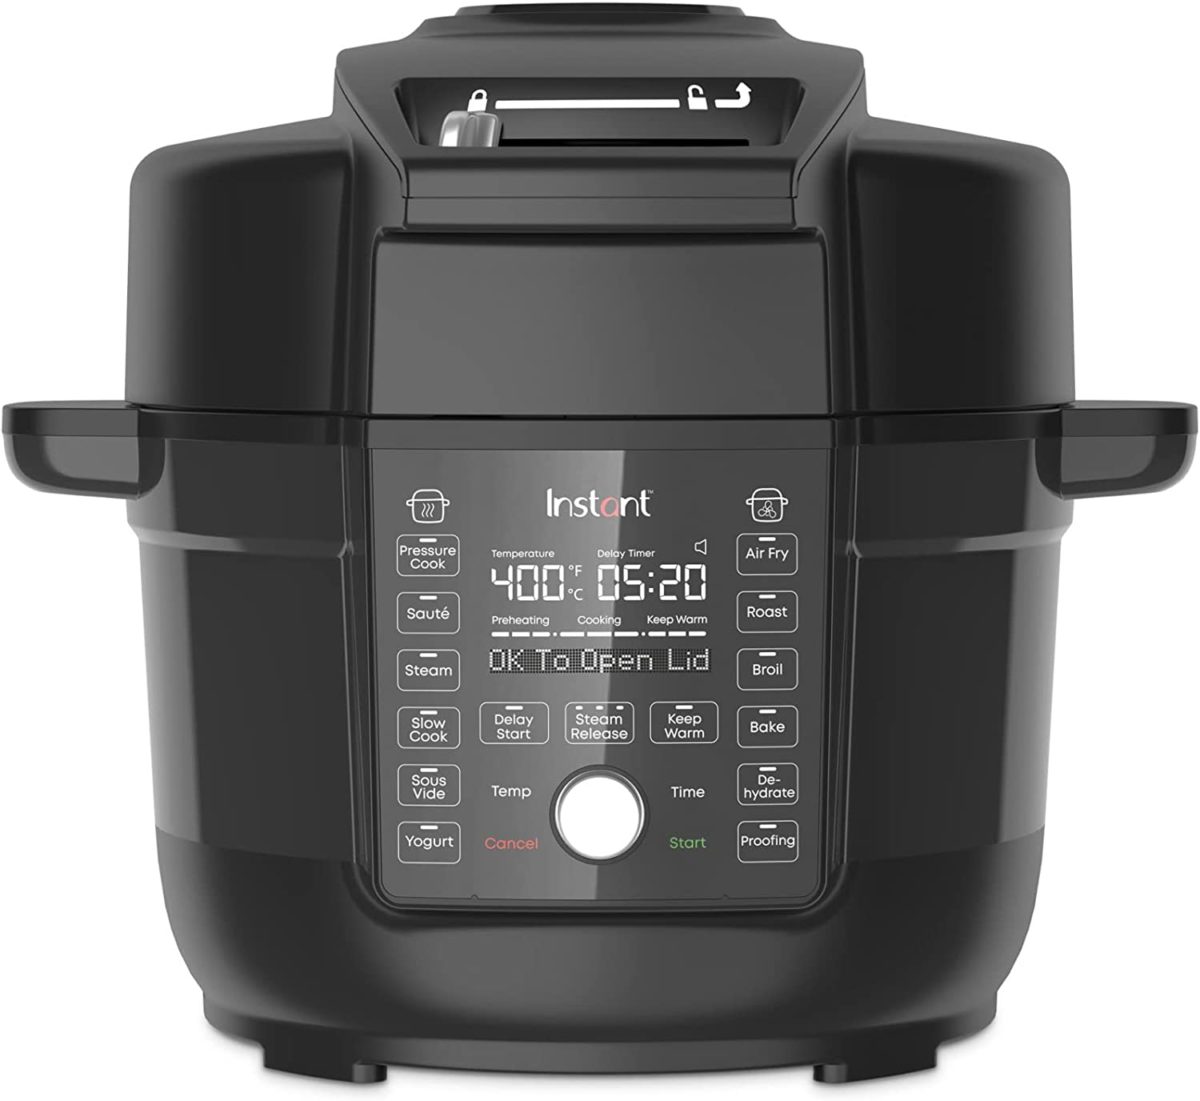
I just got this new Instant Pot and folks it’s THE BEST ONE I’ve EVER owned! It’s by far superior to the older models I have!
- 13-in-1 FUNCTIONALITY: Air Fryer, Pressure Cooker, Sauté, Slow Cook, Steam, Warm, Roast, Bake, Broil, Dehydrate, Yogurt, Sous Vide, and Bread Proofing
- And it AIR FRIES: The best part… You no longer need 2 separate lids!
This Instant Pot Duo Crisp Ultimate Lid, 13-in-1 is a MUST BUY
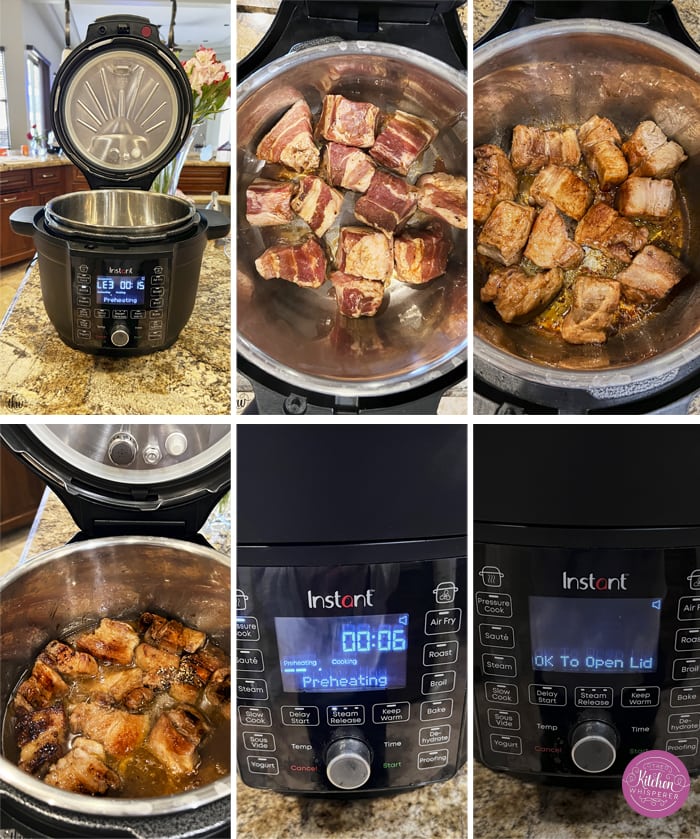
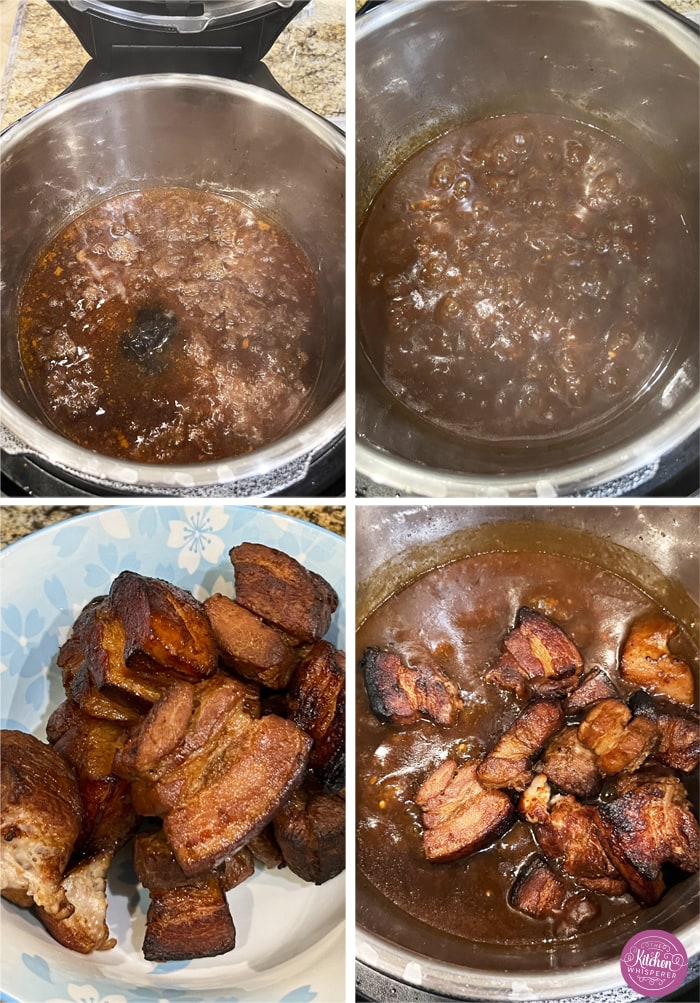
- Preheat the Instant Pot on L3 or L4 with NO OIL. The pork belly is so fatty that it’ll render its only oil needed to sear.
- Sear the pieces on all sides under caramelized or golden brown.
- Add the marinade plus the chicken stock to the pot, and stir the mixture around to pick up any caramelized or browned bits on the bottom.
- Close the lid, lock it, and set it to 6 minutes on Pressure Cook.
- Allow it to do a Natural Release for 20 minutes.
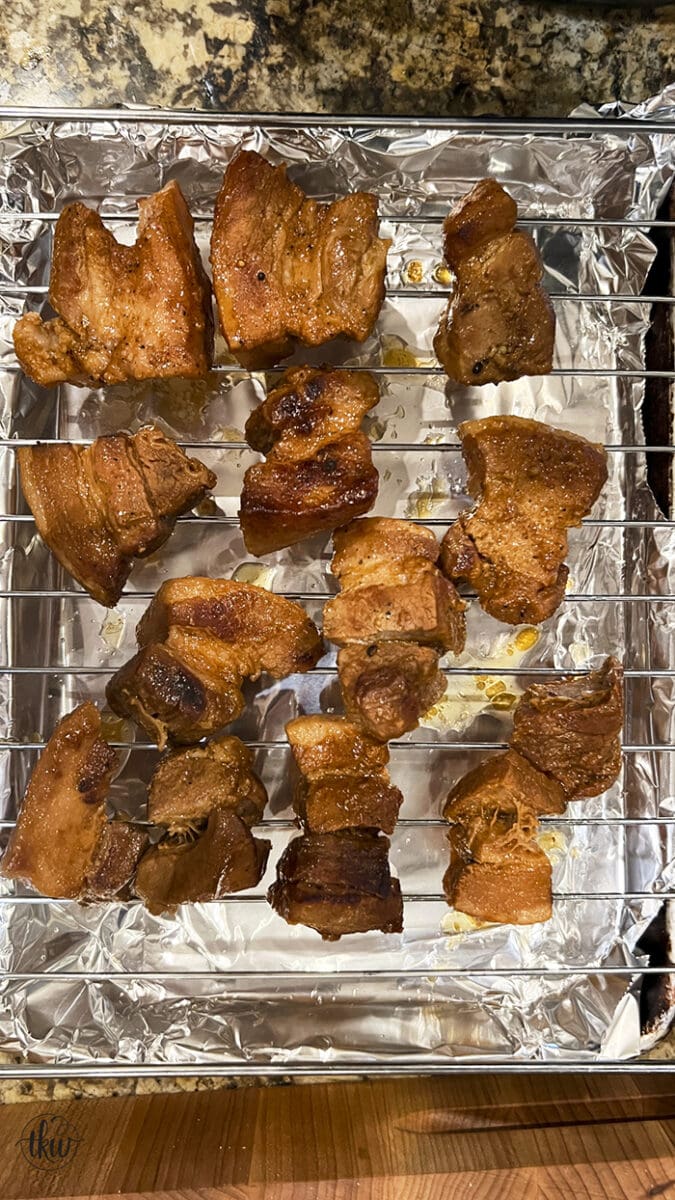
Broil To Crisp
- Remove the pork belly from the instant pot and place it on a foil-lined baking sheet. The cooling rack is optional (I ended up removing it halfway through broiling).
- Broil for a minute or two on each side just to get it sizzling.
Make The Lip-Smacking Sauce
When you make this make sure to have a fat-separator near buy as you REALLY need to strain the fat from the liquid before you make the sauce.
- Strain the fat from the sauce and put the liquid (not the fat) back into the Instant Pot on Saute (L3). Add in the sauce ingredients and cook until it starts to thicken. I added a slurry mixture of cornstarch and water as I wanted it a bit thicker and I was impatient and didn’t want to wait any longer for it to reduce.
- Once the sauce thickened, add the burnt ends back into the pot, stir and enjoy
- *OPTIONAL* – if you want to caramelize the sauce too, you can place the sauced burnt ends back onto the foil-lined tray and pop them back under the broiler for a few seconds. Just watch so the sauce doesn’t burn.
TIME TO EAT!!!
Y’all when I tell you that the first bite I took was like a religious experience, it was! It took my butt to church and had me praise the lord it was so dang good!
That pork belly was so incredibly tender it just melted in my mouth. It was as if I had smoked it low and slow for hours as it practically fell apart just by looking at it!
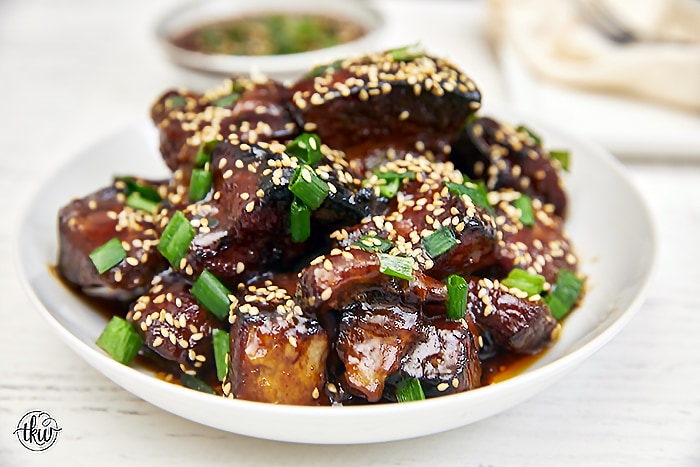
That Sauce Y’all!!!
We all know I’m a sauce girl. Whether I’m dipping chips into a dip, ketchup on my burgers, or bbq sauce all up on my face, I’m totally #TeamSauce .
The heat from the Gochujang pairs so perfectly with the Oyster sauce, the fresh ginger, and the brown sugar. Yes, I’ve totally made that sauce just for pizza too.
Of course, I save some of this for a pizza. I had to!
If you’re unfamiliar with gochujang, check out this web post as I have a pretty detailed section on what it is and why it’s amazing.
Recipe Substitutions
So there’s not a whole lot you can substitute but I can give you what I’ve tried and worked so you can make it Gluten-Free and Keto-Friendly
- Brown Sugar – all honey or for low/no sugar, go with Brown Sugar Substitute.
- Honey – go with all brown sugar or a Honey Substitute
- White Grape Juice – It’s not something I have on hand often but Shaoxing wine is more authentic
- Oyster Sauce – Hoisin Sauce is a 1:1 substitute
- NOTE: not all Hoisin Sauce is Gluten Free. This Hoisin Sauce IS Gluten Free.
Instant Pot Sticky Gochujang Pork Belly Burnt Ends

These Korean flavor-inspired pork belly burnt ends are so tender, they melt in your mouth. And that lip-licking gochujang sweet heat sauce they are coated in is like a religious experience!
- Prep Time: 15
- Cook Time: 6
- Total Time: 30
- Category: Instant Pot, Pork, easy meals, appetizers, aisan, korean bbq
- Method: Instant Pot
- Cuisine: Instant Pot, Pork, easy meals, appetizers, aisan, korean bbq
Ingredients
Marinade
- 4 pounds pork belly (skin removed) cut into 2×1.5” pieces
- 1 Tablespoon rice wine vinegar
- 2 Tablespoon white peach juice
- 1/4 cup low-sodium oyster sauce
- 1/4 cup brown sugar
- 2 tablespoons gochujang
- 1 Tablespoon grated ginger
- 3/4 teaspoon each of kosher salt and black pepper
For cooking
- 1 cup pork stock (or chicken stock)
- All of the marinade
Sauce
- 2 Tablespoons rice wine vinegar
- 1/4 cup white peach juice
- 1/2 cup low-sodium oyster sauce
- 1/4 cup brown sugar
- 1/4 cup honey
- 5 tablespoons gochujang
- 2 Tablespoons grated ginger
- 1 teaspoon each of kosher salt and black pepper
- 2–3 Tablespoons of cornstarch
Instructions
- 24 hours prior to cooking, whisk together all of the marinade ingredients (minus the pork belly). Pour that over the cut pork belly, coat the pork belly, cover, and place into the fridge overnight (12-24 hours).
- When you’re ready to make, turn the Instant Pot to L3-L4 (Sauté) and add the Pork Belly cubes. Do NOT add oil and do not crowd. Sear the pork belly on all sides until they are caramelized on all sides. Work in batches.
- When all of the pork belly has been seared, shut the Instant Pot off, add in the pork stock, stir it around scraping up any bits on the bottom, and then add in the marinade liquid. Stir to combine and then add the caramelized pork belly bites back into the sauce. Close the lid and set it to 6 minutes. Allow it to do a Natural Release for 20 minutes.
- As you’re releasing the pressure, whisk together the sauce and set aside. Turn the oven on to broil and line a rimmed baking pan with foil (a cooling rack is optional). Open up the lid, carefully, and transfer the pork belly bites to the pan. They will be super tender to do it carefully.
- Place the pan into the oven and broil for a few minutes on each side. As the pork belly is under the broiler, use a fat separator and strain the liquid from the Instant Pot. Place the liquid only back into the pot (discard the fat) and also add in the sauce mixture. Place it on the sauce (L3-L4) and allow the sauce to reduce and thicken.
- Remove the pan from the broiler and set aside. The sauce can take about 10-15 minutes to thicken. If it thickens too much just add a splash or two more stock (or water). Once the sauce is thick, add the pork belly back into the pot, coating all sides. If desired, you can place the sauce bites back onto the baking sheet and back into the broiler but only for a few seconds as it will burn.
- To serve, top with toasted sesame seeds and green onions. Store leftovers in the fridge for up to 4 days.
Equipment
 Buy Now →
 Notes
*Time does not include the 24-hour marinate or the 20 minutes of natural pressure release


Leave a Reply