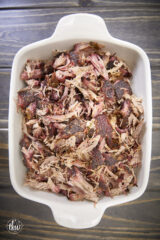
Are you looking to take your cookout game to the next level? Cross-hatching hotdogs, seasoning…


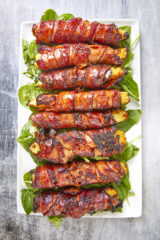
Weekly Menu – 7 Amazing…
These Weekly Menu recipes allow you to get out of that same ol’ recipe rut and…


The Best Smoked Hot Dogs…
Are you looking to take your cookout game to the next level? Cross-hatching hotdogs, seasoning them…


Weekly Menu – 7 Amazing…
These Weekly Menu recipes allow you to get out of that same ol’ recipe rut and…


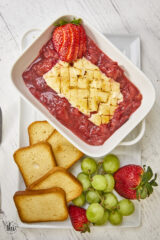
Caramelized Vidalia Onion Dip Made…
Delicious dips can elevate any gathering, and a caramelized Vidalia onion dip made on the smoker…

See more recipes