• Skip to primary navigation
  • Skip to header navigation
  • Skip to footer navigation
  • Skip to main content
  • Skip to primary sidebar
  • Work with Me
  • Press/PR
  • Contact
Display Search Bar

The Kitchen Whisperer

  • Home
  • About
  • Recipe Index
  • Shop
  • Weekly Menu
  • Tuesday’s Tips

Jun112012

Artisan Sourdough Breads

Posts may contain affiliate links. Please see my Privacy Policy for further details.


She’s pretty, isn’t she? 🙂

So I’ll be the first to admit, I love carbs.  I mean love is an understatement.  I think I have this unbridled passion for bread.  Wait, let me rephrase that.  I have this unbridled passion for really GOOD bread.  Nothing against those loaves of bread you buy in the market, all sliced and ready for it.  If you like it cool, but that’s not me.  I want warm, fresh out of the oven, so hot the butter melts before you put it on the slice.  I like to know that I controlled what went in it.  AND okay yes.. I like knowing that I didn’t have to pay $6 for a loaf either.

Call me a snob perhaps, so be it.  But if I know I can make it myself, whenever I want, without having to leave my house or put a bra on (c’mon admit it ladies.. NO ONE likes wearing one if you don’t have to) and most importantly, knowing I can make it 10,000 times better well by God I am 🙂  Wait.. did that sentence even make sense?  LOL

Sunday my in-laws came up for the day (which was AWESOME by the way!).  And of course I baked a bunch and made lots of food.  There’s one thing I bake every time they come up; a few loaves of my breads.  It doesn’t necessarily have to be sourdough bread but it must be bread none the less.  See my mother in law is like me, she could live on just bread.  It’s just so comforting… all warm and soft; almost like that soft blankie you had a child 🙂

Since I hadn’t made sourdough in a while, I decided to go with my trusty dusty recipe.  Now before you hit print, no I’m not giving you my TKW signature recipe but this one by King Arthur is awesome and a lot easier than mine.  I’ve made this often and do love it.  Let me put it this way, if I didn’t think it was good, I would never post it nor encourage others to use it.

Now before you jump right in and make you, you need to make sure you have Sourdough Starter already made.  It takes about 8 days to make it and once you make it, it will last generations (okay, as long as you feed it and take care of it).  I’ve been using the same starter base for over 10+ years now.  The longer you have it, the more amazing the flavor gets!

Assuming you have your starter made and in the fridge, you’ll need to Feed your starter the night before you want to make this.

Ready?  Let’s bake bread!

Print

Artisan Sourdough Breads

  • Author: The Kitchen Whisperer

Find more fantabulous recipes, tips and tricks at www.thekitchenwhisperer.net. Also, join our TKW Family on Facebook

Print Recipe
Pin Recipe
★★★★ 3.7 from 3 reviews
Did you make this recipe?
Leave a review

Ingredients

  • 1 cup “fed” Sourdough Starter
  • 1 1/2 cups lukewarm water
  • 2 tsp instant yeast
  • 1 Tbl sugar
  • 2 1/2 tsp salt
  • 5 cups High-Gluten Flour or Bread Flour
  • 1 egg beaten with 1 Tbl water
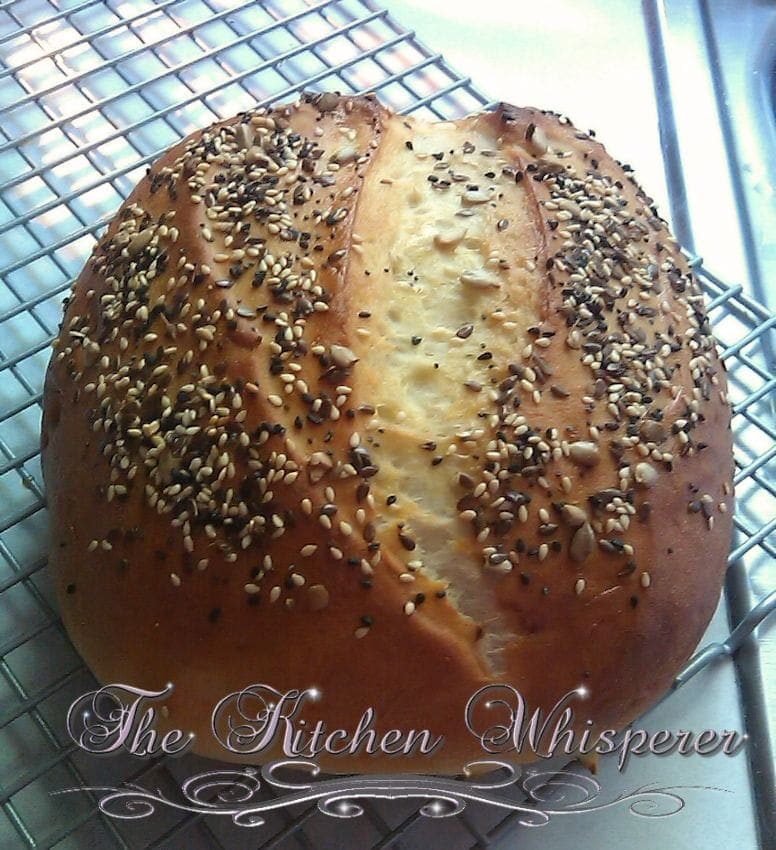
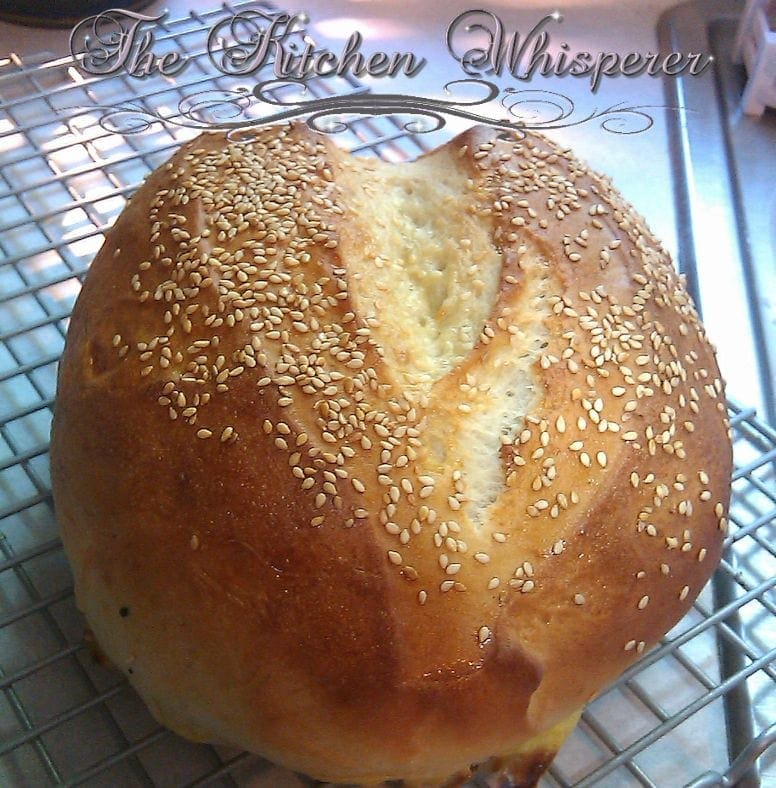
  • *Artisan toppings: equal parts toasted sesame seeds, baby sunflower seeds, poppy seeds, caraway seeds, flax seeds

Instructions

  1. In the bowl of a stand mixer fitted with the dough hook, add the Sourdough starter, water, yeast, sugar, salt and flour. Combine all of the ingredients until a smooth dough forms. Remove the dough from the mixer and place in a sprayed bowl. Cover with sprayed plastic wrap and allow to rise until doubled in size ~ 90 minutes or so.
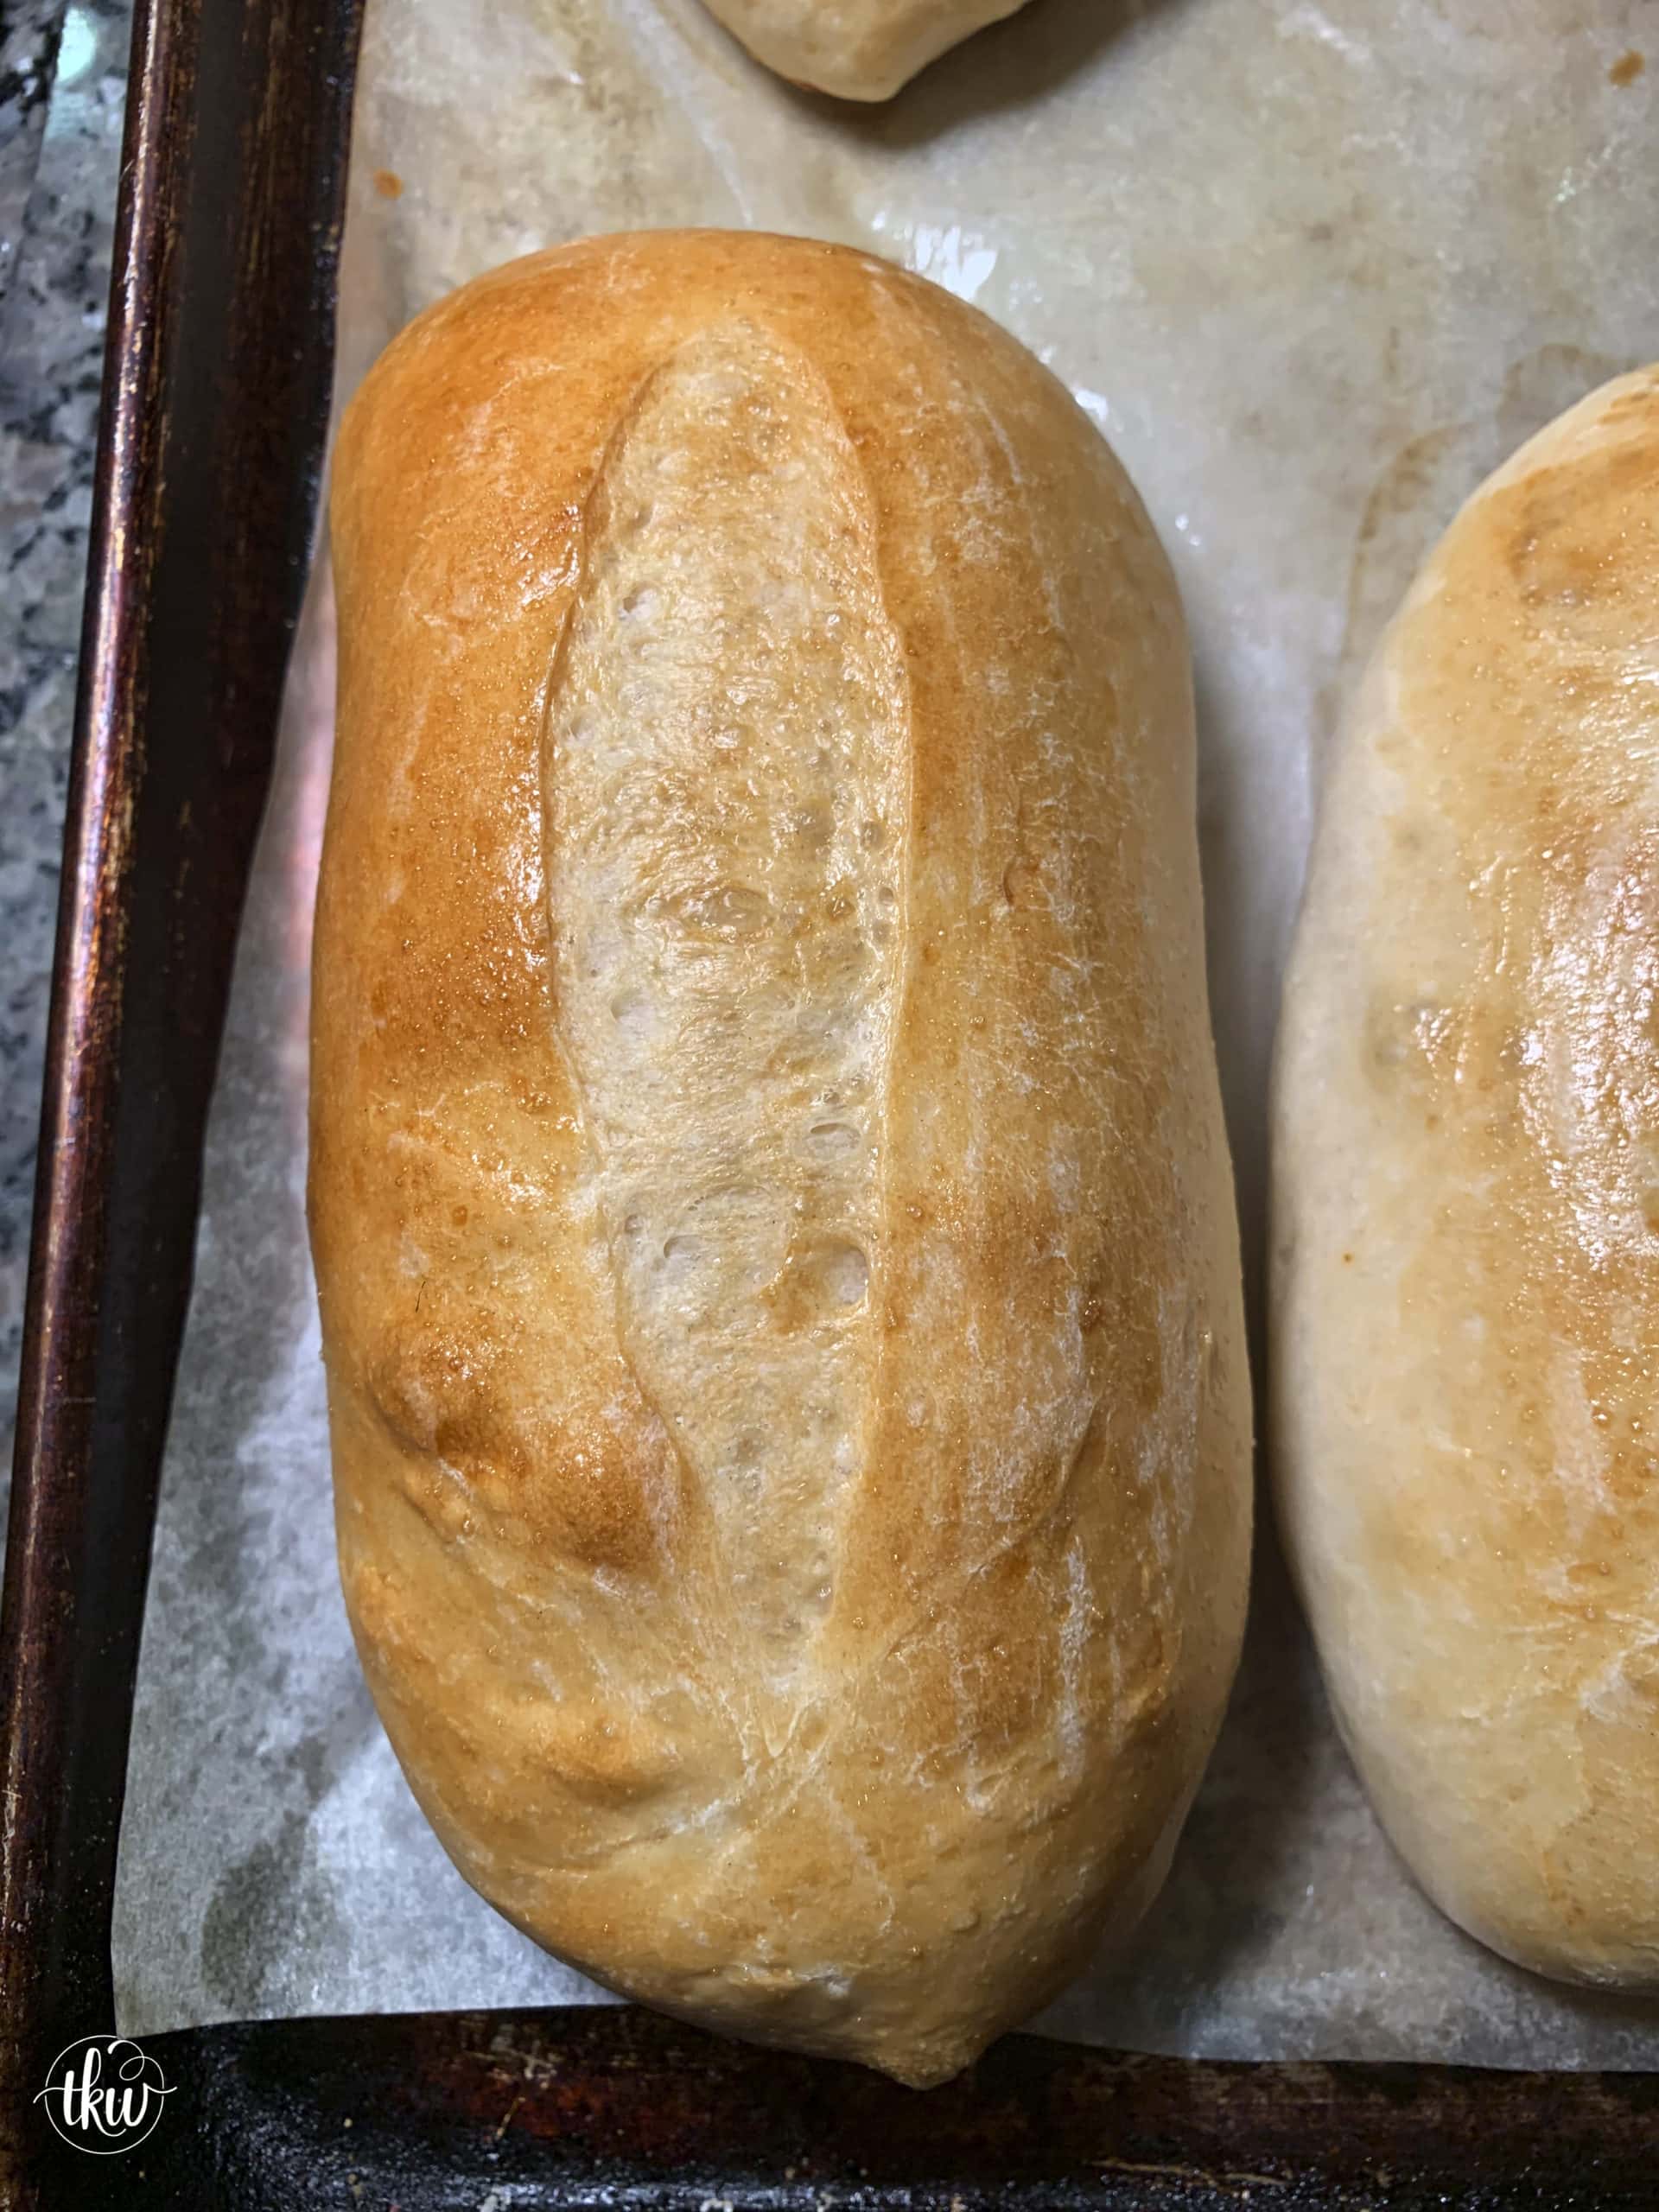
  2. Remove the dough from the bowl and place on a lightly floured board. Divide in half and shape into 2 oval loaves. On a large baking sheet, add sprayed parchment and place the loaves on on it leaving a 4″space between the two loaves. Cover until they both are doubled and puffy. ~1 hour
  3. While the bread is proofing place one rack in the middle and one in the lower third. On that oven place an empty metal pan (a 9X13″ metal pan works fine).
  4. When the loaves are doubled, preheat the oven to 425°F. To decorate, make a few deep in each loaf; a serrated bread knife, works well. Brush each loaf with the egg wash. Sprinkle 2-3 Tbl of the Artisan topping on top.
  5. Spritz the bread with water (not necessary but it helps with a great crust). Fill a cup or container with 1 cup of hot water. Place the bread on the middle rack. As fast you can, pour the 1 cup of very hot water in the 9×13″ metal pan and close the oven door!
  6. Bake the bread for 25 to 30 minutes, rotating the pans half-way through. *Note: If you make smaller loaves, they will be done in 15-20 minutes. Remove it from the oven, and cool on a rack.

Made this Recipe?

Tag @thekitchenwhisperer on Instagram and hashtag it #thekitchenwhisperer
Recipe Card powered byTasty Recipes
I opted for plain sesame seed here

Since not everyone likes seeds I made a ‘nekkid’ one. Yes, still brush it with the egg wash to get that gorgeous color.

close
Belgian Liege Waffles

JOIN MILLIONS OF TKW FAMILY MEMBERS

SUBSCRIBE TO OUR NEWSLETTER TODAY! RECIPES THAT ARE EASY TO MAKE, DELICIOUS, AND CHEF CREATED!

No email clutter! Read our privacy policy for more info.

You're one step closer to joining millions of TKW Family Members! Check your inbox or spam folder to confirm your subscription.

Sharing is caring!

Previous Post
Next Post

Reader Interactions

View Comments

Recipe Reviews & Comments

  1. Wendy says

    December 5, 2018 at 5:45 pm

    I’m not sure what happened. I made half the recipe and shaped it very gently into the 10 long loaf/log. I followed the directions exactly but my loaf seems dense, not airy. The taste is fine though. My loaf spread sideways a lot, so it is wider than it is high. I was hoping to share a picture for advice.

    ★★

    Reply
    • Clay Reeves says

      December 24, 2020 at 8:46 pm

      Wendy to direct the rise of your loaves upward (instead of sideways) you introduce tension in the top crust as you form the loaves. Basically by stretching the dough and tucking the extra underneath! There are some good YouTube videos demonstrating the techniques! I know because I’ve been there!

      Reply
  2. Janice Burford says

    December 16, 2014 at 3:15 pm

    i love this bread. I make it often.

    ★★★★

    Reply
    • TKWAdmin says

      December 17, 2014 at 1:24 pm

      Thank you so much Janice! I’ve been experimenting with this recipe by adding herbs and nuts in it for the holidays. Absolutely LOVE it!

      Best Kitchen Wishes!

      ★★★★★

      Reply

Leave a Comment & Review Cancel reply

Made it?

Primary Sidebar

Welcome!

I'm Lori, The Kitchen Whisperer®! Let me help you tame the kitchen one bite at a time!

More About Lori

let’s be friends

Deliciousness Delivered.

Sign up to receive delicious recipes, kitchen tips and weekly menus (bacon, pizza, oh my!) straight to your inbox.

Yeah!!! I'm so happy you are joining the TKW Family! You will get an immediate email asking you to confirm your subscription. If it's not in your inbox check your SPAM or JUNK folders. If you do not confirm it, you won't receive my newsletters.

Subscribe for delicious new recipes, kitchen tips & weekly menus

Yeah!!! I'm so happy you are joining the TKW Family! You will get an immediate email asking you to confirm your subscription. If it's not in your inbox check your SPAM or JUNK folders. If you do not confirm it, you won't receive my newsletters.

What's Trending on TKW

Biscoff Cookie Butter Cheesecake Dip
Cheesy Dill Pickle Bacon Cheese Ball
Fudgy Hot Chocolate Cookies with Marshmallow Filling
Everything Bagel Breakfast and Brunch Casserole
Authentic Belgian Liège Waffles
Slow Cooker Pulled Banana Pepper Roast Beef
Iconic Grandma-Style Pan Pizza with Pepperoni Cups
Chunky Portabella Mushroom Veggie Burgers
The Best Super Soft and Chewy Hoagie Bread Rolls
Back to Top
  • Recipe Index
  • instagram
  • Contact
  • Terms & Conditions
  • Privacy Policy
Site CreditsDesigned by Melissa Rose Design.Developed by Once Coupled.