Crispy tater tots make up the crust to this creamy egg filled ham & cheese breakfast pie! Perfect for a crowd and breakfast for dinner!
Growing up Mom always had tater tots (though not the ‘official’ brand) on hand in the freezer. She’d use them as a side dish with burgers, cover them with chili and cheese for a hearty winter meal (or when the boys came home from football practice), toss them into soups as a thickener (yes it really works!) and her ‘famous’ breakfast pie. Now hers was huge and wasn’t made in a springform pan. Feeding a family of 8, 4 of which were football players and various friends that always seemed to ‘live’ at our house it just wasn’t practical. No, Mom made her in giant sheet pans that had 2″ sides. While Mom wasn’t a classically trained chef she was often hired to bake cakes for parties, events, weddings and so forth. So Mom had the pans (like this one).
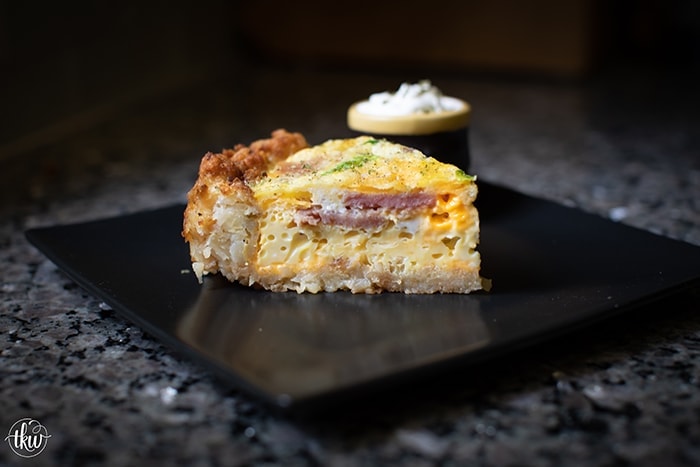
She would grease up the bottom and sides and 2 bags of tots would go into each pan lining the bottom and sides to form that crust. It took her a little while to get it right to where the tots were crispy not just on the top but also on the bottom. You see the first time she made it she just put the tots in and then poured the egg mixture on top. What happened is that the eggs kind of infused into the tots and while still good, they weren’t really that crispy. And let’s face it, half of the reason we love tots is because they are so crispy.
I used to LOVE when Mom made hers. She’d make huge trays of this for Christmas morning and Easter though sometimes throughout the year as a random dish. She’d bake this while she was frying up bacon, sausages, biscuits were waiting to go into the oven. Dad was making pancakes and or French toast. And every time she was making this she’d ask if she should also make a dozen of scrambled eggs.
Yes you read that right…. a dozen of scrambled eggs to go on the side of an egg pie. *scratches her head*
Mom always worried she didn’t put enough food out when honestly, she had enough to feed my entire neighborhood! No wonder, honestly, I grew up fat. The portions were huge and there really was no limit to food. But thankfully I’ve learned portion control and ‘everything in moderation’.
But then one day Mom changed how she was making this. My Dad and she discovered onion tater tots <insert serious gag face>. Remember as a kid, onions were the enemy and I was not having this in my world so I quit eating this for years.

Truth be told I kind of forgot about it. Then the evolution of Pinterest happened and I started seeing variations of a hash brown casserole or a tater tot casserole which immediately made me think of Mom and her dish. Most of those recipes all make the same error (in my opinion) of just pouring the eggs right on top of the uncooked tots. But hey if you like that, go for it. I do not.
I decided that I needed to make this but definitely not as big as Mom’s and definitely not with onion tots <still gagging>. It just so happened that the Fantabulous in-laws were coming up for the weekend. For the longest time every time they came up I would make some type of breakfast casserole as it was easy to make and there was enough leftover for snacks or for them to take home. This time though, I decided to make my Mom’s recipe.
Out came the 9″ Springform Pan, the cooking spray and the bag of frozen tots (yes you can certainly use homemade but it was too much hassle to make them for this). In order for this recipe to work the tots have to be thawed. They thaw fairly fast to be honest. I just emptied the bag into a bowl, went and threw a load of laundry in and folded the one in the dryer. By the time I came upstairs (maybe 25 minutes later) they were perfect to use.
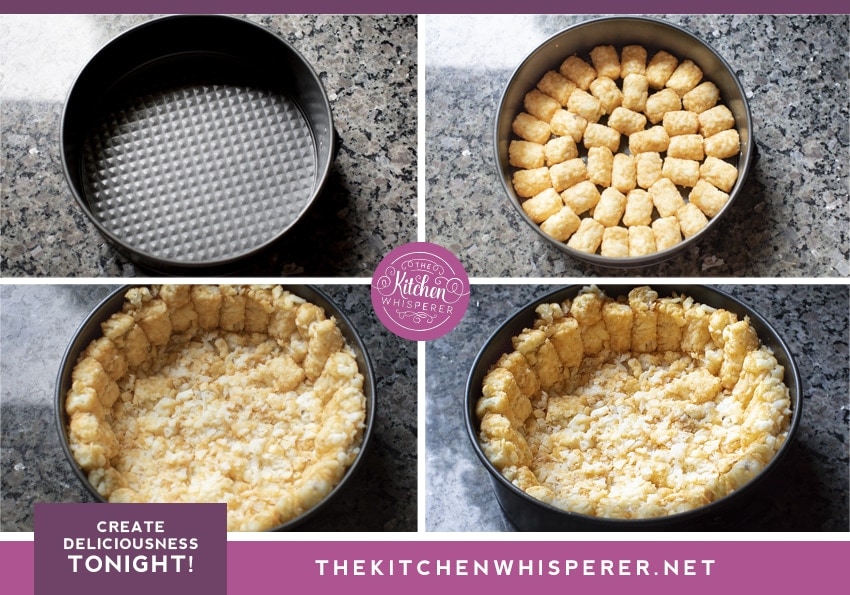
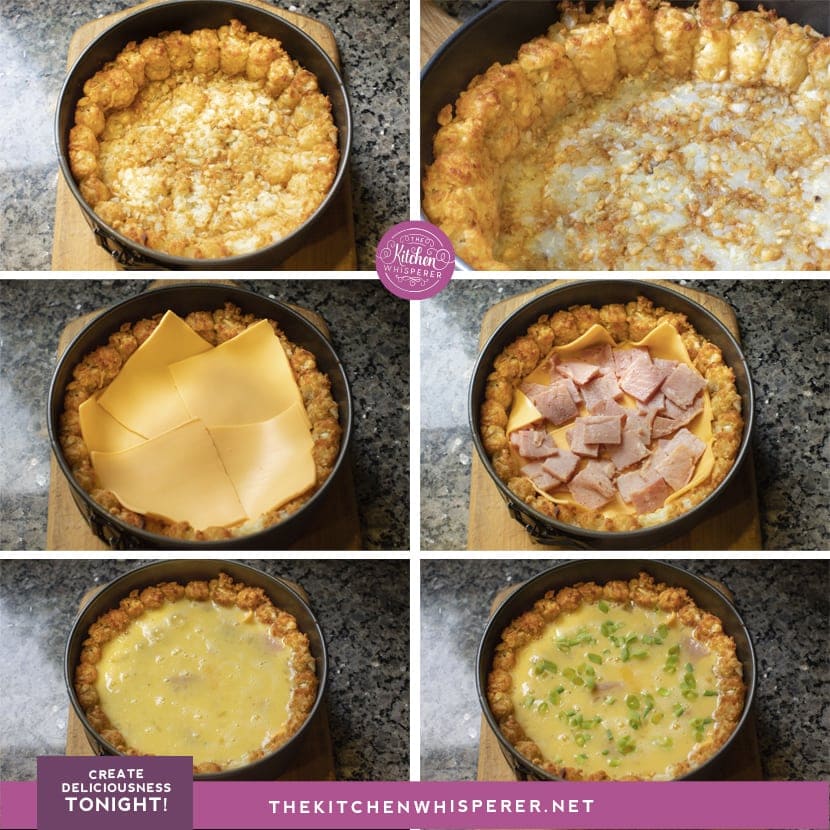
The key to making this so the crust is well, a crust and not mushy is to bake the tots for about 18-20 minutes. You want them to get crispy but till be a tad soft in the middle. If you bake them til they are fully cooked they will burn and turn yucky. Once baked, add your cheese (go with your personal favorite), ham (not deli but rather sliced ham steaks or do what I did and use leftover Easter ham stored in the freezer!). If you go with the leftover frozen ham, make sure it’s thawed before you put it in the recipe. Next pour in the egg mixture. I prefer to use cream in this for a richer egg taste but feel free to go with milk. I personally don’t like water in my baked eggs but it’s your choice. And don’t forget the baking soda!
Baking soda in eggs like this is a trick to getting them soft and fluffy.
Next just cover and bake. Towards the end of the baking period, remove the cover and finish off the baking. You want the center to be set though there may be a little jiggle around the edges. Don’t worry, it will set as it cools.
One thing about this dish is that it MUST COOL COMPLETELY (minimum an hour) before trying to remove the side or slicing it. It’s best warm/room temperature. What I’ll even do is after I remove the side wall, I’ll pop it under the broiler before I slice and serve – just to re-crisp up the tots.
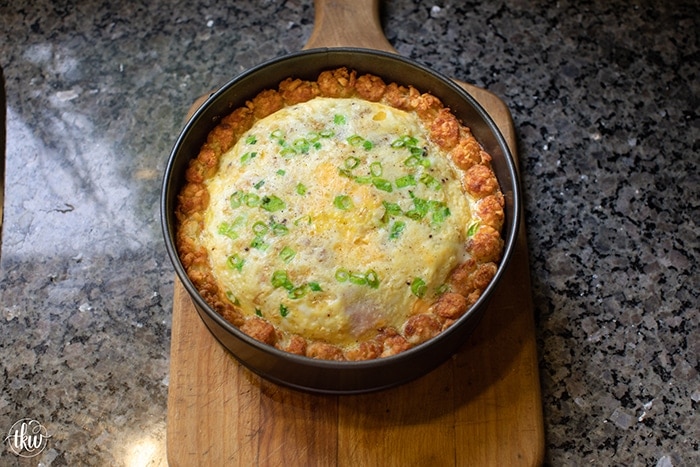
To slice this, go with a sharp knife. One thing I do recommend is investing in a large spatula to remove the pie from the bottom of the springform pan. I HIGHLY RECOMMEND using a Cake Lifter! It will save the bottom of your pan from getting scratched or gauged by your knife and makes it easier to present your foods. You can use it on cheesecakes, brownies, tortes – anything really you make in a springform pan!
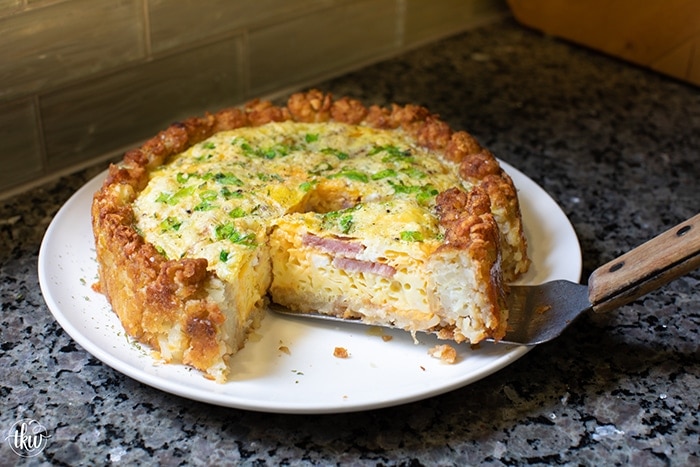
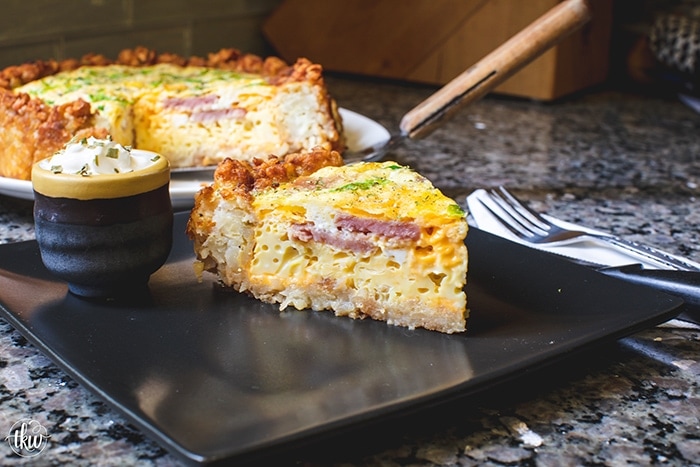
As I took this out and presented it Mama Fantabulous was looking over my shoulder giving me praise on how beautiful it looked then told me to ‘hurry the heck up cause we’re starvin’ woman!’ LOL God I love her! Now I didn’t do what my Mom did and serve stuff on the side. We had bagel halves and they had coffee. Papa Fantabulous put his red pepper flakes on it cause well, he puts that on everything. Mama and Mr. Fantabulous ate theirs as-is and I put Sriracha on mine with a side of chive sour cream.
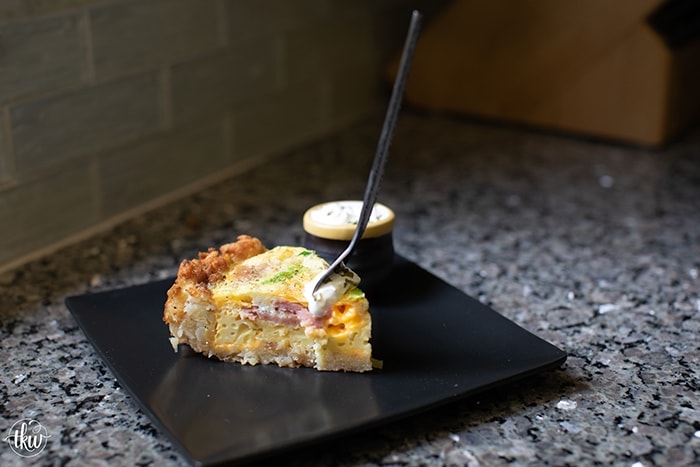
That first bite brought such a huge smile to my face. It was Mom to a tee. This was her dish, her recipe and as I ate it I couldn’t help but get a little choked up because I knew she would be proud of me following in her footsteps. Mama Fantabulous looked at me, seeing my eyes well up with tears and just reached over, covered my hand with her and said “You did good. You did real good!”
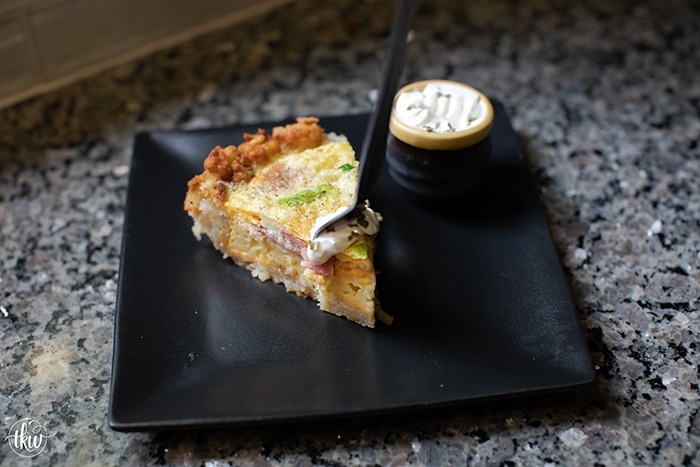
And that made the tears flow which kind of startled the men but I just laughed and said these are tears of happiness. Thanks to my Mom and her recipe I was able to share it with 3 people who I love more than anything and create another amazing memory!
Thank you Mom! ♥
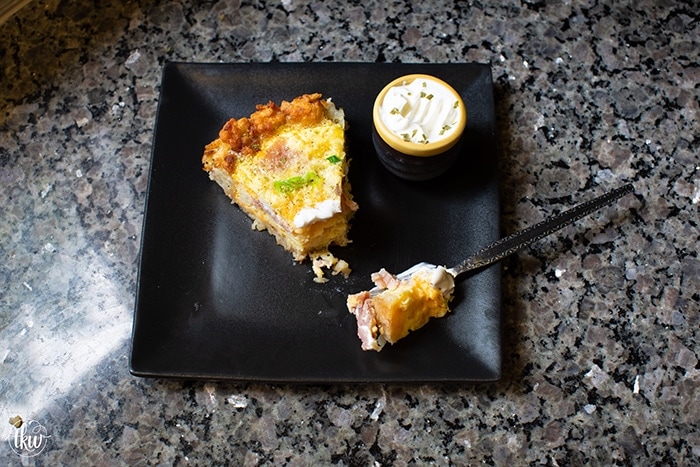
Tater Tot Breakfast Pie
- Yield: 8
Crispy tater tots make up the crust to this creamy egg filled ham & cheese breakfast pie! Perfect for a crowd and breakfast for dinner!

Ingredients
- 65–70 Potato Tots (almost a full bag), thawed
- 6 large eggs
- 1/4 cup heavy cream
- Pinch of baking soda
- 1/2 teaspoon kosher salt
- 1/2 teaspoon black pepper
- 1/2 cup chopped ham slices (can also use crispy bacon)
- 5 slices cheddar cheese (or any cheese of choice)
- 2 green onions, chopped
Instructions
- Preheat oven to 400F, rack in the middle.
- Spray a 9″ Springform Pan with cooking spray (can use 9” if that’s all you have). Line the bottom of the pan with tater tots. Make sure they are packed tight. Use the bottom of a flat glass or measuring cup and press down to form a crust. Next, going around the edge of the pan stand up the tater tots to form the crust. Depending on the height of your pan 1 row or two may be needed. Using the edge of the measuring cup, press the tater tots together on the sides to form a tight crust. You may need to use your fingers to push into place. Make sure to ‘join’ the walls to the bottom crust by taking a few pieces of the tots and pressing it in to form a barrier. You want to make sure that no eggs leak out.
- Bake for 18 minutes. While the tots are browning whisk together the eggs, baking soda, cream, salt and pepper til light and frothy. Set aside.
- Pull the pan out of the oven and reduce the temperature to 350F. Line the bottom and partially up the sides of the tot crust with the cheese, overlapping slightly. Next add in the ham pieces (bacon too if you’re using!) and then pour the eggs in. The eggs should come up close to the top (about 1/4” below). Cook for 45 minutes. *If it’s easier for you, place the tot pan on a rimmed baking sheet before adding the cheese/eggs then put the rimmed sheet into the oven if you’re worried about spillage/leakage.
- Open the oven, remove the foil and continue to bake for another 10-15 minutes or until the center is set.
- Remove from the oven and allow to cool in the pan for at least an hour prior to removing the sides. Slice and serve warm.
Notes
If you don’t have ham you can use crispy bacon. You can go vegetarian with roasted veggies, cooked mushrooms or with lots of cheeses! The beauty of this recipe is that you can truly make it your own!



Can the tater tor breakfast pie be made ahead, like the night before?
You’d have to bake it fully and then reheat it. I’ve done that. I’ve even made it and frozen it (once cool). It reheats beautifully!
Best Kitchen Wishes!
I pulsed the tater tots in a food processor for the base in the springform pan. Came out ExcellentX3.
I have a serious love for tater tots, so this is my favorite kind of breakfast! And it always hit with everyone who tries it. Thanks for sharing!
I love the idea of using tater tots for the “crust” I’ve made something like this with hash browns, but the tater tots bring to the next level!
I normally skip my breakfast but if this is what is served I’d like to have breakfast every morning. Looks delicious and easy
I’ve never bought tater tots, but this recipe looks so creative and tasty, that I just might have to go look for some!
You have seriously combined everything I love about breakfast into a literal breakfast cake. I cannot WAIT to try this out next weekend!